Saturday, October 31

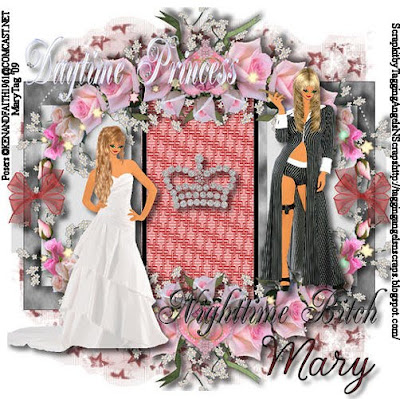
Daytime Princess/Nighttime Bitch


Scrapkit is Daytime Princess Nighttime Bitch from Kissy at Taggin AngelsNScraps here. You can purchase it here or here. This kit is awesome Kissy,love the posers!! Thank you!!

Template of choice,I am using template 42 from AquaRebel315 at Creative Misfits Creations here.

Mask of choice,I am using Star mask7 also from AquaRebel315 here.

Script font of choice.
-This tutorial was written assuming you have working knowledge of PSP-

Dropshadow for tut:
Vertical 6
Horizonal 6
Opacity 60
Blur 10

Open mask,minimize.

Open template/delete credits.

Highlight white background layer/paste spontanious paper/right click on paper layer/new mask layer/from image/select mask/ok/layers/merge/merge group/image/free rotate to the left 90*/layers/duplicate/image/flip.

Highlight raster1 layer/selections/select all/float/defloat/paste paper1 into selection/deselect/repeat for copy of raster1 layer.

Raster2 and copy we are leaving white.

Repeat last steps for raster3 layer,using paper 2.

Highlight raster4 layer/selections/select all/float/defloat/flood fill black/deselect.

Raster5 layer is left as is.

Paste 1 Bleikur bogi3/resize 50%/edit/repeat resize/position/layers/duplicate/image/flip/dropshadow to both.
Moving up top/paste nighttime bitch wordart/resize 50%/position/dropshadow.

Repeat with daytime princess wordart.

Paste bow3/resize 50%/edit/repeat resize 3 times/layers/duplicate/position/dropshadow.

Paste crown2/resize 50%/edit/repeat resize 2 times/position/dropshadow.
Paste princess2 and bitch2 posers/position/dropshadow.

Layers/merge/merge visible.
Image/resize all layers 5%/optional.

Add copyrights.

Add name.

Save.
*Make sure to name your tag/save as jpeg,png,etc.
Hope you enjoyed my tut,would love to see your results.

Hugs,Mary

Friday, October 30

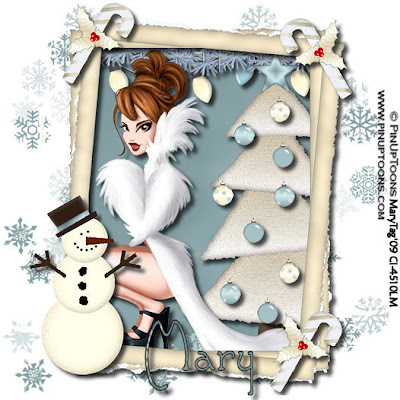
Blue Christmas


Tube of choice,I am using PinUpToons,which you can purchase here,do not use unless you have a license to do so.

Scrapkit is Blue Christmas,a freebie from Bev at HorsePlay's Pasture here. Awesome kit Bev,thank you!!!

Mask of choice,I am using Vix's mask 301 here. Thank you Vix!!

Font of choice,I am using Santa's Sleigh here.
-This tutorial was written assuming you have working knowledge of PSP-

Dropshadow for tut:
Vertical 6
Horizonal 6
Opacity 70
Blur 8

Open mask,minimize.

Open a new 600x600 white image.

Paste paper3 as a new layer/right click on paper layer/new mask layer/from image/select mask/ok/layers/merge/merge group/resize mask layer 25%/layers/duplicate 3 times/position.

Paste frame2 as a new layer/click inside frame with magicwand/selections/modify/expand by 6.

Paste paper 6 below frame layer/resize 20%/selections/invert/delete/do not deselect.

Paste string lights 1/resize 20%/position/delete/do not deselect.

Paste garland2/position/delete/do not deselect.

Paste tree 4/resize 15%/position/delete/do not deselect.

Paste tube/position/delete/deselect/dropshadow to all layers.

Paste star1/resize 50%/edit/repeat resize/position on top of the tree/erease the blue going over the tree,to make it look like its on the tree.

Moving up top/paste snowman 1/resize 50%/position/dropshadow.
Paste ball5/resize 50%/edit/repeat resize 2 times/position on tree/repeat with same ball or a few different ones/dropshadow to each.

Paste candy cane 2/resize 50%/layers/duplicate 2 times/position/dropshadow.
Layers/merge/merge visible.

Image/resize all layers 12%.

Add copyrights.

Add name.
*For my name,I used paper 8 for fill/black on foreground.

Save.
Hope you enjoyed my tut,would love to see your results.

Hugs,Mary

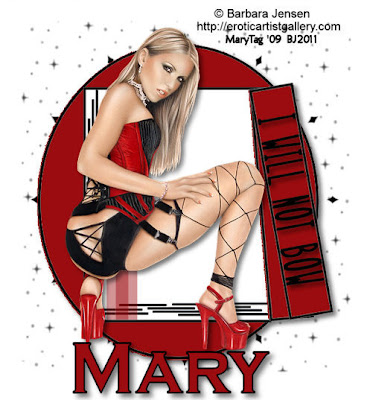
I Will Not Bow


Tube of choice,I am using Barbara Jensen,which you can purchase here,do not use unless you have a license to do so.

Template of choice,I am using template06 from Artmama here. Thank you,its awesome!

Mask of choice,I am using Sabine's diamond mask1 from Creative Misfits Creations here. Make sure to leave a big thank you for all their hard work! Thank you Sabine!!

Font of choice,I am using Copperplate Gothic Bold,came with my psp program.
-This tutorial was written assuming you have working knowledge of PSP-

Open mask,minimize.

Open template/delete credit layer/highlight raster1 layer/flood fill white/new raster layer/flood fill with color of choice,I went with black/right click on new raster layer/new mask layer/from image/select mask/ok/layers/merge/merge group.

Highlight circle layer/adjust/color/red green blue/% settings:Red 100% Green -94% Blue -94%/ok.

Highlight circle frame layer/selections/select all/float/defloat/flood fill black/selections/select none.

Highlight rectangle layer/flood fill white.

Highlight doodle layer/selections/select all/float/defloat/a new 500x500 white image/flood fill black/edit/copy/go to doodle layer/edit/paste into selection/deselect.

Highlight rt white strip/colorize to match your tube/I used #9a0c0f/repeat for left white strip/flood fill circle layer also.

Highlight frame layer/flood fill black.

Flood fill same color we used for lt&rt white strips to bottom and top tag/frames flood fill black.

Highlight words layer/copy colored layer we made for the doodles/edit/paste into selection/deselect/dropshadow.

Hide white background layer/layers/merge/merge visible/dropshadow/unhide layer.

Paste tube/position/dropshadow.

Layers/merge/merge visible.

Image/resize all layers 14%.

Add copyrights.

Add name.

Save.
Make sure to name your tag differently than the template/save as jpeg,png,etc.
Hope you enjoyed my tut,would love to see your results.

Hugs,Mary

Wednesday, October 28

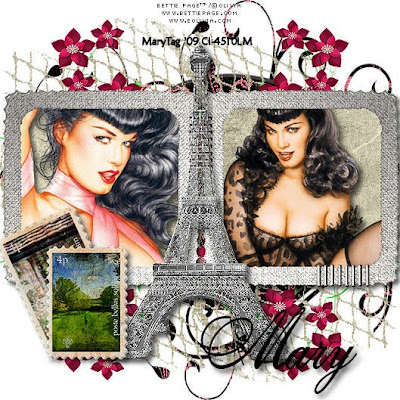
Paris


Tubes/close ups of choice,I am using Bettie Page/Olivia,which you can purchase here,do not use unless you have a license to do so.

Scrapkit is Paris,a freebie from Artmama at ArtmamasStudio here. Thank you for such a gorgeous kit!!

Mask of choice,I am using doodlemask4 from Insatiable Dreams here. Thank you!

A script font of choice.
-This tutorial was written assuming you have working knowledge of PSP-

Dropshadow for tut:
Vertical 5
Horizonal 5
Opacity 64
Blur 10

 
Open a new 600x600 white image.

Paste paper 10/layers/load save mask/load mask from disc/select mask/ok/layers/merge/merge group.

Paste embellie28(frame)/click inside frame with magicwand/selections/modify/expand by 7/paste paper 9 below frame layer/selections/invert/delete/do not deselect.

Paste first tube or close up/position/delete/do not deselect.

Paste second tube/close up/position/delete/deselect/dropshadow to both tube layers.

Hide mask and background layers/layers/merge/merge visible/dropshadow/unhide layers.

Paste embellie 1(eiffel tower)/position/dropshadow.

Highlight mask layer/paste embellie 26 as a new layer/position to the top left of the tag/layers/duplicate/image/mirror/flip.

Paste embellie 40(flowers)/position to the left/layers/duplicate/image/mirror/layers/duplicate/image/flip/layers/duplicate/mirror(total of 4 flower layers/right click on layer4 of flowers/merge/merge down to first flower layer/erase any green you see/dropshadow.

Moving up top/paste one of the embellie40(stamps)/resize 30%/position/dropshadow.

Repeat with opposite stamp/resizing 35%.

Layers/merge/merge/merge visible.

Image/resize all layers 12%.

Add copyrights.

Add name.

Save.
Hope you enjoyed my tut,would love to see your results.

Hugs,Mary

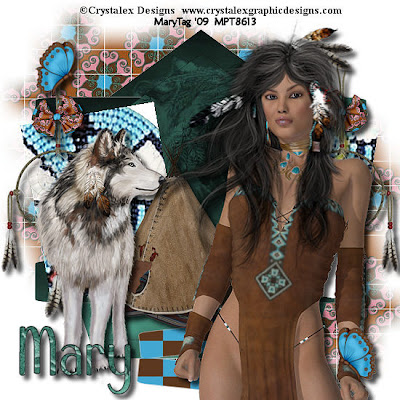
Spirit Of The Highlands


Scrapkit,Tube amd Teepee(a freebie) from Crystalex Designs,which you can purchase here,do not use unless you have a license to do so.

Template of choice,I am using Aqua Rebel's template 51 from Creative Misfits Creations here. Thank you Aqua Rebel!

Mask of choice,I am using WSL84 mask from Chelle here. Thank you Chelle!

Font of choice,I am using Blue Melody here.
-This tutorial was written assuming you have working knowledge of PSP-

Dropshadow for tut:
Vertical 6
Horizonal 6
Opacity 72
Blur 9

Open template/delete credit layer.

Highlight raster1 layer/paste paper5 as a new layer/layers/load save mask/load mask from disc/select mask/ok/layers/merge/merge group/layers/duplicate/position both.

Highlight raster 2 layer/selections/select all/float/defloat/paste paper 2 as a new layer/position/selections/invert/delete/deselect/right click on paper layer/merge/merge down to raster 2 layer.

Repeat with raster 3 layer.

Right click on copy of raster 7 layer/merge/merge down to raster 7/selections/select all/float/defloat/paste same paper 2 as a new layer/selections/invert/delete/merge down.

Highlight copy rater layer/right click/merge/merge down to raster 5 layer(total of 4 layers).

Selections/select all/float/defloat/edit/paste paper 10 into selection/deselect.
Right click on copy of raster 4/merge/merge down to orginal raster 4/flood fill white/selections/select all/float/defloat/paste element 10 on both sides/resize 20%/position/selections/invert/delete/deselect.

Paste element 5/resize 30%/layers/duplicate/position/dropshadow.

Paste bow1/resize 50%/edit/repeat resize/position to the left of the tag/layers/duplicate/image/mirror/dropshadow to both layers.

Paste teepee freebie/reisze 50%/position/dropshadow.

Moving up top paste element 15(wolf)as a new layer/resize 30%/position/dropshadow.

Paste close up tube/position/dropshadow.

Paste butterfly 5/resize 50%/edit/repeat resize/layers/duplicate/position both/dropshadow.

Layers/merge/merge visible.

Resize if desired.

Add copyrights.

Add name.
*For my name,I used paper7 for fill/black on foreground.

Save.
*Make sure to name your tag/save as jpeg,png etc.
Hope you enjoyed my tut,would love to see your results.

Hugs,Mary

Tuesday, October 27

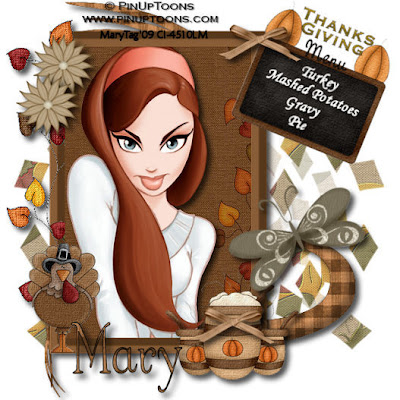
Thanksgiving Harvest


Tube of choice,I am using PinUpToons,which you can purchase here,do not use unless you have a license to do so.

Scrapkit is Thanksgiving Harvest from Dee at Scraps By Dmg and you can purchase it on her blog here. Love this kit,prefect for Thanksgiving!! Thank you Dee!!

Mask of choice,I am using Vix_Mask 175 here. Thank you Vix!

Font of choice.
-This tutorial was written assuming you have working knowledge of PSP-

Dropshadow for tut:
Vertical 6
Horizonal 6
Opacity 69
Blur 11

Open frame1/we are going to make the canvas larger/image/canvas size/change both height and width to 600.

Layers/new raster layer/right click/arrange/send to bottom/flood fill white.
Paste paper 12 as a new layer/layers/load save mask/load mask from disk/select mask/ok/layers/merge/merge group.

Position frame/click inside frame using your magicwand/selections/modify/expand by 7/paste paper 8 below frame layer/resize 30%/position/selections/invert/delete/do not deselect.
Paste tube of choice/position/delete/deselect/dropshadow.

Hide white background and mask layers/layers/merge/merge visible/dropshadow/unhide layers.

Paste doodle 3 below merged layers/position/dropshadow.

Moving up top,paste bowls/resize 50%/position/dropshadow.

Paste menu/resize 50%/position/dropshadow/you can write a list of foods on it like I did,I personally love a huge turkey dinner lol or you can use it for your name,your choice :)

Paste flower5/resize 50%/edit/repeat resize/layers/duplicate/position both layers/dropshadow.

Repeat with bow 1.

Paste butterfly1/resize 50%/position/dropshadow.

Layers/merge/merge visible.

Image/resize all layers 12%.

Add copyrights.

Add name.
*I used paper 6 for fill/black on foreground.

Save.
*Make sure to name your tag/save as jpg.
Hope you enjoyed my tut,would love to see your results.

Hugs,Mary

Trick Or Treat

Photobucket

Scrapkit is Trick or Treat from Dee at Scraps By Dmg and you can purchase it on her blog here. I so love this kit-posers are awesome and just love all the elements!!! Thank you Dee!

Mask of choice,I am using WSL mask8 from Chelle here. Thank you!

Halloween font of choice.
-This tutorial was written assuming you have working knowledge of PSP-

Dropshadow for tut:
Vertical 7
Horizonal 7
Opacity 70
Blur 7
 
Open a new 600x600 white image.

Paste paper 14 as a new layer/layers/load save mask/load mask from disc/select mask of choice/ok/layers/merge/merge group/layers/duplicate/position both layers.

Paste frame 7 as a new layer/click inside frame with your magicwand/selections/modify/expand by 6.

Paste paper 14 below frame layer/resize 20%/position/selections/invert/delete/do not deselect.

Paste haunted house/resize 25%/edit/repeat resize/position/delete/do not deselect.

Paste grave2/resize 50%/edit/repeat resize/position/delete/deselect/apply dropshadow to last 2 layers.

Moving up top/paste dead tree 3/position/dropshadow.

Paste ghost 4/resize 50%/position/dropshadow.

Paste pumpkin 3/resize 50%/position/dropshadow.

Repeat with couldron 3.

Paste wordart 3/position/dropshadow.

Paste poser witch/resize 15%/position/dropshadow.

Add copyrights.

Add name.

For my name,I used paper 17 for fill/black on foreground.

Image/resize all layers 11%.

Right click on wordart layer/merge/merge down to ghost layer/selections/select all/float/defloat/layers/duplicate 2 times.

Rename each them t1,t2 and t3.

Highlight t1 layer/adjust/add remove noise/add noise:
Random checked
Noise 45%
Monochrome checked

Repeat with frame layer t2/changing the noise % to 46/and layer t3 to 47%/selections/select none.

Hide layer t2 and t3 frames/highlight layer t1 /edit/copy merged/take to animation shop/paste as a new animation.

Go back to psp/hide layer t1/unhide layer t2/edit/copy merged/take to animation shop/paste after current frame.

Repeat with frame layer t3.

I changed my frame properties to 31,in order to do this click on edit-select all/animation/frame properties/change display time to 31.

Save as gif.
Hope you enjoyed my tut,would love to see your results.

Hugs,Mary

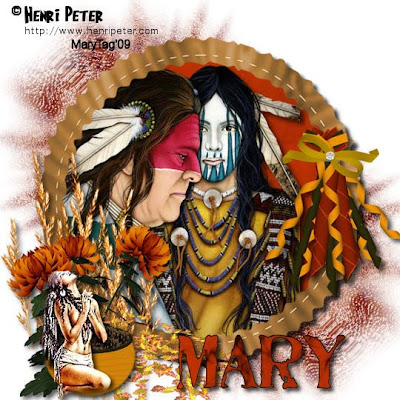
Give Thanks


Tubes of choice,I am using Henri Peter here.

Scrapkit is Give Thanks by Stacey at Staceys Designs here. Beautiful kit Stace,thank you!

Mask of choice,I am using WSL mask 6 here.

Font of choice,I am using Stamp Act here.
-This tutorial was written assuming you have working knowledge of PSP-

Open mask,minimize.

Open a new 600x600 white image.

Paste paper 5 as a new layer/right click/new mask layer/from image/select mask/ok/layers/merge/merge group/layers again/duplicate/position copy.

Paste round frame/resize 30%/adjust/hue saturation/colorize/hue 24 saturation 124/click inside frame with your magicwand/selections/modify/expand by 7.

Paste paper 10 below frame layer/selections/invert/delete/do not deselect.

Paste first tube/position/delete/selections/select none/dropshadow:

Vertical 6
Horizonal 6
Opacity 64
Blur 9

Hide mask layers/white background layer/layers/merge/merge visible/dropshadow of choice/unhide layers.

Paste bow/resize 55%/position/same dropshadow.

Paste grass/resize 50%/layers/duplicate/position both layers/dropshadow:

Vertical 4
Horizonal 4
Opacity 68
Blur 10

Paste flowers/resize 50%/position/same dropshadow.

Repeat with the leaves.

Paste bowl of pine cones/resize 50%/edit/repeat resize/position/same dropshadow.

Repeat with studded bow.

Paste second tube/resize of desired/position/dropshadow:

Vertical 5
Horizonal 5
Opacity 73
Blur 9

Layers/merge/merge visible.

Image/resize all layers 10%.

Add copyrights.

Add name.

Save.
Hope you enjoyed my tut,would love to see your results.

Hugs,Mary

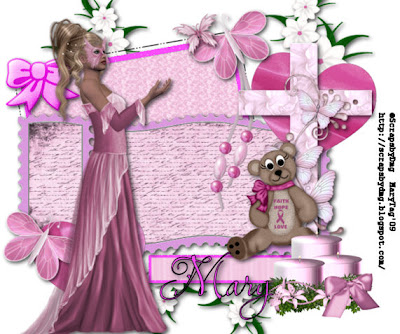
Faith,Hope and Love


Scrapkit is from Dee at Scraps By Dmg,her part of The North Wings BCA Collab Train,pop over to her blog here and check out the blog train!! Gorgeous kit Dee,thank you!!

Template is by Poppy at Creative Misfits Creations here. Thank you Poppy!!

Font of choice,I'm using Lavishly Yours here.
-This tutorial was written assuming you have working knowledge of PSP-
Dropshadow of choice for tut.

Open template/delete credit layer.

Highlight raster 6 layer/click in the center of the rectangle/edit/paste into selection/selections/select none/flood fill outer edge with color of choice,I am using #fb4df9/dropshadow.

Repeat with raster 6 layer/dropshadow.

Highlight raster 1 layer/use magicwand inside both shapes/edit/paste paper 8 into selection/selections/select none/color fill white with color of choice,I am using #db99dd/dropshadow.

Both heart layers/selections/select all/float/defloat/paste paper2 into selection(edit)/dropshadow.

Highlight raster 7(bow)/adjust/hue saturation/colorize/hue 215 and saturation 222/ok/dropshadow.

Paste flowervine below raster6/duplicate 3 times/position each layer/dropshadow.

Paste cross/resize 30%/position/dropshadow.

Paste bear 1/resize 50%/position/dropshadow.

Paste candle 2/resize 50%/position/dropshadow.

Paste butterfly 4/resize 40%/edit/repeat resize/layers/duplicate/position/dropshadow.

Paste beadstring2/resize 20%/position/dropshadow.

Paste tube 3/resize 20%/edit/repeat resize 2 times/position/dropshadow.

Layers/merge/merge visible.

Image/resize all layers 16%.

Add copyrights.

Add name.

Save.
Hope you enjoyed my tut,would love to see your results.

Hugs,Mary

Monday, October 26

Bad Kitty

Photobucket

Tube of choice,I am using Marco Guaglione,which you can purchase here,do not use unless you have a license to do so.

Template of choice,I am using Sixxbug template 2 from Creative Misfits Creations here. Thank you Sixxbug!!

Animation Shop

Font of choice,I am using Showtime here.
-This tutorial was written assuming you have working knowledge of PSP-

Dropshadow for tut:
Vertical 5
Horizonal 5
Opacity 71
Blur 10
Open template/delete credit layer.

Highlight raster1 layer/flood fill white.
Highlight circle2/selections/select all/float/defloat/flood fill with color of choice,I am using #ff0b72/selections/select none.

Repeat with cirlce 4 and dot line layers/circle 1 and 3 we are leaving white.

Paste tube/position/dropshadow.

Image/resize all layers 14%.

Add copyrights.

Add name.

Highlight bad kitty layer/selections/select all/float/defloat/layers/duplicate 2 times/rename k1,k2 and k3.

 
Highlight k1 layer/adjust/add remove noise/add noise:

Random checked
Noise 48%
Monochrome checked

Repeat with frame layer 2/changing the noise % to 49/and layer 3 to 50%/selections/select none.

Hide layer k2 and k3 frames/highlight layer k1 /edit/copy merged/take to animation shop/paste as a new animation.

Go back to psp/hide layer k1/unhide layer k2/edit/copy merged/take to animation shop/paste after current frame.

Repeat with frame layer k3.

Save as gif.
Hope you enjoyed my tut,would love to see your results.

Hugs,Mary

Shades Of Grey

Photobucket

Tube of choice,I am using Kim Harlow,which you can purchase here,do not use unless you have a license to do so.

Scrapkit is Shades Of Grey from Terry at Terry's Treasures here and you can purchase it here. So love this kit,its just gorgeous!! Thank you Terry!!

Animation Shop

Font of choice,I am using Black Chancery here.
-This tutorial was written assuming you have working knowledge of PSP-

Dropshadow for tut:
Vertical 4
Horizonal 4
Opacity 68
Blur 4

Open a new 500x500 white image.

Paste frame 3 as a new layer/click inside frame with magicwand/selections/modify/expand by 2.

Paste paper 8 below frame layer/selections/invert/delete/do not deselect.

Paste curtain1/resize 25%/position/delete/dropshadow/do not deselect.

Paste tube/delete/layers/duplicate/resize top tube layer 20%/image/mirror/position/deselect/lower opacity to bottom tube layer to 70/position/apply dropshadow to top tube layer.

Moving up top/paste bow 4/resize 30%/position/dropshadow.

Paste flower 1/resize 50%/layers/duplicate/position both flowers/dropshadow.
Paste butterfly 1/resize 50%/position/dropshadow.

Paste netting with shadow below mask layer.

Paste fan 2/resize 50%/position/dropshadow.

Add copyrights.

Resize if desired.

Add name.

Highlight frame layer/layers/duplicate 2 times.

Rename them 1,2 and 3.

Highlight layer 1/adjust/add remove noise/add noise:

Random checked
Noise 47%
Monochrome checked

Repeat with frame layer 2/changing the noise % to 48/and layer 3 to 49%.
Hide layer 2 and 3 frames/highlight layer 1 /edit/copy merged/take to animation shop/paste as a new animation.

Go back to psp/hide layer 1/unhide layer 2/edit/copy merged/take to animation shop/paste after current frame.

Repeat with frame layer 3.

Save as gif.
Hope you enjoyed my tut,would love to see your results.

Hugs,Mary

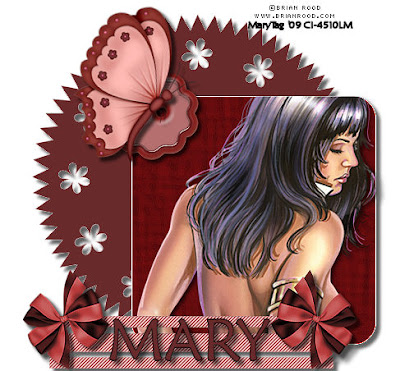
Dreams


Tubes of choice,I am using Brian Rood,which you can purchase here,do not use unless you have a license to do so.

Kit I am using is a tagger size all elements kit from Kissy at Taggin AngelsNScraps here and you can purchase it here. I love all the elements in this kit!! Thank you Kissy!!

Template of choice,I am using Simply Sensational Scraps template 4 by Lorne here. Thank you Lorne!

Pentacom-Jeans(optional) here.

Font of choice,I am using Maiandra GD,came with my psp program.
-This tutorial was written assuming you have working knowledge of PSP-

Open template,delete credits.

Highlight flower circle layer/selections/select all/float/defloat/click on your flood fill tool/fill in layer with color of choice,I am using #682a2b/deselect.

Repeat with the rectangle layer,using different color of choice,I am using #620c0e/do not deselect.

Paste tube of choice/position/selections/invert/delete/dropshadow:

Vertical 3
Horizonal 3
Opacity 67
Blur 7

Effects for rectangle layer: effects/textures/texture/canvas/default settings/effects again/edge effects/enhance more.

Highlight lines layer/selections/select all/float/defloat/flood fill with color of choice,I am using #b85254 /position/same dropshadow/effects/penta.com/jeans/settings 64/2/2.

Paste button 4 as a new layer/resize 50%/position/dropshadow:

Vertical 4
Horizonal 4
Opacity 69
Blur 6

Moving up top/paste butterfly fancy3 as a new layer/resize 50%/edit/repeat resize/position/dropshadow:

Vertical 5
Horizonal 5
Opacity 62
Blur 5

Paste bow 3 as a new layer/resize 50%/edit/repeat resize 2 times/position/layers/duplicate/image/mirror/same dropshadow/to both bow layers: adjust/hue and saturation/colorize/factory defaults.

Hide white background layer/layers/merge/merge visible/same dropshadow/unhide layer.

Layers/merge/merge visible.

Add copyrights.

Resize if desired.

Add name.

Save.
*Make sure to name your tag.not the template/as a jpeg.
Hope you enjoyed my tut,would love to see your results.

Hugs,Mary

Friday, October 23

Rock On!

Photobucket

Tube/close up of choice,I am using Ismael Rac,formally of MPT but now you can get his tubes here,you will need a license # to use his work.

Template of choice,I am using template 19 from Susan at Hippiedaze Scrappin Stuff here. Thank you Susan for the rockin template!!

Mask of choice,I am using ButterflyFlutterby Creations mask 67 here. Thank you!

Animation Shop(optional)

Font of choice,I am using Ocenia Display here.
-This tutorial was written assuming you have working knowledge of PSP-

Open template/delete credit layer/we need to make the canvas alittle larger so go to image/canvas size/change the width to 600,make sure height is 600 also/ok.

Highlight the big circle/to colorize: I am using the purple background layer from my tube/selections/select all/float/defloat/paste background as a new layer/selections/invert/delete/deselect.

Highlight the checks cirlce layer/using your magicwand/click on the layer until you see the dancing lines all over,took me a few clicks to get it.

Paste the same colored backgrpound you previously used as a new layer/selections/invert/delete/deselect.

Both circle frames will remain black.

Highlight the rectangle layer/flood fill black.

Highlight rectangle frame/flood fill with color choice or same background we used eariler.

Repeat with dark stars layer.

Flood fill white on the light stars layer.

Highlight rock on wordart/layers/duplicate 2 times,making 3 rock on layers/highlight first wordart layer/selections/select all/float/defloat/flood fill color of choice,I used #340436/you will have to look in the side layers window to see that is getting colorized/repeat with 2nd wordart layer,I used #942f97 and on the 3rd layer,I used #c185c3.

Deselect/rename the wordart layers 1,2 and 3.

Now to add mask/highlight white background layer/layers/new raster layer/flood fill color of choice,I used #c185c3/right click/new mask layer/from image/select mask/ok/layers/merge/merge visible/position.

Paste close up/position/paste tube/resize if desired/position/dropshadow.

Image/resize all layers 10%.

Add copyrights.

Add name.

To animate: Hide layer 2 and 3 of the wordart/highlight layer 1 of wordart/edit/copy merged/take to animation shop/paste as a new animation.
Go back to psp/hide layer 1/unhide layer 2/edit/copy merged/take to animation shop/paste after current frame.

Repeat with wordart layer 3.

To view,click on view animation/top tool bar/to slow it down some:edit/select all/animation/frame properties/change frame properties to 23/ok/view again and change til you are happy with it.

Save as gif.
Hope you enjoyed my tut,would love to see your results.

Hugs,Mary

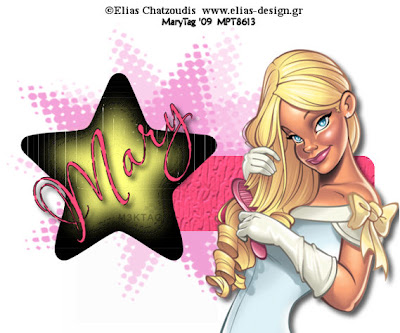
Star


Tube of choice,I am using Elias Chatzoudis,which you can purchase here,do not use unless you have a license to do so.

Template of choice, I am using Yvettes template 31 from Essence Of Creativity here. Thank you Yvette!

Mask of choice,I am using Vix mask148 here. Thank you Vix!

Font of choice.
-This tutorial was written assuming you have working knowledge of PSP-

Open mask,minimize.

Open template/delete credits/image/canvas size 600x500.

Highlight white background layer/layers/new raster layer/flood fill with a color from your tube,I used #f4a2d8 /right click on color filled layer/new mask layer/from image/select mask/ok/layers/merge/merge group/position towards the template star.

Highlight rectangle layer/flood fill with color of choice,I used #fb4d7a/effects/texture effects/texture/tin foil:default settings.

Highlight large star/effects/texture effects/squares/settings:mosiac deep
Highlight small star/flood fill with color of choice,I used #eef68c/effects/artistic effects/enamel/blurred low detail/ok.

Paste tube/resize if needed,I resized mine 30%/dropshadow:
Vertical 6
Horizonal 6
Opacity 65
Blur 10

Layers/merge/merge visible.

Image/resize all layers 5%.

Add copyrights.

Add name.

Save.

*Make sure to name your tag differently than Yvettes template/as a jpg.
Hope you enjoyed my tut,would love to see your results.

Hugs,Mary

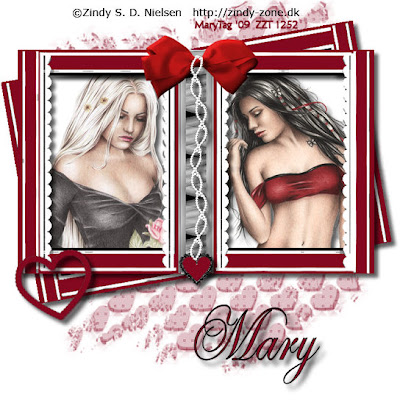
Red Hearts


Tubes of choice,I am using Zindy,which you can purchase here,do not use unless you have a license to do so.

Template of choice,I am using Poppys template7 from Creative Misfits Creations here. Thank you Poppy!

Mask of choice,I am using AquaRebels mask 4 from Creative Misfits Creations week1 freebies here. Thanks you Aqua Rebel!

Script font of choice.
-This tutorial was written assuming you have working knowledge of PSP-

Dropshadow for tut:
Vertical 7
Horizonal 7
Opacity 63
Blur 9

Open template,we are coloring everything first/highlight background layer/flood fill white.

Highlight bottom frame layer/flood fill color of choice to black area's,I am using #84081f/repeat on top frame layer.

Open a new 700x600 white image/flood fill white/using magicwand/click on all gray on the top frame/paste your white layer we just created into selection(edit)/deselect.

Repeat on bottom frame layer where you can see.

Pop up the white layer we just created/flood fill color of choice,I used #5a0e10/edit/copy/minimize.

Highlight bow layer/adjusr/color channel/click on red green blue selection: red% -5 Green -50% Blue -50%/ok.

Click inside the heart/flood fill same color we used for frames/dropdhadow.
Repeat for large heart.

Highlight very bottom white raster1 layer/layers/new raster layer/flood fill with color of choice,I am using #84081f/right click/new mask layer/from image/select mask/ok/layers/merge/merge visible/position.

Highlight white background layer/selections/select all/float/defloat/paste tubes of choice/position/selections/invert/delete/deselect/dropshadow.
Add dropshadow to top and bottom frame layers.

Layers/merge/merge visible.

Image/resize all layers 22%.

Add copyrights.

Add name.

For my name I used #84081f for fill/black on foreground.

Save.(make sure to rename Poppys template and save as a jpg).
Hope you enjoyed my tut,would love to see your results.

Hugs,Mary

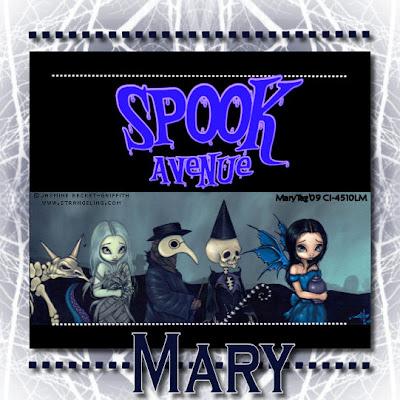
Spook Avenue


Tube/image of choice,I am using Jasmine Becket-Griffith,(this specfic image was part of a tier promotion CILM had)which you can purchase here,do not use unless you have a license to do so.

Template of choice,I am using Bev's template 64 here. Thank you Bevie!

Mask of choice,I am using Vixs_Mask86 here. Thank you Vix!

Wordart is from Susan at Hippiedaze Scrappin Stuff here. Thank you Susan for sharing!!

A bold font of choice,I am using Copperplate Gothic Bold,same with my psp program.
-This tutorial was written assuming you have working knowledge of PSP-

Dropshadow for tut:
Vertical 6
Horizonal 6
Opacity 67
Blur 8

Open mask,minimize.

Open template/delete credits.
Highlight white background layer/flood fill with color from tube/image you are using,I am using #0a1034/right click/new mask layer/from image/select mask/ok/layers/merge/merge group/using pick tool/position mask to the left of the tag/layers/duplicate/image/mirror.

Right click on copy layer of mask/merge/merge down/back to layers/duplicate/image/flip.

Highlight the rectangler layer/selections/select all/float/defloat/paste tube or image of choice/selections/invert/delete/deselect/right click on image layer/merge/merge down to rectangle layer/dropshadow.

Open a new 600x600 white image/flood fill with same color you used for the mask layer/edit/copy/minimize.

Highlight outer dotted lines/selections/select all/float/defloat/edit/paste flood filled layer you just created into selection(edit)/deselect/dropshadow.

Paste wordart/resize 50%/position/adjust/color/channel mixer/settings:

Output channel:blue
Red % -148
Green % 200
Blue % 200
Constant % 12
Monochrome unchecked/ok/dropshadow.

Layers/new raster layer/right click/arrange/send to bottom/flood fill white.

Layers/merge/merge visible.

Image/resize all layers 10%.

Add copyrights.

Add name.

*For my name,I used #0a1034 for fill/white on foreground.

Save.

*Make sure to name your tag differently than the templates,and save as a jpg.
Hope you enjoyed my tut,would love to see your results.

Hugs,Mary

Passion


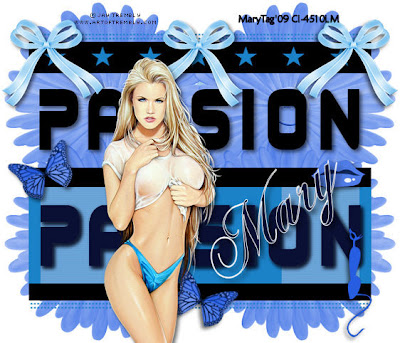
Tube of choice,I am using Jay Trembly,which you can purchase here,do not use unless you have a license to do so.

Scrapkit is Chica's Pinky Lee here. So love this kit! Thank you Chica!!

Template of choice,I am using Linda's template 27 from Creative Misfits Creations here. Thank you Linda!

Font of choice,I am using Chopin Script here.
-This tutorial was written assuming you have working knowledge of PSP-

Dropshadow for tut:
Vertical 4
Horizonal 4
Opacity 59
Blur 10

Open template/delete credit layer/image/canvas size/700x600.

Layers/new raster layer/right click/arrange/send to bottom/flood fill white.

Highlight the wordart PASSION/layers/duplicate/using your move tool/move to bottom of the template like I did/selections/select all/float/defloat/flood fill a dark color,I used #0a1034/deselect/dropshadow to both layers.

Highlight pink rectangle layer/to change the color:adjust/hue&saturation/colorize/change hue to 144 and saturation to 195.
Repeat with halftone layer,lower&upper dotted lines and stars.

Paste bow 1/resize 50%/position on the left of the tag/apply same color we just used on the stars etc./layers/duplicate/image/mirror/layers/duplicate/position in center/dropshadow.

Paste butterly 1/resize 50%/edit/repeat reside/adjust/hue&saturation/colorize/change hue to 157 and saturation to 195/layers/duplicate/position/dropshadow to both.

Highlight halftone layer/paste daisy5/same colorization/layers/duplicate 3 times/position.

Repeat with lips 1/do not duplicate/dropshadow.

Paste kitty 4/resize 50%/edit/repeat resize/colorize under adjust/position/dropshadow.

Layers/merge/merge visible.

Image/resize all layers 20%.

Add copyrights.

Add name.

Save.

Make sure to name your tag,don't save as the template and as a jpeg.
Hope you enjoyed my tut,would love to see your results.
Hugs,Mary

Wednesday, October 21

Colors Of Fall


Tube of choice,I am using Caron Vinson, which you can purchase here,do not use unless you have a license to do so.


Scrapkit is Fall Giggles from Chris of KateLynns Designs here and you can purchase it here. The colors in this kit are stunning!! Thank you Chris for such a fabby kit!!!


Mask of choice,I am using lace frame from Insatiable Dreams here.


Font of choice,I am using Juice ITC,came with my psp program.


-This tutorial was written assuming you have working knowledge of PSP-


Dropshadow for tut:
Vertical 5
Horizonal 5
Opacity 63
Blur 9

 
Open mask,minimize.


Open a new 500wx600h white image.


Paste paper 3_2 as a new layer/right click/new mask layer/from image/select yhour mask/ok/layers/merge/merge group.


Paste frame 2_4 as a new layer/position.


Click inside frame with your magicwand/selections/modify/expand by 6.


Paste paper 4_2 below frame layer/resize 35%/selections/invert/delete/do not deselect.


Paste tube of choice/resize if needed/delete/deselect/dropshadow.


Hide mask and white background layers/layers/merge/merge visible/dropshadow/unhide layers.


Paste leaves 2_3 below frame/using your pick tool/position on the right of the frame/layers/duplicate/image/mirror.


Repeat with leaves 2_4.


Moving up top/paste leaves 1_1 as a new layer/resize 50%/position to the left of the frame/layers/duplicate/image/mirror/dropshadow.


Paste bow 1_4 as a new layer/resize 50%/edit/repeat resize/position on the left of the frame/layers/duplicate/image/mirror/dropshadow to both layers.


Paste brad 1_6 as a new layer/resize 50%/position over left bow/layers/duplicate/image/mirror/dropshadow.


Paste flower 1_2 as anew layer/resize 50%/position/dropshadow.


Repeat with butterfly 1_3.


Paste flower 1_4 as a new layer/resize 50%/edit/repeat resize/position/dropshadow.


Layers/merge/merge visible.


Image/resize all layers 12%.


Add copyrights.


Add name.


Save.


*For my name,I used paper 2_2 for fill/black on foreground.


Hope you enjoyed my tut,would love to see your results.


Email me


Hugs,Mary

Tuesday, October 20

Spook Me At Midnight


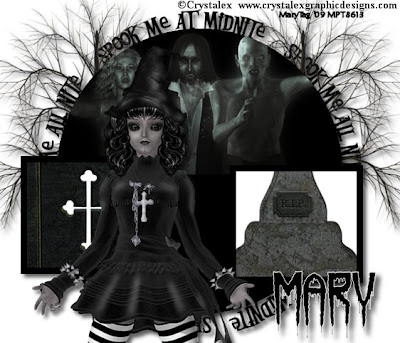
Tube or close up of choice,I am using Crystalex from MPT here. One is ptu,the other 2 are freebies,but you must have a license number to still use them.

Circle template of choice,I am using template 12 from Yvette at Essence of Creativity here. Thank you Yvette!

Wordart is from Susan at HippyDaze Scrappin Stuff here. Thank you Susan!

Font of choice, I am using Horrorfind here.
-This tutorial was written assuming you have working knowledge of PSP-

Open template/hit shiftD/close the orginal/delete credit layer.

We need to make the canvis size larger: Image/canvas size/change to 700 on top,bottom should be 600/ok.

Highlight circle layer/selections/select all/float/defloat/hide background layer on ghosts/edit/copy merged/paste as a new layer/position/selections/invert/delete/do not deselect.

Using your move tool/move the rectangle down some/delete/deselect/flood fill black.

Highlight square 1/flood fill white/selections/select all/float/defloat/paste grave2 as a new layer/resize 20%/position/selections/invert/delete/deselect.

Repeat with square 2 using grave3/do not resize.

Highlight frame 1/flood fill black/repeat with frame 2.

Right click on frame 2/merge/merge down to square 2/repeat with frame 1.

Position each square.

Paste tree below circle layer/layers/duplicate/position.

Paste wordart below trees/resize 15%.

Apply dropshadow of choice to layers.

Moving up top/paste tube of choice/position/dropshadow.

Layers/merge/merge visible.

Image/resize all layers 20%.

Add copyrights.

Add name.

Save.
Hope you enjoyed my tut,would love to see your results.

Hugs,Mary
Country Kitchen


Tube of choice,I am using Jessica Dougherty,which you can purchase here,do not use unless you have a license to do so.

Scrapkit is Cider Mill Lane Kitchen addon from Kristi here and you can purchase it here. I love this kit,just awesome!! Thank you Kristi!

Mask of choice,I am using zuzzanna mask56 here. Thank you Zuzzanna!

Font of choice,I am using Blue Melody Ultra Bold here.
-This tutorial was written assuming you have working knowledge of PSP-

Dropshadow for tut:
V6
H6
O61
B8
 
Open mask,minimize.

Open a new 800x600 white image,we will resize later.

Paste window as a new layer/resize 35%.

Layers/new raster layer/keep above white background layer,below window frame/flood fill yellow,I used #f3fb8b/right click/new mask layer/from image/select mask/ok/layers/merge/merge group/position in center of the window/using pick tool/move each side of the mask so there's yellow in the end window squares.

 
Click inside window frame with your magicwand/selections/modify/expand by 7.

Paste tube of choice below window/position/selections/invert/delete/deselect/dropshadow.

Hide white background and mask layers/layers/merge/merge visible/dropshadow/unhide layers.

Paste spoon/resize 40%/position on the left/layers/duplicate/image/mirror/dropshadow to both.
Paste rolling pin/resize 50%/position above window/dropshadow.

Paste gingerbread man 2/resize 50%/edit/repeat resize 2 times/position on left sppon/layers/duplicate/image/mirror/dropshadow to both.

Paste pie/resize 50%/edit/repeat resize/position/dropshadow.

Layers/merge/merge visible.

Image/resize all layers 28%.

Add copyrights.

Add name.

Save.

For my name,I used recipe card 2 for the fill/black on foreground.
Hope you enjoyed my tut,would love to see your results.

Hugs,Mary
Monday, October 19

Angel On My Shoulder


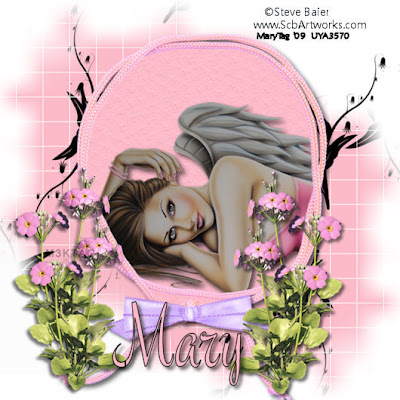
Tube of choice,I am using Steve Baier,which you can purchase here,do not use unless you have a license to do so.

Scrapkit is Angel On My Shoulder from Wilma4ever here and you can purchase it here. This is a stunning kit Wilma,thank you!!!

Mask of choice.

Font of choice.
-This tutorial was written assuming you have working knowledge of PSP-

Open mask,minimize.

Open a new 600x600 white template.

Paste paper4/right click/new mask layer/from image/select mask/ok/layers/merge/merge group/layers/duplicate/image/mirror/image/flip.

Paste frame 3/resize 5%/position.

Click inside frame with magicwand/selections/modify/expand by 3/paste paper 7 under frame layer/selections/invert/delete/do not deselect.

Paste tube of choice/postion/delete/deselect/dropshadow:

Vertical 5
Horizonal 5
Opacity 62
Blur 10
 

Hide masks and white background layers/layers/merge/merge visible/same dropshadow/unhide layers.

Paste doodle1 under frame layer/layers/duplicate/using your pick tool/position.
Paste bow6/resize 30%/position/dropshadow:V4 H4 O53 B6

Paste flower3/resize 30%/layers/duplicate/position both/same dropshadow.

Layers/merge/merge visible.

Image/resize all layers 12%.

Add copyrights.

Add name.

Save.

For my name,I used paper4 for fill/black on foreground.
Hope you enjoyed my tut,would love to see your results.

Hugs,Mary
Glitz


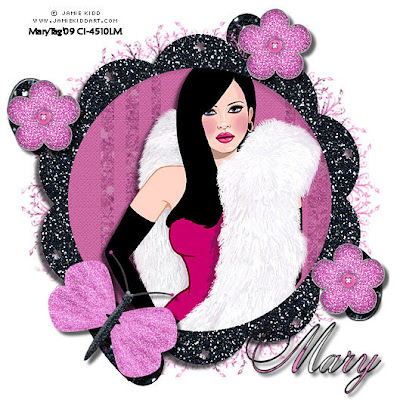
Tube of choice,I am using Jamie Kidd,which you can purchase here,do not use unless you have a license to do so.

Scrapkit is Glitz from Buffy at Deziners Utopia here and you can purchase it here. I love the glitz in this kit-its awesome! Thank you Buffy!

Mask of choice,I am using mask2 from Babes Designz here. Thank you Babes!!

Script font of choice.
-This tutorial was written assuming you have working knowledge of PSP-

Dropshadow for tut:
Vertical 6
Horizonal 6
Opacity 53
Blur 6

Open mask,minimize.

Open a new 600x600 white image/paste paper 3 as a new layer/resize larger 17%/right click/new mask layer/from image/select mask/ok/layers/merge/merge group.

Paste frame 2 as a new layer/resize smaller 25%.

Click inside frame with your magicwand/selections/modify/expand by 7.

Paste paper11 as a new layer under the frame layer/selections/invert/delete/do not deselect/right click on paper layer/properties/change opacity to 60.

Paste tube/position/delete/deselect/dropshadow.

Hide mask and white background layers/layers/merge/merge visible/dropshadow/unhide layers.

Paste swirl4 under merged frame layer/layers/duplicate/position both/dropshadow.

Paste butterfly2/resize 50%/position/dropshadow.
Paste button2/resize 50%/edit/repeat resize/layers/duplicate 2 times/position both/dropshadow.

Layers/merge/merge visible.

Image/resize 12%.

Add copyrights.

Add name.

Save.

For my name,I used paper7 for fill/black on foreground
Hope you enjoyed my tut,would love to see your results.

Hugs,Mary
Saturday, October 17

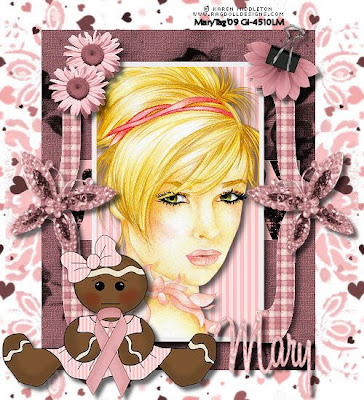
Reverie


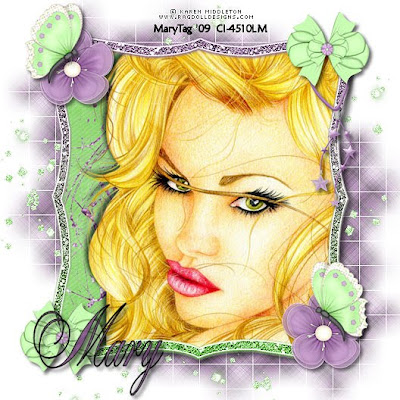
Tube of choice,I am using Karen Middleton,which you can purchase here,do not use unless you have a license to do so.

Scrapkit is Reverie from Melissa at Pink Quixotic here.(Her stores are currently closed so you will have to contact her for info on the kit).
The colors in this kit are gorgeous Melissa,thank you!

Mask of choice

Font of choice,I used Alexandra Script here.
-This tutorial was written assuming you have working knowledge of PSP-

Open a new 600x600 white image.


Paste frame 3 as a new layer/click inside the frame with your magicwand/selections/modify/expand by 6.

Paste paper 4 as a new layer under your frame layer/selections/invert/delete/do not deselect.

Paste splatter2 as a new layer/position/delete/do not deselect.

Paste tube/position/delete/deslect/dropshadow:

Vertical -5
Horizonal -5
Opacity 61
Blur 8

Hide white background layer/layers/merge visible/dropshadow:

Vertical 6
Horizonal 6
Opacity 56
Blur 10/unhide layer.

Paste paper1 as a new layer under merged frame layer//layers/load save mask/select mask/ok/layers/merge/merge group/position to the left of the tag/layers/duplicate/image/mirror/image/flip.

Paste scattered gliiter 2/layers/duplicate 3 times/postion.

Paste flower4 as a new layer/resize 50%/edit/repeat resize/layers/position both/dropshadow:

Vertical 4
Horizonal 4
Opacity 58
Blur 7

Repeat with butterfly 3.

Repeat with bow 4.

Paste charm 1 as a new layer/resize 50%/position/same dropshadow.

Layers/merge/merge visible.

Image/resize all layers 12%.

Add copyrights.

Add name.

Save.

For my name,I used paper5 for fill/black on foreground.
Hope you enjoyed my tut,would love to see your results.

Hugs,Mary

Wednesday, October 14

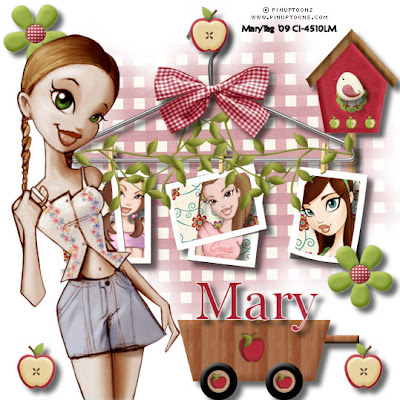
Just Hangin'


4 Tubes of choice,I am using PinUpToons,which you can purchase here,do not use unless you have a license to do so.

Scrapkit is Cinder Mill Lane from Kristi here and can be purchased here. I so love this kit,just so country!! Thank you Kristi!!

Template of choice,I am using hang template is from Grace at Digital Retouching here. Thank you Grace!

Mask of choice,I am using WSL7 by Chelle at WeeScotsLass Creations here. Thank you Chelle!

Font of choice,I am uising Georgia,came with my psp program.
-This tutorial was written assuming you have working knowledge of PSP-

Dropshadow for tut:
Vertical 7
Horizonal 7
Opacity 60
Blur 9

Open mask,minimize.

Open template/resize 73%/layers/new raster layer/send to bottom/make sure its highlighted.

Open paper6/minimize/go to materials/click on backgrounds/fill porperties/pattern/click on the black triangle/find paper6 in the drop menu/click on it/ok/flood fill the new raster layer we added.

Right click on paper layer/new mask layer/from image/select mask/ok/layers/merge/merge group.

Highlight template layer/click inside frames with your magicwand/selections/modify/expand by 3.

Paste paper12 under frame layer/resize 15%/selections/invert/delete/do not deselect.

Paste 1 tube in each set of frames/deselect/dropshadow.

Hide mask layer/layers/merge/merge visible/dropshadow/unhide layer.

Move the hanger up alittle to the top of the tag/position mask behind it.

Paste 4th tube of choice/position/dropshadow.

Paste birdhouse/resize 50%/edit/repeat resize/position/dropshadow.

Paste bow 1/resize 50%/edit/repeat resize/position/dropshadow.
Repeat with flower5/duplicating 1 time.

Paste apple 5/resize 50%/edit/repeat resize/layers/duplicate 2 times/position/dropshadow.

Paste bird/resize 50%/edit/repeat resize 2 times/position/dropshadow.

Paste branch/resize 50%/edit/repeat resize/layers/duplicate/position/dropshadow.

Paste cart/resize 50%/edit/repeat resize/position/dropshadow.
Layers/new raster layer/right click/arrnage/send to bottom/flood fill white.

Layers/merge/merge visible.

Add copyrights.

Add name.

Save.
Hope you enjoyed my tut,would love to see your results.

Hugs,Mary
Tuesday, October 13

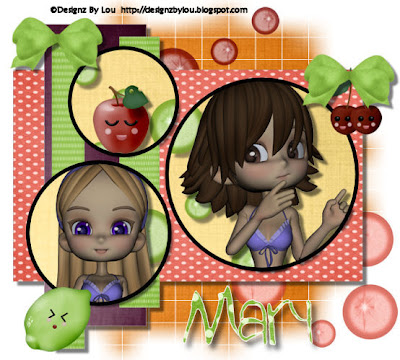
We All Need Fruity Friends


Tubes of choice,I am using freebie posers from Designz by Lou here,Sarah&Cassie-Best Friends. Love these posers Lou-just awesome! Thank you!!

Scrapkit is Fruit Basket,a freebie from Alyssa's ScrapsnSuch here. Thank you for the freebie Alyssa!

Template of choice,I am using template 218 from Missy at Divine Intentionz here. Thank you Missy!

Mask of choice.

Font of choice,I am using Bestest Buddies here.
-This tutorial was written assuming you have working knowledge of PSP-

Dropshadow for tut:
Vertical 6
Horizonal 6
Opacity 51
Blur 4
 
 
Open template/delete credit layer.

Highlight white background layer/paste paper11/layers/load mask/select mask/ok/layers/merge/merge group/layers/duplicate/image/flip.

Highlight large rectangle layer/selections/select all/float/defloat/paste paper6 into selection(edit)/deselect.

Repeat with rectangle using paper8.

Repeat with rectangles 2&3 using paper4.

Highlight frames backgrounds/click with magicwand/paste paper9 as a new layer/selections/invert/delete/do not deselect.

Paste first poser/resize 30%/position/delete/do not deselect.

Repeat with 2nd poser/resizing 40%/do not deselect.

Paste bubbles3/resize 50%/position behind posers/delete/deselect/dropshadow to posers&bubble layers.

Hide white background layer/layers/merge/merge visible/dropshadow/unhide layer.

Paste bubbles2 below merged layers/resize 50%/position/dropshadow.

Repeat with bubbles 1.

Moving up top/paste bow3/resize 60%/layers/duplicate/position/dropshadow.
Paste apple/resize 50%/edit/repeat resize 2 times/position/dropshadow.

Repeat with cherries and lime.

Layers/merge/merge visible.

Image/resize 5%.

Add copyrights.

Add name.

Save.
(Make sure to change file name/save as type)
 

For my name,I used paper4 for fill/white on foreground.
Hope you enjoyed my tut,would love to see your results.

Hugs,Mary

Monday, October 12

Pink Carnations:By The River


A story on how I came up with the title for this tut:
Yesterday,while listening to the radio,a woman had written in to request Garth Brooks song"By The River".
She lives in Canada,a 11 year surviour,and she is part of a group of woman that formed a breast cancer surviours support group,their name fails me at the moment.
But once a year,they take pink carnations to the river,throw them in and say prayers for their battle with this horrid disease,their prayers for lost friends,their praise of beating it and their graditude to all the love&support they recieve from all over the world.
So I decided to pay tribute to them,and all women,and families,that have been effected by this disease. May peace and health be with you all,keep fighting.
Hugs Mary
Tube of choice,I am using Karen Middleton,which you can purchase here,do not use unless you have a license to do so.

Scrapkit is Cindy Lee,a breast cancer awareness kit from Shani at Wicked Princess Scraps here. This is a beautiful kit,Shani,thank you!

Template of choice,I am using template41 from AquaRebel315 here.

Font of choice.
-This tutorial was written assuming you have working knowledge of PSP-

Open template/hit shiftD/close the orginal/delete copyright layer from the one you are using.

Highlight copy of raster1/right click/merge/merge down to raster 1/keep highlighted.

Selections/select all/float/defloat/paste paper11 as a new layer/resize 10%/selections/invert/delete/deselect/right click on paper layer/merge/merge down to black layer we just merged.

Repeat with raster5 layer,using paper6.

Highlight raster2 layer/selections/float/defloat/papste paper2 as a new layer/selections/invert/delete/do not deselect.

Paste tube/postion/delete/deselect/dropshadow:

Vertical 5
Horizonal 5
Opacity 63
Blur 10

Right click on raster3 layer(frame)/merge/merge down to raster2 layer/same dropshadow.

Right click on copy of raster4 layer/merge/merge down to raster4/selections/select all/float/defloat/paste paper1 as a new layer/resize 15%/selections/invert/delete/deselect/right click on paper layer/merge/merge down to raster4 layer/same dropshadow.

Highlight white background layer/paste doodle2/position to the left of the tag using your pick tool/layers/duplicate/image/mirror/layers/duplicate/image/flip/layers/duplicate/image/mirror.
Paste hearts1/position with pick tool laying down more at the top of the tag/layers/duplicate/image/flip/right click on copy layer/merge/merge down to firsy hearts layer/layers/duplicate/image/free rotate to the left 90*/position.

Moving up top/paste butterfly2/resize 30%/position on the right/slant slightly with pick tool/layers/duplicate/image/mirror/dropshadow for both layers:
Vertical 6
Horizonal 6
Opacity 59
Blur 7

Paste doll4/resize 50%/position/same dropshadow.

Paste flower2/resize 50%/edit/repeat resize/image/free roate to the right 20 degrees/position/same dropshadow.

Paste flower4/resize 50%/edit/repeat resize/layers/duplicate/position&dropshadow to both layers.

Layers/merge/merge visible.

Add copyrights.

Add name.

Save.

For my name,I used paper5 for fill/#f59799 on foreground.
Hope you enjoyed my tut,would love to see your results.

Hugs,Mary
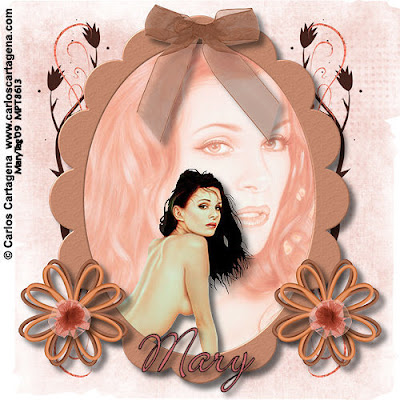
Remix


Tube/close up of choice,I am using Carlos Cartagena,which you can purchase here,do not use unless you have a license to do so.

Scrapkit is Remix from Wima4ever here and you can purchase it here. The colors in this kit are gorgeous! Thank you Wilma for letting me work with it!

Mask of choice,I am using a grundge mask from Insatiable Dreams here.

Font of choice,I am using Kolibri here.
-This tutorial was written assuming you have working knowledge of PSP-

Dropshadow for tut:
Vertical 7
Horizonal 7
Opacity 56
Blur 9

Open mask,minimize.

Open a new 500x500 white image.

Paste paper11 as a new layer/right click/new mask layer/from image/select mask/ok/layers/merge/merge group.
Paste frame3/click insdie frame with magicwand/selections/modify/expand by 6.

Paste paper12 under frame layer/selections/invert/delete/do not deselect.

Paste close up/postion/delete/paste tube/position/delete/deselect/dropshadow to tube layer only.

Hide mask layer and white background layer/layers/merge/merge visible/dropshadow/unhide layers.

Paste doodle4 below merged frame layer/position to the left/layers/duplicate/image/mirror.

Paste header1/resize 25%/edit/repeat resize/image/free rotate 90* to the right/layers/duplicate/image/mirror.

Moving up top/paste stringflower2/resize 50%/position to the left/layers/duplicate/image/mirror/dropshadow.

Paste bow3/resize 50%/position/dropshadow.

Paste ribbon flower1/resize 50%/edit/repeat resize 2 times/position in center of left string flower/layers/duplicate/image/mirror/dropshadow.

Layers/merge/merge visible.

Resize if desired.

Add copyrights.

Add name.

Save.

For my name is used #d16d6f for fill/black on foreground.
Hope you enjoyed my tut,would love to see your results.

Hugs,Mary

Vampyre Love Is Forever


Scrapkit is Vampyre from Dee at Scraps By Dmg and you can purchase it on her blog here. This kit is so awesome,love everything in it! Thank you Dee!!

Template of choice,I am using a template from Aqua,her blog is here and you can download it at Creative Misfits here.

Font of choice,I am using Dead Secretary here.
-This tutorial was written assuming you have working knowledge of PSP-

Dropshadow for tut:
Vertical 7
Horizonal 6
Opacity 62
Blur 8

 
Open template/hit shiftD/close the orginal/delete credit info.

Highlight rectangle back/selections/select all/float/defloat/paste paper14 as a new layer/reszie 10%/selections/invert/delete/deselect/right click on paper layer/merge/merge down to rectangle layer/dropshadow.

All frames will be done with paper3/selections/select all/float/defloat/paste paper3 into selection(under edit).

Highlight top rectangle layer/repeat same steps we used for the first rectangle layer using paper15.

Top and bottom heart backs:repeat last steps using paper11.

Right click on bottom heart frame/merge/merge down to heart back/dropshadow/position.

Repeat with top heart frame.

Highlight top rectangle back/selections/select all/float/defloat/paste gate layer as a new layer/resize 30%/edit/repeat resize/position/selections/invert/delete/do not deselect.

Highlight white background layer/paste dead tree/resize 50%/edit/repeat resize/position to the right of the tag with your pick tool/layers/duplicate 2 times/position across the top of the tag.

Right click on copy2 of tree/merge/merge down to first tree/layers/duplicate/image/flip.

Paste vamp2/resize 50%/position/delete/deselect/dropshadow to tube&gate layers.

Hide white background layer/layers/merge/merge visible/dropshadow/unhide layer.

Paste vamp1 tube/resize 20%/edit/repeat resize/position on frame/dropshadow/we will work below tube layer now.

Paste cat2/resize 30%position/dropshadow.

Paste dagger/resize 50%/edit/repeat resize/position over top heart/dropshadow.

Repeat with bow4.

Repeat with candle.

Repeat with spider1/duplicate 1 time(layers)positioning on candle and male vamp.

Repeat with flower1/duplicating 2 times/position.

Layers/merge/merge visible.

Add copyrights.

Add name.

Save.

For my name,I used paper8 for fill/white on foreground.
Hope you enjoyed my tut,would love to see your results.

Hugs,Mary

  © Blogger template Customization and Installation by Krissy's Scraps and Imaging 2011

Back to TOP