Wednesday, December 30

Happy New Year 2010


Tube of choice,I am using Jay Trembly,which you can purchase here,do not use unless you have a license to do so.

Scrapkit is Happy New Year 2010 from Stacey at Staceys Designs here and you can purchase it here. Love the colors in this kit,just beautiful! Thank you Stacey!

Mask of choice,I am using mask 84 from Chelle here. Thank you!

Font of choice,I am using Oceana here.
-This tutorial was written assuming you have working knowledge of PSP-

Dropshadow for tut:
Vertical 4
Horizonal 4
Opacity 60
Blur 8

Open a new 700x500 white image.

Paste filmstrip frame/position towards the bottom of the tag/click in wach frame with your magicwand/selections/modify/expand by 5.

Paste paper 5/layers/load save mask/load mask from disk/select mask/ok/layers/merge/merge group.

Paste fireworks 1/resize 15%/position tot he left to the tag/layers/duplicate/image/mirror.

Paste paper 5 below filmstrip/selections/invert/delete/deselect.

Paste clock and candles/position/dropshadow.

Paste champange bucket/resize 50%/position/dropshadow.

Repeat with champange glass.

Paste curly bow/resize 50%/position to the left of the frame/layers/duplicate/image/mirror/dropshadow to both bows.

Paste button 3/resize 50%/edit/repeat resize/layers.duplicate/position over bows/dropshadow.

Paste new year banner/resize 50%/position/dropshadow.

Paste tube/resize if needed/psotion/dropshadow.

Paste party horn/resize 25%/position/dropshadow.

Add copyrights.

Add name.
*For my name,I used paper 6 for fill/black on foreground.

Layers/merge/merge visible.

Resize all layers 23%.

Save.
Hope you enjoyed my tut,would love to see your results.

Email me.

Hugs,Mary

Girly Girl


Tube/close up of choice,I am using Jamie Kidd,this tube came from CILM's xmas gift,you can find it here and many other Jamie Kidd tubes,must have a license to use.

Scrapkit is Girly Girl from Amy at Ziggyfan Scraps here and you can purchase it here. This kit is gorgeous,perfect for any girl!!!! Thank you Amy!!

Font of choice,I am using Abbeyline here.
-This tutorial was written assuming you have working knowledge of PSP-

Open frame 4/image/canvas size/change height and width to 500/layers/new raster layer/right click on new layer/arrange/send to bottom/flood fill white.
Highlight and click inside frame with your magicwand/selections/modify/expand by 6.

Paste paper 9 as a new layer below frame layer/selections/invert/delete/do not deselect.

Paste close up/position/delete/deselect/dropshadow:

Vertical 5
Horizonal 5
Opacity 55
Blur 5

Hide white background layer/layers/merge/merge visible/same dropshadow/unhide layer/resize merged layer 10%/position.

Paste glitter 1 below merged layers/resize 40%/layers/duplicate 2 times/position all layers.

Repeat with glitter 2.

Paste dragonfly 1/resize 50%/position/dropshadow:

Vertical 4
Horizonal 4
Opacity 50
Blur 3

Paste clips/using your eraser tool/erase 1 clip you are not using/resize 50%/position/dropshadow:

Vertical 3
Horizonal 3
Opacity 52
Blur 4

Paste flower 1/resize 50%/edit/repeat resize/layers/duplicate 2 times/position each layer/same dropshadow.

Paste boxes/resize 50%/position/dropshadow:

Vertical 6
Horizonal 6
Opacity 45
Blur 5

Repeat with hand mirror.

Repeat with lipstick.

Paste tube/position/same dropshadow.

Add copyrights.

Add name.
*For my name I used paper 8 for fill/black on foreground.

Layers/merge/merge visible.

Resize all layers 10%.

Save.
Hope you enjoyed my tut,would love to see your results.

Email me.

Hugs,Mary

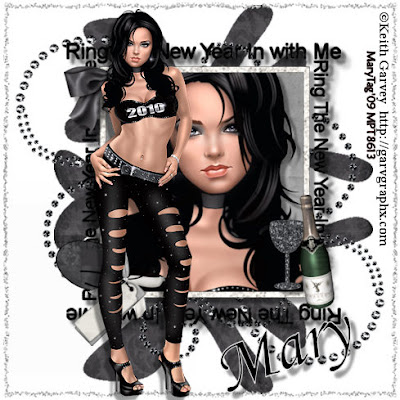
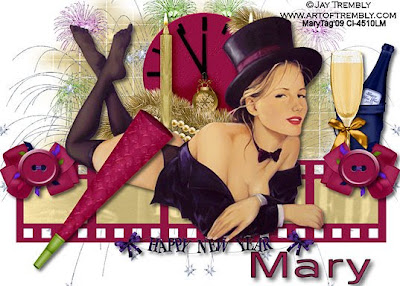
Ring The New Year In(With Me)


Tube/close up of choice,I am using Keith Garvey,which you can purchase here,do not use unless you have a license to do so.

Scrapkit is New years Kiss,a freebie from Seven's Scraps here. Thank you for the awesome kit!!!

Template of choice or mine here.

Font of choice.
-This tutorial was written assuming you have working knowledge of PSP-

Dropshadow for tut:
Vertical 7
Horizonal 7
Opacity 40
Blur 4

Open template/delete credit and flower layers.

Highlight accent background/selections/select all/float/defloat/paste paper 4 into selection(edit)/deselect.

Repeat on frame.

Repeat on glass.

Highlight and click on frame back with your magicwand/paste paper 17 into selection/do not deselect.

Paste close up as a new layer/position/selections/invert/delete/deselect/dropshadow.

Hide accent and white backgrounds/layers/merge/merge visible/dropshadow/unhide layers.

Paste bling 3 below merged layers/layers/duplicate/position.

Paste bow 1/resize 50%/position/dropshadow.

Paste champagne 2/resize 55%/position/dropshadow.

Paste glitter overlay 2/resize 23%.

Paste tag 1/resize 50%/position/dropshadow.

Paste tube/position/dropshadow.

Add copyrights.

Add name.

Layers/merge/merge visible.

Resize all layers 10%.

Save.
Hope you enjoyed my tut,would love to see your results.

Hugs,Mary

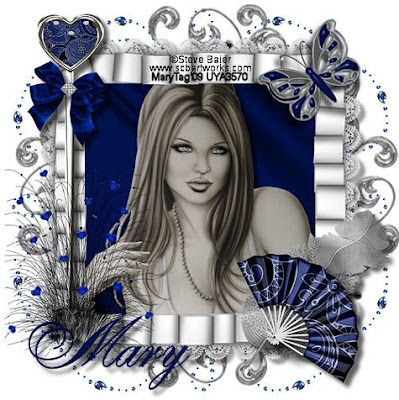
Just In Time


Tube of choice,I am using Steve Baier,which you can purchase here,do not use unless you have a license to do so.

Scrapkit is Stina,a freebie from Tracey at Soxsational Scraps Designs here. Thank you for the gorgeous freebie Tracey!!

Script font of choice.
-This tutorial was written assuming you have working knowledge of PSP-

Dropshadow for tut:
Vertical 6
Horizonal 6
Opacity 62
Blur 7

Open frame 2/resize 15%/make sure all layers is unchecked/layers/new raster layer/right click on new layer/arrange/send to bottom/flood fill white.

Highlight and click inside frame with your magicwand/selections/modify/expand by 7.

Paste paper 2 below frame layer/selections/invert/delete/do not deselect.

Paste tube/resize if needed to fit/delete/deselect/dropshadow.

Right click on frame/merge/merge down to paper layer/resize 5%/dropshadow.
Paste bling 2 below merged layers/resize 20%/layers/duplicate 3 times/position around frame.

Paste heart pin 4/position/dropshadow.

Paste butterfly 2/resize 50%/edit/repeat resize/position/dropshadow.

Repeat with elegant bow 6.

Paste feather 3/resize 50%/position/dropshadow.

Paste fan 1/resize 60%/position/dropshadow.

Repeat with heart weed.

Add copyrights.

Add name.

Layers/merge/merge visible.

Resize all layers 5%.

Save.
Hope you enjoyed my tut,would love to see your results.

Email me.

Hugs,Mary

Tuesday, December 29

Happy New Year

Photobucket

Scrapkit is Happy New Year from Dee at Scraps By Dmg and you can grab it for free until 12/31 then it goes PTU so check out her blog here. This kit is awesome,the posers are stunning!!!! Thank you Dee!! And hope I am not the only one thinking 2010 already????LOL

Animation Shop

Font of choice,I am using Dungeon here.
-This tutorial was written assuming you have working knowledge of PSP-

Dropshadow for tut:
Vertical 5
Horizonal 5
Opacity 58
Blur 5

Open frame 6/image/resize 15%/amke sure all layers is unchecked/layers/new raster layer/right click on new layer/arrange/send to bottom/flood fill white.

Paste clock below frame layer/resize 35%/position/dropshadow.

Paste confetti 1 below clock layer/resize 30%.

Repeat with fireworks 3/right click on fireworks layer/merge down to confetti/layers/duplicate 2 times/rename layers 1,2 and 3/we will come back to this later.

Paste doodle 6/layers/duplicate/image/mirror.

Paste balloons 3/resize 40%/position/dropshadow.

Repeat with balloons 1&2.

Paste champagne 1/resize 43%/position/dropshadow.

Paste hat 3/resize 50%/edit/repeat resize/position/dropshadow.

Repeat with wine glass 1.

Repeat with noisemaker 1.

Paste wordart 8/resize 50%/position/dropshadow.

Paste poser 2/position/dropshadow.

Add copyrights.

Add name.

Resize all layers 15%.

 
Highlight layer 1/adjust/add remove noise/add noise:

Random checked
Noise 47%
Monochrome checked

Repeat with layer 2/changing the noise % to 48/and layer 3 to 49%.

Hide layer 2 and 3 /highlight layer 1 /edit/copy merged/take to animation shop/paste as a new animation.

Go back to psp/hide layer 1/unhide layer 2/edit/copy merged/take to animation shop/paste after current frame.

Repeat with frame layer 3.

Save as gif.
Hope you enjoyed my tut,would love to see your results.

Email me.

Hugs,Mary

Monday, December 28

Frosty Love

Photobucket

Tube of choice,I am using Walter Girotto,this tube is from MPT's xmas gift but you can see more of Walter's tubes here.

Scrapkit is Frosty Love from Amy at Tagging AngelsNScraps here and you can purchase it here. Love this kit,so much to choose from for all projects!! Thank you Kissy!!

Snow here.

Font of choice,I am using Mistral,came with my psp program.
-This tutorial was written assuming you have working knowledge of PSP-

Dropshadow for tut:
Vertical 6
Horizonal 6
Opacity 52
Blur 3

Open a new 600x600 white image.

Paste curtain window 1/resize 30%/edit/repeat resize.

Paste tube below window layer/erase any tube showing below window/dropshadow.

Repeat with fae 1(gazebo).

Highlight white background layer/paste wire piece as a new layer/resize 50%/edit/repeat resize/position to the left of the tag/layers/duplicate/image/mirror/image/flip/position.

Moving up top/paste christmas pendant/resize 50%/position/dropshadow.

Paste fia bow/resize 50%/edit/repeat resize/layers/duplicate/position both bows/dropshadow.

Repeat with glitter poinsetta's.

Repeat with xmas flower.

Paste bling tree/resize 20%/position/dropshadow.

Highlight tube layer/selections/select all/float/defloat/maximize the snow we opened eariler/edit/copy one layer/paste as a new layer/selections/invert/delete/rename snow 1/copy another snow layer/paste/delete/rename snow 2 and repeat for snow 3 layer/deselect.

 
Add copyrights.

Add name.

Resize all layers 15%.

 
Highlight snow 1 layer/hide snow 2&3 layers/edit/copy merged/paste into animation shop as as new animation.

Hide snow layer 1/highlight and unhide snow layer 2/edit/copy merged/paste into animation shop after current frame/repeat for snow 3 layer.

Save as gif.
Hope you enjoyed my tut,would love to see your results.

Hugs,Mary

Sunday, December 27

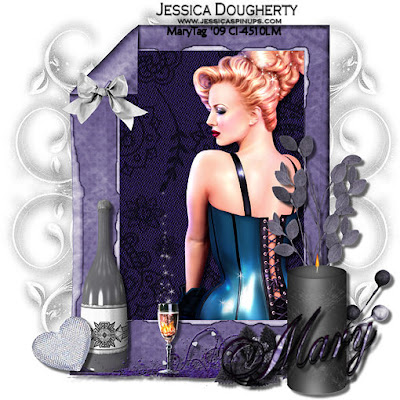
Purple Resolutions


Tube of choice,I am using Jessica Dougherty,which you can purchase here,do not use unless you have a license to do so.

Scrapkit is Purple Resolutions from Jay at Heartbeatz Creationz here and you can purchase it here. I so love this kit,its purple and gorgeous! Thank you Jay!!

Script font of choice.
-This tutorial was written assuming you have working knowledge of PSP-

Dropshadow for tut:
Vertical 5
Horizonal 5
Opacity 58
Blur 4

 
Open element 25(frame)/image/canvas size/change height and width to 600.
Layers/new raster layer/right click on new layer/arrange/send to bottom/flood fill white.

Highlight and click inside frame with your magicwand/selections/modify/expand by 7.

Paste paper 7 below frame layer/resize 25%/selections/invert/delete/do not deselect.

Paste tube/position/delete/deselect/dropshadow.

Hide white background layer/layers/merge/merge visible/dropsdhadow/unhide layer.

Paste element 8 below merged layers/position to the left of the tag/layers/duplicate/image/mirror/right click on copy layer/merge/merge down/layers/duplicate/image/flip/position.

Moving up top/paste element 11/resize 25%/edit/repeat resize/position/dropshadow.

Paste element 28/resize 50%/position/dropshadow.

Repeat with element 19.

Paste element 20(glass)/I am using one that came with my tube/position/dropshadow.

Paste element 4(bow)/resize 50%/edit/repeat resize/position/dropshadow.

Paste element 9(branch)/resize 50%/layers/duplicate/position both layers/dropshadow.

Paste element 1(candle)/resize 50%/position/dropshadow.

Add copyrights.

Add name.

Layers/merge/merge visible.

Resize all layers 15%.

Save.
Hope you enjoyed my tut,would love to see your results.

Email me.

Hugs,Mary

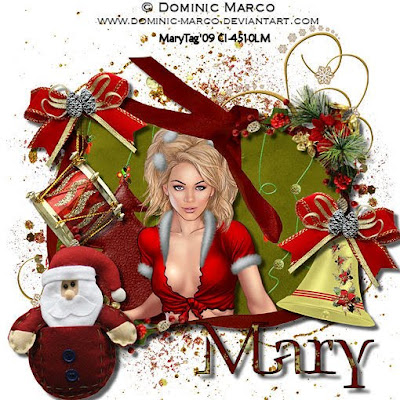
It's All About Christmas


Tube of choice,I am using Dominic Marco,which you can purchase here,do not use unless you have a license to do so.

Scrapkit is It's All About Christmas from Wilam at Wilma 4ever here and you can purchase it here. The colors in this kit are stunning,love the classic look of it all!! Thank you Wilma!

Font of choice,I am using Blue Island here.
-This tutorial was written assuming you have working knowledge of PSP-

Dropshadow for tut:Your Choice

Open a new 600x600 white image.
Paste frame 3 as a new layer/click inside frame with your magicwand/selections/modify/expand by 4.

Paste paper 11 below frame layer/selections/invert/delete/do not deselect.

Paste deco element 7/resize 50%/position/delete/do not deselect.

Repeat with tree 4.

Paste tube of choice/position/delete/deselect/dropshadow to tube,tree and element layers.

Hide white background layer/layers/merge/merge visible/dropshadow/unhide layer.

Paste deco element 6 below merged layers/layers/duplicate/position both layers.

Repeat with gold splatters.

Repeat with deco element 2.

Moving up top/paste bell 1/resize 50%/position/dropshadow.

Repeat with deco element 1.

Paste bow 5/resize 50%/layers/duplicate/position both bows/dropshadow.

Repeat with deco element 4.

Paste santa 2/resize 50%/position/dropshadow.

Add copyrights.

Add name.

Layers/merge/merge visible.

Resize all layers 15%.

Save.
Hope you enjoyed my tut,would love to see your results.

Email me.

Hugs,Mary

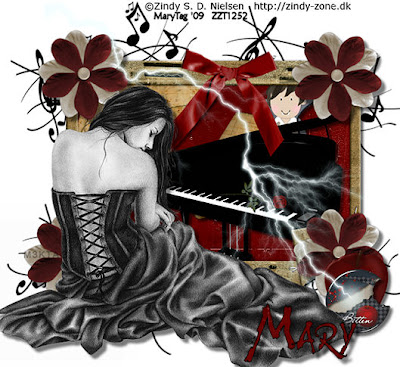
Waiting For Edward


Tube of choice,I am using Zindy,which you can purchase here,do not use unless you have a license to do so.

Scrapkit is Edward Cullen from Amy at Ziggyfan Scraps here and you can purchase it here. Love this kit,its awesome for all Twilight fans! Thank you Amy!!

Font of choice,I am using Wolfs Rain here.
-This tutorial was written assuming you have working knowledge of PSP-

Open a new 600x550 white image.

Paste frame 1 as a new layer/click inside frame with your magicwand/selections/modify/expand by 6.

Paste paper 5 below frame layer/selections/invert/delete/do not deselect.

Paste piano/resize 30%/position/delete/do not deselect.

Paste toon/resize 50%/edit/repeat resize/positi9on/do not deselect.

Paste sheet music/resize 50%/position/delete/deselect/dropshadow for piano,toon and sheet music:

Vertical 4
Horizonal 4
Opacity 56
Blur 4

Hide white background layer/layers/merge/merge visible/same dropshadow/unhide layer/position merged layers.

Paste music notes below merged layers/resize 50%/layers/duplicate 3 times/position all layers.

Paste tube/position/dropshadow:

Vertical 6
Horizonal 6
Opacity 52
Blur 5

Paste flower 4/resize 50%/edit/repeat resize/layers/duplicate 3 times/position bows/same dropshadow.

Paste button 1/resize 50%/position/dropshadow:
Vertical 4
Horizonal 4
Opacity 60
Blur 5

Paste apple/resize 50%/edit/repeat resize/position/same dropshdow.

Paste bow 2/resize 60%/position/same dropshadow.

Paste lightening bolt/resize 40%/position.

Add copyrights.

Add name.

Layers/merge/merge visible.

Resize all layers 12%.

Save.
Hope you enjoyed my tut,would love to see your results.

Hugs,Mary

Monday, December 21

Just Me Attitude


Tube of choice,I am using Rene Kunert,which you can purchase here,do not use unless you have a license to do so.

Scrapkit is Just Me,a freebie from Seven's Scraps here. Thank you!

Mask of choice,I am using Aqua Rebel315's mask 21 here.

Font of choice,I am using Amelia BT here.
-This tutorial was written assuming you have working knowledge of PSP-

Open mask,minimize.

Open a new 500/500 white image.

Paste paper 9 as a new layer/right click/new mask layer/from image/select mask/ok/layers/merge/merge group.

Paste frame 1/image/free rotate to the right 90*/resize 30%.

Click inside frame with your magicwand/selections/modify/expand by 6.
Paste paper 6 below frame layer/resize 35%/selections/invert/delete/do not deselect.

Paste tube/resize if needed to fit alittle better/delete/deseelct/dropshadow:

Vertical 6
Horizonal 6
Opacity 58
Blur 3

Hide white background layer/layers/merge/merge visible/same dropshadow/unhide layer.

Paste shoe 2/resize 33%/position/dropshadow:

Vertical 5
Horizonal 5
Opacity 45
Blur 4

Paste bow 2/resize 40%/position/same dropshadow.
Repeat with flower 2.

Paste butterfly 1/resize 40%/edit/repeat resize/position/same dropshadow.

Add copyrights.

Add name.

Layers/merge/merge visible.

Resize all layers 7%.

Save.
Hope you enjoyed my tut,would love to see your results.

Hugs,Mary

It's Christmas Time


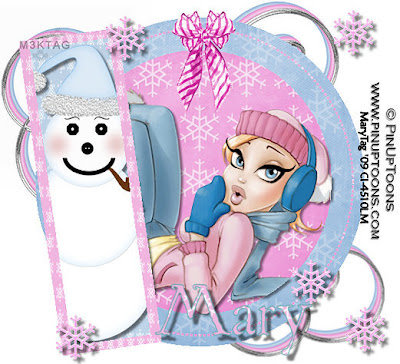
Tube of choice,I am using PinUpToons,which you can purchase here,do not use unless you have a license to do so.

Scrapkit is Its Christmas Time,a freebie from EllaVG at Creative Misfits Creations here. Thank you!

Template of choice,I am using template 69 from Missy at Divine Intentionz here.

Mask of choice,I am using snowflake 2 from Faith at Creative Misfits Creations here.

Font of choice,I am using Christmas Card here.
-This tutorial was written assuming you have working knowledge of PSP-

Dropshadow for tut:
Vertical 5
Horizonal 5
Opacity 60
Blur 6

 
Open mask,minimize.

Open template/delete credit layer.

Highlight white background layer/paste paper 5/right click/new mask layer/from image/select mask/ok/layers/merge/merge group.

Highlight and click on circle layer with your magicwand/paste paper 4 into selection(edit)/deselect/dropshadow.

Repeat with thin rectangles 1 using paper 3.

Repeat with thin rectangles 2 using paper 2.

Highlight and click on frame back with your magicwand/flood fill white/do not deselect.

Paste tube as a newlayer/resize if needed/postition/selections/invert/delete/deselect/dropshadow.

Highlight and click on the frame layer with your magicwand/paste paper 4 into selection/deselect/right click on frame layer/merge/merge down to frame background layer/dropshadow.

Paste swirl 2 below merged frame layer/resize 50%/edit/repeat resize/layers/duplicate/position both layers/dropshadow.

Paste bow 2/resize 50%/position/dropshadow.

Repeat with tree 2.

Paste box/resize 50%/edit/repeat resize/position/dropshadow.

Paste candycane 2/resize 50%/edit/repeat resize 2 times/position/dropshadow.

Add copyrights.

Add name.

Layers/merge/merge visible.

Resize all layers 3%.

Save.
Hope you enjoyed my tut,would love to see your results.

Email me.

Hugs,Mary

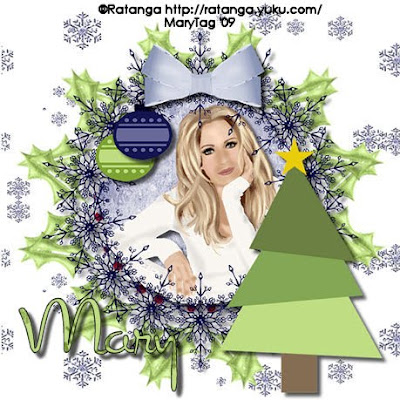
Holiday Cheer


Tube of choice,I am using Ratanga,ftu tubes here. Thank you!

Scrapkit is Holiday Cheer,a freebie from Kaci at Scrappin Krazy Designs here and you can get here at Creative Misfits Creations.

Script font of choice.
-This tutorial was written assuming you have working knowledge of PSP-

Dropshadow for tut:
Vertical 6
Horizonal 6
Opacity 65
Blur 7

 
Open blue frame/layers/new raster layer/right click on new layer/arrange/send to bottm/flood fill white.

Highlight and click inside frame with your magicwand/selections/mosify/expand by 6.

Paste paper 5 below frame layer/selections/invert/delete/do not deselect.

Paste tube of choice,position/delete/deselect/dropshadow/right click on frame layer/merge/merge down to paper layer/dropshadow.

Paste bow 2/resize 40%/edit/repeat resize/now we need to change the color to match better/adjust/hue&saturation/colorize/from the dropdown menu/select blue neutral/ok/dropshadow.

Paste holly/resize 50%/edit repeat resize/effects/MuRa's copies/select encircle/default settings/resize larger 10%/edit/repeat resize 2 times/right click/arrange/move down.

Paste ornament 4/resize 50%/edit/repeat resize/position/dropshadow.

Repeat with ornament 3.

Paste snowflake 2/resize 50%/edit/repeat resize 2 times/effects/MuRa's copies/wallpaper(lighten)default settings/right click on snowflake layer/arrange/send below holly layer/layers/duplicate/image/flip.

Paste tree/resize 35%/position/dropshadow.

Add copyrights.

Add name.

Layers/merge/merge visible.

Resize all layers 25%.

Save.
Hope you enjoyed my tut,would love to see your results.

Hugs,Mary

Sunday, December 20

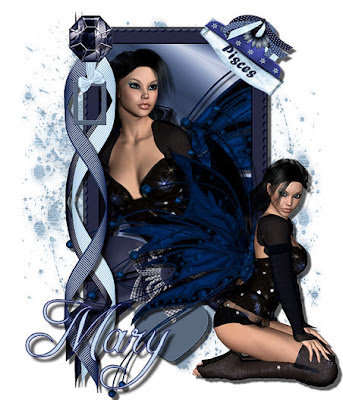
Pisces


Scrapkit is Pisces from Stacey at Staceys Designs here and you can purchase it here. Stunning kit Stacey,love the posers!! Thank you!

Mask of choice,I am using grunge mask2 from Rose at Creative Misfits Creations here.

Font of choice,I am using Freebooted Script here.
-This tutorial was written assuming you have working knowledge of PSP-

Dropshadow for tut:
Vertical 6
Horizonal 6
Opacity 65
Blur 3

Open mask,minimize.

Open wrapped frame/image/canvas size/change width to 600,keeping 700 for height/image/resize frame 10%/make sure all layers is unchecked.

Layers/new raster layer/right click on new layer/arrange/send to bottom/flood fill white.

Keeping white layer highlighted/paste paper 7 as a new layer/right click on paper layer/new mask layer/from image/select mask/ok/layers/merge/merge group.

Highlight and click inside frame/selections/modify/expand by 6.

Paste paper 4 below frame layer/resize 30%/selections/invert/delete/do not deselect.

Paste poser 3/position/delete/deselect/dropshadow.

Hide mask and white background layers/layers/merge/merge visible/dropshadow/unhide layers.

Paste clip/resize 50%/edit/repeat resize/position/dropshadow.
Paste button flower 2/resize 50%/edit/repeat resize/position/dropshadow.

Paste light tag/resize 50%/edit/repeat resize/position/dropshadow.

Paste curled ribbon/position/resize 5%/dropshadow.

Repeat with curled ribbon 1.

Repeat with curled ribbon 2.

Repeat with light blue hanging frame.

Repeat with gem.

Add copyrights.

Add name.

Layers/merge/merge visible.

Resize all layers 25%.

Save.
Hope you enjoyed my tut,would love to see your results.

Hugs,Mary

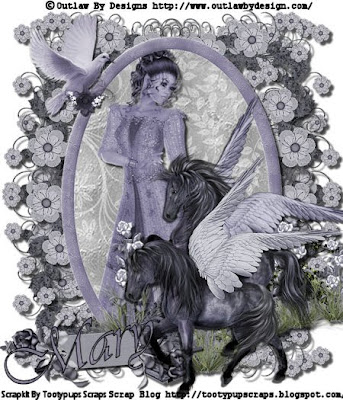
Mystical Dreams


Scrapkit is Mystical Dreams from Susan at Tootypup's Scraps here and you can purchase it here. This kit is just simply stunning Pup!!! Thank you!!

Font of choice,I am using Vivaldi,came with my psp program.
-This tutorial was written assuming you have working knowledge of PSP-

Dropshadow for tut:
Vertical 6
Horizonal 6
Opacity 68
Blur 4

 
Open a new 600x700 white image.

Paste frame/resize 30%/click inside the frame with your magicwand/selections/modify/expand by 6.

Paste paper 17 below frame layer/resize 20%/selections/invert/delete/do not deselect.

Paste poser 2/resize 20%/position/delete/deselect/dropshadow.

Hide white background layer/layers/merge/merge visible/resize 15%/dropshadow/unhide layer.

Paste corner 1 below merged layer/position to the left of the tag/layers/duplicate/image mirror/right click on copy layer/merge/merge down/layers/duplicate/image/flip/dropshadow.

Open bridge 2/apply dropshadow/paste as new layer/resize 33%/position/dropshadow.

Open winged horse 2/apply dropshadow/paste as new layer/resize 35%/position/dropshadow.

Repeat with winged horse 3.

Open dove 1/apply dropshadow/paste as new layer/resize 50%/position.
Repeat with tag 3.

Add copyrights.

Add name.

Layers/merge/merge visible.

Resize all layers 25%.

Save.
Hope you enjoyed my tut,would love to see your results.

Hugs,Mary

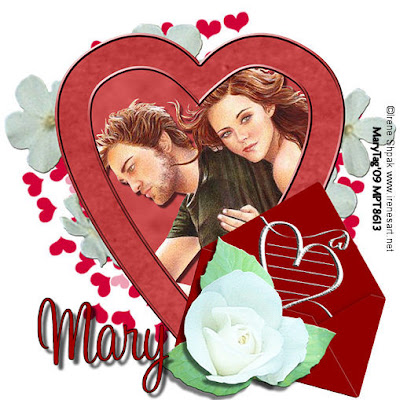
Sweethearts


Tube of choice,I am using Irene Shpak,which you can purchase here,do not use unless you have a license to do so.

Scrapkit is Sweetheart from Tammy at Bunchies Bin here and you can purchase it here. This kit is gorgeous Tammy,thank you!!

Mask of choice,I am using Vix_Mask176 here.

Script font of choice.
-This tutorial was written assuming you have working knowledge of PSP-

Open mask,minimize.

Open a new 600x600 white image.

Paste bg 2 as a new layer/right click on new layer/new mask layer/from image/select mask/ok/layers/merge/merge group.

Paste frame red 1/reszie 35%/edit/repeat resize 2 times/click inside frame with your magicwand/selections/modify/expand by 7.

Paste bg 1/selections/invert/delete/do not deselect.

Paste tube/position/delete/deselect/dropshadow:
Vertical 5
Horizonal 5
Opacity 61
Blur 3

Paste phlox below paper layer/reszie 30%.

Paste red envelope/resize 37%/edit/repeat resize 2 times/position/same last dropshadow.

Moving up top/paste rose/resize 55%/edit/repeat resize/dropshadow:

Vertical 6
Horizonal 6
Opacity 53
Blur 5

Paste leaf trio/resize 45%/position below rose layer/same dropshadow.

Add copyrights.

Add name.

Layers/merge/merge visible.

Resize all layers 15%.

Save.
Hope you enjoyed my tut,would love to see your results.

Hugs,Mary

Naughty Or Nice


2 tubes/close ups of choice,I am using Crystalex Designs,which you can purchase here,do not use unless you have a license to do so.

Scrapkit is Naughty Or Nice,a freebie from Puds at Creative Misfits Creations here. Thank you!

Template of choice,I am using template 217 from Missy at Divine Intentionz here.

Font of choice,I am using Ransom here.
-This tutorial was written assuming you have working knowledge of PSP-

Dropshadow for tut:
vertical 4
Horizonal 4
Opacity 58
Blur 5

 
Open your template/delete credit layer.

Highlight thin rectangle 3 and click on it with your magicwand/paste paper 6 as a new layer/selections/invert/delete/deselect/right click on paper layer/merge/merge down to rectangle/right click again/arrange/send to bottom/right click/arrange/move up 1 time so its above the white background/image/resize larger 10%/position/dropshadow.

Repeat on thin rectangle 2 using paper 8.

Repeat on thin rectangle 1 using paper 5.

Highlight and click on rectangle layer with your magicwand/paste paper 2 as a new layer/selections/invert/delete/paste close up of choice/delete/deselect/right click on close up layer/merge/merge down to rectangle layer/dropshadow.

Repeat with circle layer using paper 1 and 2nd close up.

Highlight dotted circle/selections/select all/float/defloat/paste paper 6 into selection(edit).

Highlight white background/paste image 21.

Paste image 16(tree)/position/dropshadow.

Paste image 9/position/dropshadow.

Repeat with image 7.

Paste image 5/resize 50%/edit/repeat resize/layers/duplicate/position/dropshadow.

Repeat with image 3.

Repeat with image 1.

Paste tubes of choice/resize if needed/position/dropshadow.

Add copyrights.

Add name.

Layers/merge/merge visible.

Resize all layers 12%.

Save.
Hope you enjoyed my tut,would love to see your results.

Hugs,Mary

Friday, December 18

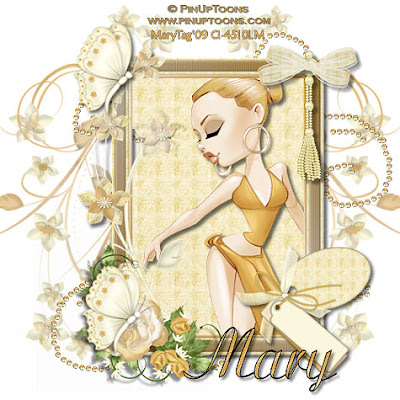
Antiqued Butterscotch


Tube of choice,I am using PinUpToons,which you can purchase here,do not use unless you have a license to do so.

Scrapkit is Antiqued Butterscotch from Terry at Treasures By Terry here and you can purchase it here. This kit is stunning Terry,loved it the second I saw it!!

Font of choice,I am using Ariston here.
-This tutorial was written assuming you have working knowledge of PSP-

Open a new 500x500 white image.

Paste frame 3 as a new layer/click inside frame with your magicwand/selections/modify/expand by 5.

Paste paper 3 below frame layer/selections/invert/delete/do not deselect.

Paste tube of choice/position/delete/deselect/dropshadow:

Vertical 4
Horizonal 4
Opacity 56
Blur 5

Hide the white background layer/layers/merge/merge visible/same dropshadow/unhide layer.

Paste flower doodle 1 below merged layers/resize 15%/layers/duplicate 3 times/position.

Paste pearl doodle 3/duplicate/position both layers.

Moving up top/paste flower 8/resize 50%/position/dropshadow:

Vertical 5
Horizonal 5
Opacity 45
Blur 4

Paste pearl tassel 1/position/same dropshadow.

Paste bow 5/resize 60%/position/same dropshadow.
Paste butterfly 2/resize 60%/layers/duplicate 2 times/position/dropshadow:

Vertical 3
Horizonal 3
Opacity 60
Blur 6

Paste tag 2/resize 50%/position/same dropshadow.

Add copyrights.

Add name.

Layers/merge/merge visible.

Resize all layers 5%.

Save.
Hope you enjoyed my tut,would love to see your results.

Email me.

Hugs,Mary

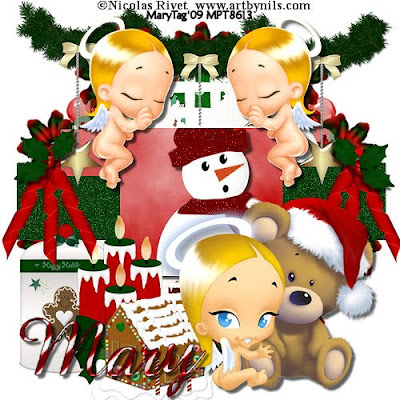
Beary Christmasy Angels


Tube of choice,I am using Nicolas Rivet,which you can purchase here,do not use unless you have a license to do so.

Scrapkit is Christmas 2009 by Donna at Donna's Designzs here and you can purchase it here. I love this kit,so Christmas!!

Template of choice,I am using template 4 from Kirsty at Kirstys Scraps here. Thank you Kirsty!!

Font of choice,I am using Abbeyline here.
-This tutorial was written assuming you have working knowledge of PSP-

Dropshadow for tut:
Vertical 5
Horizonal 5
Opacity 62
Blur 4

 
Open template/delete credit layer.

Image/canvas size/leave width at 600,change height to 600.

Highlight layer 1/flood fill white.

Highlight layer 2/click on it with your magicwand/paste paper 23 as a new layer/selections/invert/delete/deselect/delete layer 2.

Repeat with layer 4/resize paper 20%.

Repeat with layer 3 using paper 23(do not resize).

Repeat with layer 5/layer 6 and copy layer using paper 27.

Highlight white background layer/paste flower circle frame 1/resize larger 20%.
Paste flower beads circle frame 1/resize larger 20%/edit/repeat resize.

Highlight raster 4 layer/selections/select all/float/defloat//paste snowman 1/position/selections/invert/delete/dropshadow.

Paste candle trio 2/resize 50%/make sure to change your settings back to 600x600 before resizing/position/dropshadow.

Repeat with cookie jar.

Repeat with gingerbread house.

Paste garland 1/position/highlight layer 4/selections/select all/float/defloat/highlight garland layer/delete(do not invert)/selections/none.
Paste curly ribbon 1/resize 50%/position/dropshadow.

Paste holly/resize 50%/edit/repeat resize/layers.duplicate/position/dropshadow.

Paste 1st tube/resize if needed/position/dropshadow.

Repeat with 2nd tube.

Add copyrights.

Add name.

Layers/merge/merge visible.

Resize all layers 17%.

Save.
Hope you enjoyed my tut,would love to see your results.

Hugs,Mary

Wednesday, December 16

Beary Christmas


Tube of choice,I am using PinUpToons,which you can purchase here,do not use unless you have a license to do so.

Scrapkit is Bear Christmas,a freebie from Von at Soaring Hawks Nest here and you can find the bows here and the christmas buttons here. Awesome freebies Von,love the bear!! Thank you!!

Mask of choice,I am using mask 39 from Aqua Rebel315 at Creative Misfits Creations here.

Font of choice.
-This tutorial was written assuming you have working knowledge of PSP-

Open mask,minimize.

Open a new 600x600 white image.

Layers/new raster layer/flood fill color of choice,I used #074107/right click on new rater layer/new mask layer/from image/select mask/ok/layers/merge/merge group.

Paste pearl frame/resize 23%/click inside frame with your magicwand/selections/modify/expand by 7.

Paste paper of choice below frame layer/selections/invert/delete/do not deselect.

Paste tube/position/delete/deselect/dropshadow:

Vertical 5
Horizonal 5
Opacity 58
Blur 5

Right click on frame layer/merge/merge down to paper layer.
Moving up top/paste bell/resize 30%/position/same dropshadow.

Paste polar bear/resize 50%/position/dropshadow:

vertical 4
Horizonal 4
Opcity 46
Blur 4

Paste bow 3/resize 50%/edit/repeat resize/layers/duplicate 2 times/position/same dropshadow.

Paste merry chrsitmas green button/resize 50%/edit/repeat resize/position/dropshadow.

Add copyrights.

Add name.

Layers/merge/merge visible.

Resize all layers 17%.

Save.
Hope you enjoyed my tut,would love to see your results.

Email me.

Hugs,Mary

Let It Snow

Photobucket

Scrapkit is Let It Snow from Crazed's Creations here and you can purchase it here. This kit is gorgeous,love the poser!!! Thank you Katie!!

Mask of choice,I am using winter mask 25 from Aqua Rebel at Creatice Misfits Creations here.

Snow here.

Font of choice,I am using Annabelle here.

Animation Shop
-This tutorial was written assuming you have working knowledge of PSP-

Dropshadow for tut:your choice.

Open mask,minimize.

Open snow,unhide 2 more layers than whats already showing.

Open a new 600x600 white image.

Paste paper 13 as a new layer/resize 30%/right click on paper layer/new mask layer/from image/select mask/ok/layers/merge/merge group.

Paste frame 5/resize 20%/click inside frame with your magicwand/selections/modify/expand by 5.

Paste paper 10 as a new layer before frame layer/resize 30%/selections/invert/delete/keep selected.

Maximize the snow we opened eariler/edit/copy one layer/paste as a new layer/delete/rename snow 1/copy another snow layer/paste/delete/rename snow 2 and repeat for snow 3 layer/deselect/we will come back to this later.

Highlight mask layer/paste branch 3/reszie 12%/layers/duplicate/position/dropshadow.

Moving up top/paste bells 1/resize 40%/edit/repeat resize/position/dropshadow.

Paste tree 3/resize 15%/position/dropshadow.

Paste sled 2/resize 20%/position/dropshadow/selections/select all/float/defloat/paste bear 1 as a new layer/resize 35%/position/delete/deselect/dropshadow.

Paste bird 1/resize 50%/edit/repeat resize/position/dropshadow.
Paste bow 2/resize 32%/position/dropshadow.

Paste fae 1/position/dropshadow.

Add copyrights.

Add name.

Resize all layers 15%.

Highlight snow 1 layer/hide snow 2&3 layers/edit/copy merged/paste into animation shop as as new animation.

Hide snow layer 1/highlight and unhide snow layer 2/edit/copy merged/paste into animation shop after current frame/repeat for snow 3 layer.
Save as gif.
Hope you enjoyed my tut,would love to see your results.

Hugs,Mary
Classic Christmas


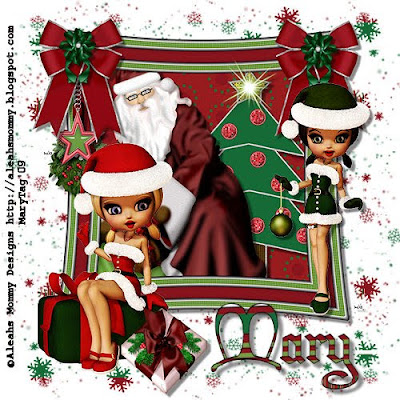
Scrapkit is Classic Christmas from Lisa at Aleahs Mommy Designs here and you can purchase it here. I love the colors in this kit and the posers are gorgeous!! Thank you Lisa!!

Mask of choice,I am using winter mask 2 from Jenny at Creative Misfits Creations here.

Font of choice,I am using Christmas Card here.
-This tutorial was written assuming you have working knowledge of PSP-

Dropshadow for tut:
Vertical 6
Horizonal 6
Opacity 46
Blur 4

Open frame 3/image/resize 20%/make sure resize all layers is unchecked.

Layers/new raster layer/right click on new layer/arrange/send to bottom/flood fill white.

Paste paper 6 as a new layer/right click on paper layer/new mask layer/from image/select mask/ok/layers/merge/merge group.

Highlight and click inside frame with your magicwand/selections/modify/expand by 7.

Paste paper 11 below frame layer/selections/invert/delete/do not deselect.

Paste tree/resize 20%/position/delete/do not deslect.

Paste santa/resize 30%/position/delete/deselect/apply dropshadow to tree and santa layers.

Hide white background layer/layers/merge/merge visible/dropshadow/resize merged layers 20%/position/unhide layer.

Paste christmas bow 3/resize 55%/layers/duplicate/position/dropshadow.

Paste bow 5/resize 50%/edit/repeat resize/layers/duplicate/position/dropshadow.

Align the green bow with the correct red bow/layers/merge/merged down seperatly.

Resize each bow layer 15%/position.

Paste poser of choice/position/dropshadow.

Repeat with 2nd poser.

Paste present/resize 50%/edit/repeat resize/position/dropshadow.

Repeat with mistletoe.

Paste starring 1/resize 50%/position/dropshadow.

Paste sparkle 4/reszie 50%/position/dropshadow.

Add copyrights.

Add name.

Layers/merge/merge visible.

Resize all layers 29%.

Save.
Hope you enjoyed my tut,would love to see your results.

Hugs,Mary
Time To Rock


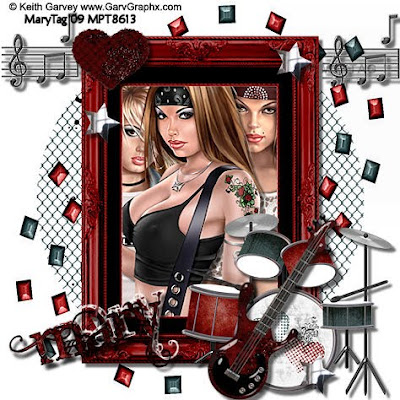
3 tubes of choice,I am using Keith Garvey,which you can purchase here,do not use unless you have a license to do so.

Scrapkit is Grunge Rock from Amy at Ziggyfan Scraps Designs here and you can purchase it here. This kit is awesome!! Thank you Ziggy!!

Font of choice,I am using Angelic War here.
-This tutorial was written assuming you have working knowledge of PSP-

Dropshadow for tut:
Vertical 5
Horizonal 5
Opacity 58
Blur 4

 
Open a new 500x500 white image.

Paste frame 3 as a new layer/click inside frame with your magicwand/selections/modify/expand by 7.

Paste paper 7 below frame layer/selections/invert/delete/do not deselect.
Paste paper 15 above paper 7/resize 50%/position/delete/do not deselect.
Paste tube 1/position/delete/do not deselect.

Paste tube 2/delete/do not deselect.

Paste tube 3/position/delete/deselect/apply dropshadow to all 3 tube layers.

Hide white background layer/layers/merge/merge visible/dropshadow/unhide layer.

Resize the merged layers 5%.

Paste chain 1 below merged layers/resize 40%.

Paste swirl/resize 50%/position to the right of the tag/layers/duplicate/image/mirror/flip/right click on copy layer/merge/merge down to orginal layer/adjust/brightness contrast/clarify/settings at 8.0/ok.
Moving up top/paste drums/resize 35%/position/dropshadow.

Repeat with base guitar.

Paste heart 2/resize 50%/edit/repeat resize/position/dropshadow.

Paste star/resize 50%/edit/repeat resize 2 times/layers/duplicate 3 times/position/dropshadow.

Paste music notes/resize 50%/edit/repeat resize/position/dropshadow.

Add copyrights.

Add name.

Layers/merge/merge visible.

Resize all layers 5%.

Save.
Hope you enjoyed my tut,would love to see your results.


Hugs,Mary
Tuesday, December 15

Snowy Dayz


Tube of choice,I am using PinUpToons,which you can purchase here,do not use unless you have a license to do so.

Scrapkit is a Snowy mini kit,a freebie from Melissa at Pink Quixotic here. Thank you Mellie,love it!!

Template of choice,I am using template 32 by Aqua Rebel315 here. Thank you Aqua!

Font of choice,I am using St.Nicholas here.
-This tutorial was written assuming you have working knowledge of PSP-

Open template/delete credit layer.

Highlight and click on raster 1 layer with your magicwand/paste paper 7 into selections(edit)/deselect.

Repeat with copy of raster 1 layer using paper 6/do not deselect.

Paste tube of choice as a new layer/position/selections/invert/delete/deselect/dropshadow:

Vertical 3
Horizonal 3
Opacity 47
Blur 4

Highlight raster 2 layers(dots)/selections/select all/float/defloat/paste papet 6 into selections/deselect.

Highlight and click on raster 3 with your magicwand/paste paper 1 into selection/do not deselect.

Paste the snowman as a new layer/resize 30%/edit/repeat resize/position/selections/invert/delete/dropshadow:

Vertical 4
Horizonal 4
Opacity 50
Blur 4

Highlight and click on raster 4 layer(frame)/paste paper 4 into selections/deselect.

Highlight white background layer/edit/copy merged swirl 2/paste as a new layer/resize 50%/layers/duplicate 2 times/position with your pick tool.

Paste bow 2/resize 50%/edit/repeat resize/position/same dropshadow we last used.

Paste snowflake 4/resize 50%/edit/repeat resize/layers/duplicate 4 times/position/dropshadow:

Vertical 5
Horizonal 5
Opacity 56
Blur 5
Add copyrights.
Add name.
Layers/merge/merge visible.
Resize all layers 5%.
Save.
Hope you enjoyed my tut,would love to see your results.
Hugs,Mary

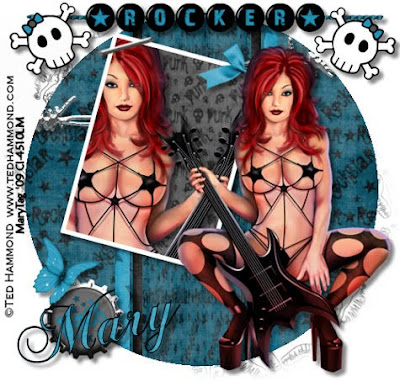
Rock Star


Tube of choice,I am using Ted Hammond,which you can purchase here,do not use unless you have a license to do so.


Scrapkit is Rock Star from Kristin of Toxic Desirez here and you can purchase this kit here. This is one awesome rockin kit Kristen!! Thank you!


Template of choice,I am using template 118 from Missy at Divine Intentionz here.


Mask of choice,I am using mask 65 from ButterflyFlutterby Creations here.


Font of choice,I am using Chopin Script here.


-This tutorial was written assuming you have working knowledge of PSP-


Dropshadow for tut:
vertical 5
Horizonal 5
Opacity 48
Blur 6

 
Open mask,minimize.


Open template/delete credit layer.


Highlight white background layer/paste paper 1 as a new layer/right click on paper layer/new mask layer/from image/select mask/ok/layers/merge/merge group/using your pick tool/position mask layer towards the top left of the tag/layers/duplicate/image/mirror/image/flip.


Highlight and click on circle layer with your magicwand/paste paper 9 into selection(edit)/paste barbed wire 1 as a new layer /selections/invert/delete/right click/arrange/move up 2 times/deselect/dropshadow.


Repeat on rectangle layer(no barbed wire) using same paper.


Repeat on thin rectangles using paper 1.


Repeat on thin rectangles 2 using paper 10.


Highlight and click on frame back layer with your magicwand/paste paper 8 into selection/do not deselect.


Paste tube of choice as a new layer/position/selections/invert/delete/deselect/dropshadow.


Frame layer I am leaving as is/your choice ot change the color :)


Right click on staple/merge/merge down to frame back layer/dropshadow/position where desired.


Paste beads string/resize 15%/position/dropshadow.


Paste skull 2/reszie 50%/layers/duplicate/position both layers/dropshadow.


Paste bottlecap 1/resize 50%/position/dropshadow.


Paste bow 5/reszie 50%/edit/repeat resize/position/dropshadow.


Paste tube again/resize if needed/position/dropshadow.


Paste butterfly 2/resize 50%/edit/repeat resize/poaition/dropshadow.


Add copyrights.


Add name.


Layers/merge/merge visible.


Resize all layers 5%.


Save.


Hope you enjoyed my tut,would love to see your results.


Email me


Hugs,Mary
Sunday, December 13

Bluesy Girl


Tube of choice,I am using Rene Kunert,which you can purchase here,do not use unless you have a license to do so.

Scrapkit is also from Rene,Bluesy Girl which you can purchase here. This kit is just sooo cute!! Thank you Rene!!

Mask of choice,I am using doodle mask 3 from Insatiable Dreams here.

Font of choice,I am using Abbeyline here.
-This tutorial was written assuming you have working knowledge of PSP-

Dropshadow for tut:
Vertical 6
Horizonal 6
Opacity 65
Blur 5

 
Open a new 650x650 white image.

Paste paper 1/layers/load save mask/load mask from disk/select mask/make sure invert mask data is checked if using the same mask I am/layers/merge/merge group/Layers/duplicate/highlight orginal mask layer/resize larger 10%/effects/photo effects/black&white film/default settings.
Paste frame 5 as a new layer/resize 25%/click inside frames using your magicwand/selections/modify/expand by 6.

Paste paper 3 below frame layer/selections/invert/delete/do not deselect.

Paste tube in frames/position/delete/deselect/dropshadow.

 
Hide masks and white background layers/layers/merge/merge visible/dropshadow/unhide layers.

Paste frame 1 below merged layers/resize 50%/position to the left of the tag/layers/duplicate/image/mirror/layers/duplicate/image/flip/layers/duplicate/image/mirror.
Paste element 15/resize 50%/position/dropshadow.

Paste element 5/resize 50%/edit/repeat resize/layers/duplicate/position/dropshadow.

Repeat with element 7(butterfly).

Paste element 6/resize 50%/edit/repeat resize/position/dropshadow.

Paste element 10/resize 50%/edit/repeat resize/layers/duplicate/position both layers/dropshadow.
Add copyrights.

Add name.

Layers/merge/merge visible.

Resize all layers 20%.

Save.

Hope you enjoyed my tut,would love to see your results.

Hugs,Mary
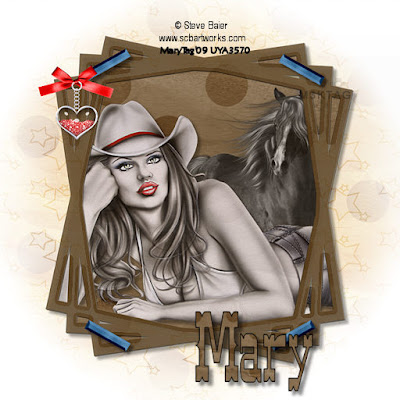
Cowgirl Heaven


Tube of choice,I am using Steve Baier,which you can purchase here,do not use unless you have a license to do so.

Scrapkit is Polkadot Heaven from Tammy at Bunchies Bin,check out her blog here and you can purchase this kit here. This kit is awesome,perfect for any project you want to do! Thank you Tammy!!

Mask of choice,I am using star mask 3 from Sabine from Creative Mosfits Creations here.

Font of choice,I am using Western here.

Additional elements of choice.
-This tutorial was written assuming you have working knowledge of PSP-

Dropshadow for tut:
Vertical 5
Horizonal 5
Opacity 45
Blur 5

Open mask,minimize.

Open a new 600x600 white image.

Paste paper 3/resize 50%/right click on paper layer/new mask layer/from image/select mask/ok/layers/merge/merge group.

Paste frame 6/resize 45%/edit/repeat resize/click inside frame with your magicwand/selections/mosify/expand by 7.

Paste paper 6 below frame layer/resize 50%/selections/invert/delete/do not deselect.

Paste tube of choice/position/delete/add any elements you'd like within the frame/deselect/dropshadow.

Right click on frame/merge/merge down to paper layer/dropshadow.
Moving up top/paste staple 3/resize 50%/edit/repeat resize/layers/duplicate 3times/position/dropshadow.

Add any other elements you'd like/dropshadow.
 
Add copyrights.

Add name.

Layers/merge/merge visible.

Resize all layers 15%.

Save.
Hope you enjoyed my tut,would love to see your results.

Hugs,Mary

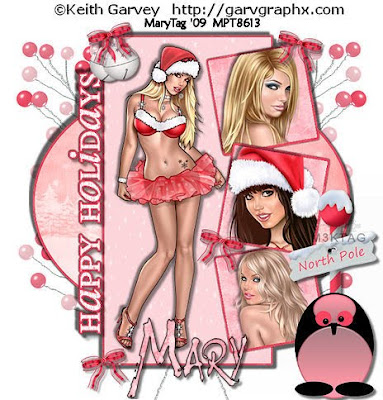
Garv's Happy Holidays


4 tubes of choice,I am using Keith Garvey,which you can purchase here,do not use unless you have a license to do so.

Scrapkit is Girly Christmas scrapkit by Tonya of Tonya's Temptations here
and can be found at Creative Misfits Creations here. Awesome kit,thank you!

Template of choice,I am using xmas template 5 from Tracy at Freebie Friends Scraps And More here. Thank you!

Font of choice,I am using Wolfs Rain here.
-This tutorial was written assuming you have working knowledge of PSP-

Open template/delete credit layer.

Layers/new raster layer/right click on new layer/arrange/send to bottom/flood fill white.

Highlight rectangle fill 1/selections/select all/float/defloat/paste paper 7 into selection(edit)/deselect/repeat this for all fill layers.

Repeat on rectangle 1 layer using paper 11.

Repeat on rectangle layer using paper 1/do not deselect.

Paste first tube/resize if needed/position/selections/invert/delete/deselect/dropshadow:

Vertical 5
Horizonal 5
Opacity 44
Blur 5

Highlight text layer/selections/select all/float/defloat/paste paper 9 into selection(edit)/deselect/right click on text layer/merge/merge down to text fill layer/same dropshadow.

Highlight square 1/selections/select all/float/defloat/paste paper 2/do not deselect.

Paste second tube as a new layer/position/selections/invert/delete/deselect/dropshadow:

Vertical -4
Horizonal -4
Opacty 50
Blur 5

Repeat on square 2 and 3 layers using 3rd&4th tube choice.

Hide white background layer/layers/merge/merge visible/dropshadow:

Vertical 6
Horizonal 6
Opacity 62
Blur 3

Repeat dropshadow:

Vertical -6
Horizonal -6
Opacity 62
Blur 3/unhide layer/resize merged layers 15%.

Paste pink berry stem below merged layers/layers/duplicate 1 time/position.

Paste north pole sign/resize 40%/edit/repeat resize/position/dropshadow:

Vertical 4
Horizonal 4
Opacity 55
Blur 4

Paste black&pink penguin/resize 40%/edit/repeat resize/position/same dropshadow.

Paste silver bells/resize 50%/edit/repeat resize/position/dropshadow:

Vertical 3
Horizonal 3
Opacity 51
Blur 3

Paste pink satin bow/resize 60%/edit/repeat resize/layers/duplicate 3 times/position/same dropshadow.

Add copyrights.

Add name.

Layers/merge/merge visible.

Resize all layers 17%.

Save.
Hope you enjoyed my tut,would love to see your results.

Hugs,Mary

Happy Holidays


Tube/close up of choice,I am using Denis Rino,this tube is from MPT's xmas gift but you can see more of Denis's tubes here.

Scrapkit is Soft Winter from Pimp'd Designz 4 Taggers here. Thank you for the awesome kit!!

MuRa's Filter Meister

Font of choice,I am using Monotype Corsiva,came with my psp program.
-This tutorial was written assuming you have working knowledge of PSP-

Open frame 1/image/canvas size/change to 700x400.

Layers/new raster layer/right click on new layer/arrange/send to bottom/flood fill white.

Highlight frame layer/selections/select all/float/defloat/paste paper 3 as a new layer/selections/invert/delete/deselect/right click on paper layer/merge/merge down to frame layer.

Paste snowflake 2 below frame layer/resize 50%/edit/repeat resize/effects/MuRa's Filter Meister/copies/wall paper(lighten)
Random
Wraparound
Lighten
Number 20
Shift X 50
Shift Y 50
Angle 0
Rotation 100
Attenuation 0
Scale 100
BG Color black
ok

Highlight frame layer/click inside frame with your magicwand/selections/modify/expand by 6.

Paste paper 6 below frame layer/selections/invert/delete/do not deselect.

Paste snowflake 1/position/delete/do not deselect.

Paste tube or close up/position/delete/dropshadow:

Vertical 4
Horizonal 4
Opacity 53
Blur 4

Hide snowflakes and white background layers/layers/merge/merge visible/same dropshadow/unhide layers.

Paste swirl below merged layers/layers/duplicate/position both.

Paste ornament 1/resize 28%/position/dropshadow:

Vertical 3
Horizonal 3
Opacity 50
Blur 5

Paste ribbon 2/resize 35%/edit/repeat resize/layers/duplicate/position both ribbons/same dropshadow.

Paste frame 4/resize 50%/edit/repeat resize 2 times/layers/duplicate 2 times/position all 3 stars/same dropshadow.

With font of choice,type out Happy Holidays/position/dropshadow.

Add copyrights.

Add name.

Layers/merge/merge visible.

Resize all layers 20%.

Save.
Hope you enjoyed my tut,would love to see your results.

Hugs,Mary
Ice Skate


Tube of choice,I am using Rene Kunert,which you can purchase here,do not use unless you have a license to do so.

Scrapkit is also from Rene Kunert,Christmas,which you can get here. Love this kit Rene!!

Template of choice,I am using template 3 from Bev at HorsePays Pasture here. Thank you Bev!

Font of choice,I am using Kanis here.
-This tutorial was written assuming you have working knowledge of PSP-

Dropshadow for tut:
Vertical 4
Horizonal 4
Opacity 58
Blur 6

Open template/delete credit and flower layers.

Highlight vertical rectamgles layer/selections/select all/float/defloat/paste paper 2 into selection(edit)/deselect/dropshadow.

Highlight large rectangle/click on it with your magicwand/paste paper 1 into selections/do not deselect.

Paste tube of choice as a new layer/position/selections/invert/delete/deselect/dropshadow.

Right click on tube layer/merge down to lrg rectangle/dropshadow/merge down to vertical rectangles.

Paste element 11 below merged layers/position to the right/layers/duplicate/image/flip/image/mirror/dropshadow to both layers.
Paste element 2/resize 40%/position/dropshadow.

Paste element 12/resize 50%/edit/repeat resize/position to the right of the tag/layers/duplicate/image/mirror/dropshadow.

Paste element 17/resize 50%/position/dropshadow.

Paste element 4/resize 50%/position to the right of the tag/layers/duplicate/image/mirror/dropshadow.

Repeat with element 5.

Paste element 6/resize 50%/edit/repeat resize/layers/duplicate/position both layers/dropshadow.

Paste tube/resize if needed,position/dropshadow.

Add copyrights.

Add name.

Layers/merge/merge visible.

Resize all layers 15%.

Save.
Hope you enjoyed my tut,would love to see your results.

Hugs,Mary
Santa Street Northpole


Tube of choice,I am using Shawli,which you can purchase here,do not use unless you have a license to do so.

Scrapkit is The North Pole from Kristi at Scrapin Divaz here and you can purchase it here. This kit is just awesome!! Thank you Kristi!

Mask of choice,I am using christmas mask 3 from Jenny at Creative Misfits Creations here.
Font of choice,I am using Segoe Media Center Semibold,came with my psp program.
-This tutorial was written assuming you have working knowledge of PSP-

Dropshadow for tut:
Vertical 5
Horizonal 5
Opacity 62
Blur 6

Open mask,minimize.

Open a new 650x600 white image.

Paste paper 11/right click on paper layer/new mask layer/from image/select mask/ok/layers/merge/merge group/position to the left of the tag/layers/duplicate/image/mirror.

Paste frame 4/resize 15%/click inside mask with your magicwand/selections/modify/expand by 5.

Paste paper 7 below frame layer/selections/invert/delete/do not deselect.

Paste tube of choice/position/delete/do not deselect.

Paste workshop/resize 55%/position/delete/do not deselect.

Repeat with street sign 1/deselect/dropshadow to tube.workshop and sign layers.

Highlight workshop layer/click inside window frames with your magicwand/selections/modify/expand by 5.

Paste tree/resize 60%/position/selections/invert/delete/do not deselect.

Repeat with santa/deselect/dropshadow to both layers.

Moving up top/paste baby reindeer 2/resize 60%/position/dropshadow.

Repeat with baby reindeer 1.

Paste bag/resize 60%/edit/repeat resize/position/dropshadow.

Repeat with gift 1.

Repeat with candy cane/duplicating one time/position both/dropshadow.

Paste sled/resize 45%/edit/repeat resize/position/dropshadow.

Paste bow 4/resize 50%/layers/duplicate/position/dropshadow.

Paste snowflake 1/resize 50%/edit/repeat resize 2 times/layers/duplicate 5 times/postion.

 
Add copyrights.

Add name.

Layers/merge/merge visible.

Resize all layers 23%.

Save.
Hope you enjoyed my tut,would love to see your results.

Hugs,Mary

  © Blogger template Customization and Installation by Krissy's Scraps and Imaging 2011

Back to TOP