Tuesday, September 29

Beaute DAzur


Scrapkit is Beaute DAzur from Dee at Scraps By Dmg,you can purchase it on her blog here. This kit is gorgeous and the poser is just stunning! Thank you Dee!!

Mask of choice,I am using Vix_Mask84 here. Thank you Vix!

Script font of choice.

-This tutorial was written assuming you have working knowledge of PSP-
Dropshadow for tut:

Vertical 6
Horizonal 6
Opacity 63
Blur 10

Open a new 600x600 white image.
Paste paper1 as a new layer/layers/load/save new mask/load from disk/select mask:
Source Luminance marked
Fit to canvas marked
Invert transparency unchecked
Hide all mask marked/load.

Layers/merge/merge group.

Paste frame8 as a new layer/I wanted this blue so I did this:
Selections/select all/float/defloat/paste paper10 into selection(edit)/deselect.
Click inside all circles with your magicwand/selections/modify/expand by 6.

Paste paper5 as a new layer under frame layer/selections/invert/delete/do not deselect.

Paste drapery1 as a new layer/resize 20%/position/delete/do not deslect.

Repeat with drapery applying some to the 3rd circle/do not select.

Paste poser/positon/delete/deselect/dropshadow.

Hide mask and background layer/layers/merge/merge visible/dropshadow/unhide layers.

Paste doodle2 as a new layer below merged frame layer/position to the right/layers/duplicate/image/mirror/flip/right click on copy doodle layer/merge/merge down to first doodle layer/dropshadow.

Repeat with feather1/resizing 10%.

Moving up top/paste fancybow1/resize 50%/layers/duplicate/position both bows/dropshadow.

Paste rose1 as a new layer/resize 50%/layers/duplicate 2 times/position each rose/dropshadow.

Paste butterfly1/resize 50%/edit/repeat resize/layers/duplicate 2 times/position each layer/dropshadow.

Paste poser again/position/dropshadow.

Layers/merge/merge visible.

Image/resize all layers 11%.

Add copyrights.

Add name.

Save.
Hope you enjoyed my tut,would love to see your results.

Hugs,Mary
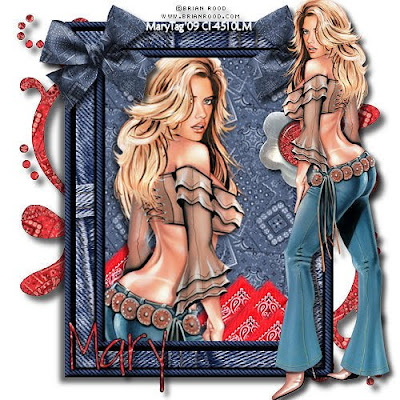
Low Rise


Tube/close up of choice,I am using Brian Rood,which you can purchase here,do not use unless you have a license to do so.

Scrapkit is DenimNBandana is a freebie from Ziggyfan here. Love this kit,thank you Ziggy!!!!
Font of choice.
-This tutorial was written assuming you have working knowledge of PSP-

Open a new 500x500 white image.

Paste the frame/image/free rotate to the right 90*.

Click inside frame with your magicwand/selections/modify/expand by 7.
Paste paper4 as a new layer under the frame layer/selections/invert/delete/do not deselect.

Paste pocket/position/delete/do not deselect.

Paste close up/position/delete/deselect/dropshadow:

Vertical 5
Horizonal 5
Opacity 62
Blur 8

Highlight pocket layer/layers/duplicate 2 times/position/same dropshadow.

Hide white background layer/layers/merge/merge visible/dropshadow:
Vertical 7
Horizonal 7
Opacity 62
Blur 10/unhide layer.

Make sure the merge layer is highlighted/image/resize 5%.

Paste paisley doodle under frame layer/resize 10%/layers/duplicate/position both layers/right click on copy layer/merge/merge down to first doodle layer/selections/select all/float/defloat/paste paper1 into selection(edit)/deselect/last dropshadow.

Paste charms/using your eraser tool/erase the blue charm/resize 50%/position/dropshadow:

Vertical 5
Horizonal 5
Opacity 70
Blur 8

Paste blue bow/resize 50%/layers/duplicate/position/same dropshadow.

Paste tube/position/same dropshadow.
Add copyrights.

Add name.

Save.

Hope you enjoyed my tut,would love to see your results.

Hugs,Mary
Sunday, September 27

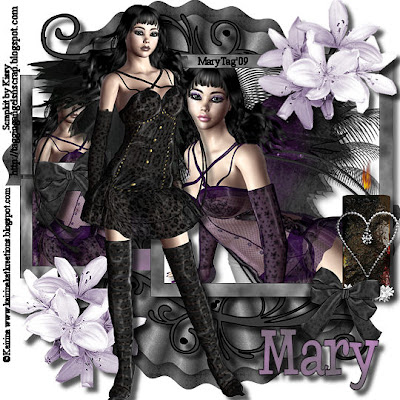
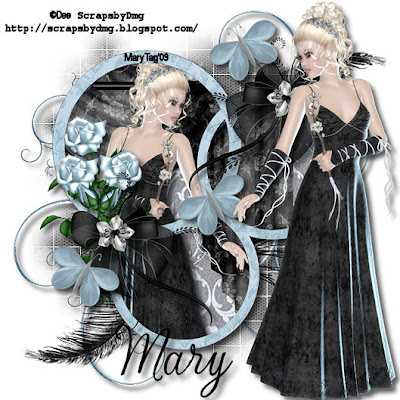
Into The Night


Scrapkit is Into The Night from Kissy at Taggin AngelsNScraps here and you can purchase it here. This kit is beautiful,love the posers!! Thank you Kissy!

Template of choice,I am using template 4 from Yvette here. Thank you!

Font of choice,I am using Chowderhead here.
-This tutorial was written assuming you have working knowledge of PSP-

Open your template/hit shiftD/close the orginal/delete copyright info from template.

Highlight rectangles/selections/select all/float/defloat/paste paper2 into selection(edit)/deselect.
Highlight large photo/flood fill white/selections/select all/float/defloat/paste flowers as a new layer/resize 25%/position/layers/duplicate/position copy/selections/invert/delete/do not deselect.

Paste poser 16/resize 25%/position/delete/deselect/dropshadow:
Vertical 5
Horizonal 5
Opacity 65
Blur 10

Highlight snall photo/flood fill white/magicwand/paste poser 19/resize 50%/position/selections/invert/delete/same dropshadow/move small frames to top.

Highlight large frame/selections/select all/float/defloat/paste paper4 into selections/deselect.

Repeat with small frames.

Hide rectangles and white background layers/merge/merge visible/dropshadow:

Vertical 6
Horizonal 6
Opacity 58
Blur 9
Hide layers.

Paste candle2/resize 50%/edit/repeat resize 2 times/position/same dropshadow we last used.

Highlight white background layer/paste fan2/resize 50%/edit/repeat reszize 1 time/position to the left of the tag/layers/duplicate/image/flip/position opposite side.

Paste doodle 2/resize 50%/using pick tool,move right above merged frame layer/layers/duplicate/image/flip/position/dropshadow to both doodle layers:

Vertical 5
Horizonal 5
Opacity 67
Blur 7

Moving up top/paste lily 1/reszie 50%/position/layers/duplicate/position copy/same dropshadow.

Paste chrome heart1/resize 50%/edit/repeat resize/position/same dropshadow.
Paste the bow of choice/resize 50%/edit/repeat resize 2 times/layers/duplicate/position both bows/dropshadow.

Paste poser 20/resize 40%/position/same dropshadow.

Layers/merge/merge visible.

Image/resize all layers if needed.

Add copyrights.

Add name.

Save.

For my name,I used paper2 for fill/black on foreground.
Hope you enjoyed my tut,would love to see your results.

Hugs,Mary

Saturday, September 26

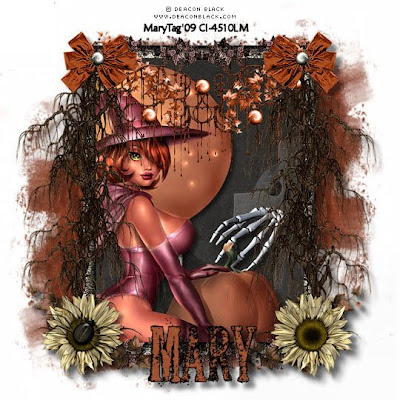
Spooky Hollow


Tube of choice,I am using Deacon Black,which you can purchase here,do not use unless you have a license to do so.

Scrapkit is Spooky Hollow from Tootypups Scraps here and you can purchase this packed full,awesome kit here. Thank you Susan!

Mask of choice.

Font of choice,I am using Dead Secretary here.
-This tutorial was written assuming you have working knowledge of PSP-

Open a new 600x600 white image.

Paste paper2c/right click on paper layer/new mask layer/from image/select mask/ok/layers/merge/merge group/layers/duplicate/image/mirror/flip/right click on copy mask layer/merge/merge down with first mask layer/resize 10%.

Paste frame/resize 25%/click insdie frame with your magicwand/selections/modify/expand by 5.

Paste paper6 under frame layer/position/selections/invert/delete,do not deselect.

Paste tube of choice/postion/delete/deselect/dropshadow:

Vertical 5
Horizonal 5
Opacity 56
Blur 8

Paste bones5/position behind tube/same dropshadow.

Paste doodle5/resize 43%/position/same dropshadow.

Paste ivy3/image/free rotate/90*to the left/position/layers/duplicate/image/mirror/same dropshadow.

Paste tree1/resize 10%/layers/duplicate/image/mirror/dropshadow:

Vertical 6
Horizonal 6
Opacity 47
Blur 7

Paste ivy2/position on the left of the frame/layers/duplicate/image/mirror/right click copy layer/merge/merge down to first ivy layer/layers/duplicate/image/flip.

Paste bow1a/resize 50%/layers/duplicate/position/same dropshadow to both bow layers.

Repeat with flower3.

Paste spider1/resize 50%/position/same dropshadow.

Hide mask and white background layers/layers/merge/merge visible/dropshadow/unhide layers.

Layers/merge/merge visible.

Image/resize all layers 10%.

Add copyrights.

Add name.

Save.

For my name,I used paper2 for fill/black on foreground.
Hope you enjoyed my tut,would love to see your results.

Hugs,Mary
Friday, September 25

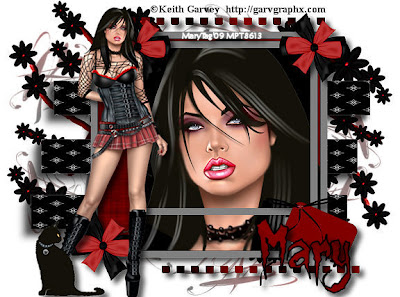
Kat Eyez


Tube/close up of choice,I am using Keith Garvey,which you can purchase here,do not use unless you have a license to do so.

Scrapkit is Broken Hearted from Stacey at Stacey's Designs here and you can purchase it here. Gorgeous kit Stacey! Thank you!

Template of choice,I am using template 8 from Simply Sensational Scraps here. Thank you Lorne!

Mask of choice,I am using Vix_Mask GBSO902 here,from her September goodie bag freebie. Thank you Vix!

Font of choice,I am using Gypsy Curse here.
-This tutorial was written assuming you have working knowledge of PSP-

Dropshadow for tut:
Vertical 6
Horizonal 6
Opacity 64
Blur 10

Open mask,minimize.

Open your template/hit shiftD/close the orginal/delete copyright info from template.

Highlight white background on template/paste paper8/right click on paper layer/new mask layer/from image/select mask/if using the one I am,invert mask data unchecked/ok/layers/merge/merge group/layers/duplicate/image/mirror/position each mask layer using your pick tool.

Paste flower branch/resize 50%/position/layers/duplicate/position copy.

Highlight grey lines/selections/select all/float/defloat/edit/paste paper10 into selections/deselect/dropshadow.

Highlight frame layer/using your magicwand/click in the center of the frame/paste paper6 as a new layer/selections/invert/delete.

Paste close up/position/delete/deselect.

Highlight black rectangle middle/click in the center with your magicwand/paste close up/line up with the first close up layer we did/selections/invert/delete/deselect.

Hide dotted lines,masks and background layers/layers/merge/merge visible/dropshadow/unhide layers/after I applied dropshadow,I mirrored my merged layer,like it from this angle better lol

Highlight dotted lines/selections/select all/float/defloat/edit/paste paper8 into selection/deselect/dropshadow.

Paste bow/resize 50%/edit/repeat resize 2 times/layers/duplicate 2 times/position each bow/dropshadow.

Paste star tag/resize 50%/edit/repeat resize/position/dropshadow.

Paste tube/resize smaller if needed/position/dropshadow.

Layers/merge/merge visible.

Add copyrights.

Add name.

Save.
Hope you enjoyed my tut,would love to see your results.

Hugs,Mary

Wednesday, September 23

Memories Of Grandma's House


Tube of choice,I'm using Irene Shpak,which you can purchase here,do not use unless you have a license to do so.

Scrapkit is Grandma's House from Kristi of Scrappin Divaz here and you can purchase this kit here. This kit is just amazing!! Thank you Kristi!

Template of choice,I am using Bev's template 30 from HorsePlay's Pasture here. Thank you Bev!

Font of choice.
-This tutorial was written assuming you have working knowledge of PSP-

Dropshadow for tut:
Vertical 3
Horizonal 3
Opacity 48
Blur 11

 
Open template/hit shiftD/close the orginal/delete copyright info.

Highlight circle1 background/selections/select all/float/defloat/paste paper9 into selection(edit)/deselect.

Repeat for circle2&3

Highlight circle1/click on it with your magicwand/paste embroidery hoop2/position/selections/invert/delete/do not deselect.

Paste house/resize 50%/edit/repeat resize/position/delete/do not deselect.

Paste rocking grandma/resize 50%/edit/repeat resize/postion/delete/deselect/right click on grandma/merge/merge down to circle1/dropshadow.

Highlight circle1 ring/selections/float/defloat/paste paper3 into selection(edit)/deselect/dropshadow/right click/merge down.

Highlight circle2/click on it with your magicwand/paste paper8/selections/invert/delete/do not deselect.

Paste sewing machine/resize 50%/edit/repeat resize 2 times/delete/do not deselect.

Paste sewing basket/resize 50%/position/delete/repeat with pincushion/deselect/dropshadow to each layer/right click on pincushion layer/merge/merge down to circle2 layer.

Highlight circle1 ring/selections/float/defloat/paste paper5 into selection(edit)/deselect/dropshadow/right click/merge down.

Highlight circle3/click on it with your magicwand/paste paper12/selections/invert/delete/do not deselect.

Paste jar1/resize 50%/position/delete/repeat with jar2&angel/position/deselect/dropshadow/right click on jar2/merge/merge down to circle3.

Highlight circle3 ring/selections/float/defloat/paste paper4 into selection(edit)/deselect/dropshadow/right click/merge down.

Paste pin1/resize 20%/position/dropshadow.

Paste ribbon1/resize 50%/edit/repeat resize/position over pin/layers/duplicate 2 times/position/dropshadow.

Paste heart1/resize 50%/edit/repeat resize 2 times/postion/dropshadow.

Paste tube of choice/position/dropshadow 2 times.

Layers/merge/merge visible.

Image/resize all layers 10%.

Add copyrights.

Add name.

Save.

For my name,I used paper9 for fill/black on foreground.
Hope you enjoyed my tut,would love to see your results.

Hugs,Mary
A Big Thank you To Manda!!!

I just wanted to say THANK YOU to Manda for the awesome blog layout!!!
I love it! The colors are gorgeous and it has ladybugs! lol
Check out Manda'z Dazzling Dezignz here,she is so talented!!
Thank you Hun!!!

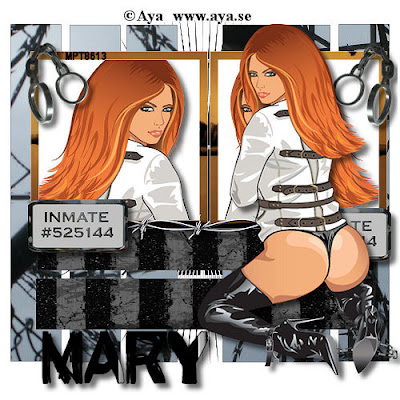
Inmate


Tube of choice,I'm using Aya,which you can purchase here,do not use unless you have a license to do so.

Scrapkit is a freebie from Dee at Scraps By Dmg for The Padded Cell blog train and you can grab it here and make sure to hop on the train!! Love this Dee,so cool!! Thank you!

Template of choice,I'm using template 70 from Simply Devilish Scrapz,her new blog,Truly Toxic is here. Thank you for all the awesome templates!

Font of choice,I'm using Prison Walls here.
-This tutorial was written assuming you have working knowledge of PSP-

Dropshadow for tut:
Vertical 6
Horizonal 6
Opacity 58
Blur 8

Open template/hit shiftD/close the orginal/delete copyright layer.

Highlight the base layer/selections/select all/float/defloat/edit/paste paper9 into selection/deselect.

Repeat with vertical stripes using paper8.

Repeat with horizonal stripes,pasting as a new layer/position/selections/invert/delete/deselect/right click on paper layer/merge/merge down to hor.stripes.

Highlight base frames/selections/select all/float/defloat/paste paper1 as a new layer/position/selections/invert/delete/deselect/right click on paper layer/merge/merge down to frame layer.

Highlight base frames/flood fill white/selections/float/defloat/selections/modify/expand by 3/paste tube or tubes/postion/selections/invert/delete/dropshadow.

Right click on frames/merge/merge down to base frames/dropshadow.

Highlight vertical stripes/right click/arrange/move up right above horizonal stripes/dropshadow/postion merged frame layer.

Paste cuffs/resize 50%/edit/repeat resize/using pick tool,position/layers/duplicate/position copy/dropshadow to both.

Paste barbed wire/resize 50%/position/dropshadow.

Paste tag1/resize 50%/edit/repeat resize/position/dropshadow/layers/duplicate/position copy.

Paste tube/position/dropshadow.

Layers/merge/merge visible.

Add copyrights.

Add name.

Save.
Hope you enjoyed my tut,would love to see your results.

Hugs,Mary
Tuesday, September 22

Lavender Paradise


Tube of choice,I'm using Shawli,which you can purchase here,do not use unless you have a license to do so.

Scrapkit is Lusciously Lavender from Terry's Treasures here and you can purchase this kit here. This kit is gorgeous,love the colors!! Thank you Terry!!

Mask of choice.

Script font of choice.
-This tutorial was written assuming you have working knowledge of PSP-

 
Open mask,minimize.

Open a new 600x600 white image/paste paper34/right click/new mask layer/from image/select mask/ok/layers/merge/merge group/position top right of tag/layers/duplicate/image/mirror/image/flip.

Paste frame13/position/click insdie frame with magicwand/selections/modify/expand by 6/paste paper 10 under frame layer/resize 20%/selections/invert/delete.
Paste tube/position/delete/deselect/dropshadow:

Vertical 5
Horizonal 5
Opacity 64
Blur 11

Hide mask layers and white background layer/layers/merge/merge viaible/same dropshadow/unhide layers.

Paste frame2/resize 30%/position/click insdie frame with magicwand/selections/modify/expand by 5/paste paper32 under frame/selections/invert/delete.

Paste tube of choice/delete/deselect/dropshadow:
Vertical 4
Horizonal 4
Opacity 64
Blur 11

Right click on frame 2 layer/merge/merge down to paper32 layer/same dropshadow/right click again/merge/merge down to first framed layer.

Paste bead heart1 below merged frame layers/position/layers/duplicate/position copy.

Paste bow4/resize 50%/position/erase any that overlaps frame/use last dropshadow.

Paste butterfly3/reszie 50%/layers/duplicate/position both butterflies/dropshadow:

Vertical 3
Horizonal 3
Opacity 67
Blur 9

Repeat with flower9/duplicating 3 times/same dropshadow.

Paste flower16/resize 50%/edit/repeat resize/position/same dropshadow.

Layers/merge/merge visible.

Image/resize all layers 10%.

Add copyrights.

Add name.

Save.
Hope you enjoyed my tut,would love to see your results.

Hugs,Mary

Sunday, September 20

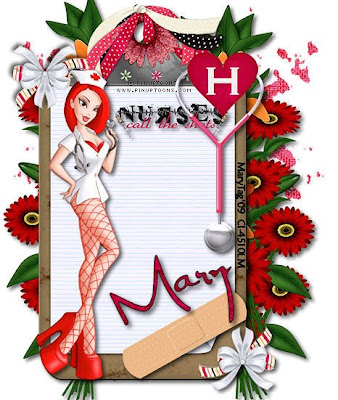
Nurses Call The Shots


Tube of choice,I am using PInUpToons,which you can purchase here,do not use unless you have a license to do so.

Scrapkit is Dr.I Feel Bad from Gina at Crafted By Gina here and you can purchase it here. This kit is awesome,thank you Gina!!

Mask of choice,I'm using Vix_Mask 101 here. Thank you Vix!

Font of choice,I'm using AL Sandra here.
-This tutorial was written assuming you have working knowledge of PSP-

Dropshadow for tut:
Vertical 4
Horizonal 4
Opacity 62
Opacity 9

Open a new 550x650 white image.

Paste paper22/right click/new mask layer/from image/select mask/ok/layers/merge/merge group/layers/duplicate/image/mirror.

Paste clipboard2/position/paste tube of choice/postion on clipboard/dropshadow to both layers.

Paste wordart5/resize 50%/position/dropshadow.

Paste bouquet2 under clipboard/position/layers/duplicate 3 times/position each layer/dropshadow.

Paste stethoscope1/resize 50%/position/dropshadow.

Paste heart3/resize 50%/postion/dropshadow.

Paste bandage3/resize 50%/using your pick tool/slant to the side,then adjust the length so it matches to the edge of the clipboard/dropshadow.

Paste bow1/resize 50%/edit/repeat resize/position/dropshadow/layers/duplicate/position.

Layers/merge/merge visible.

Image/resize all layers 15%.

Add copyrights.

Add name.

Save.

For my name,I used paper25 for fill/black on foreground.
Hope you enjoyed my tut,would love to see your results.

Hugs,Mary

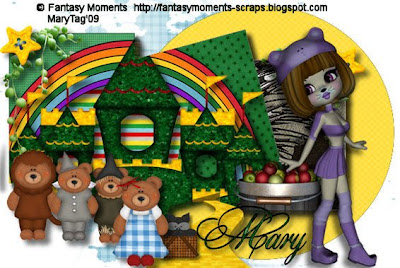
Bearly Oz


Tube of choice,I am using a ftu poser from Fantasy Moments here. Pleasre respect her TOU.

Scrapkit is Bearly Oz from Gina at Crafted By Gina here and you can purchase it here. This kit is just so cute,love the little bears! Thank You Gina!!

Template of choice,I am using Tracy's template#47 from Freebie Friends Scraps and More here. Thank you for the awesome template Tracy!

Mask of choice,I'm using Vix_Mask233 here. Thank you Vix!

Font of choice.
-This tutorial was written assuming you have working knowledge of PSP-

Dropshadow for tut:
Vertical 7
Horizonal 7
Opacity 55
Blur 10

Open mask,minimize.

Open template/hit shiftD/close the orginal/delete copyright layer.

Layers/new raster layer/right click on new layer/arrange/send to bottom.

Make sure new layer is highlighted/paste paper4/right click/new mask layer/from image/ok/layers/merge/merge group/using your pick tool,move mask layer up,to the left on the template/layers/duplicate/image/mirror/image/flip/right click on mask copy layer/merge/merge down.

Highlight very bottom layer/flood fill white.

Highlight circle layer/selections/select all/float/defloat/paste paper7 into selection(edit)/deselect.

Repeat with squares 1 thru 4:

Square 1-paper 5
Square 2-paper 14(paste as a new layer/selections/invert/delete/deselect/right click on paper layer/merge/merge down with square.
Square 3-paper 20
Square 4-paper 15

Right click on square 4/merge/merge down with square 1/dropshadow/position.

Highlight merged squares/selections/select all/float/defloat/paste emeral city as a new layer/position/selections/invert/delete-do not deselect.

Paste apples/postion/delete.

Paste rainbow below emerald city layer/resize 50%/position/delete/deselect/apply dropshadow to last 3 layers.

Hide mask and white background layers/layers/merge/merge visible/unhide layers.

Paste vine/resize 50%/edit/repeat resize/position on the left side of the tag/layers/duplicate/image/mirror/dropshadow.

Paste button1/resize 50%/edit/repeat resize/layers/duplicate/position/dropshadow to both layers.

Paste yellow brick road/resize 50%/edit/repeat resize 2 times/position/dropshadow.

Paste Dorthy/resize 50%/repeat resize/position/dropshadow.

Repeat for Toto,Tinman,Scarecrow and Lion.

Paste tube/resize if needed/psotion/dropshadow.

Layers/merge/merge visible.

Image/resize all layers 3%.

Add copyrights.

Add name.

Save.

For my name,I used paper2 for fill/black on foreground.
Hope you enjoyed my tut,would love to see your results.

Hugs,Mary

Saturday, September 19

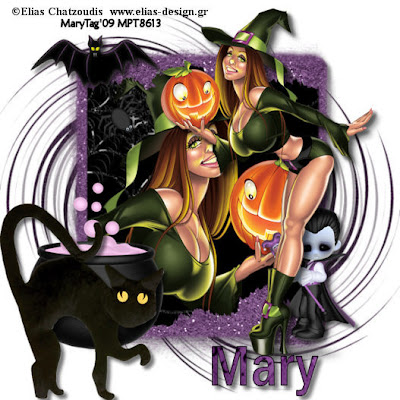
Just A Lil Spook


Tube/close up of choice,I'm using Elias Chatzoudis,which you can purchase here,do not use unless you have a license to do so.

Scrapkit is Just A Lil Spook,a freebie from Dee at Dmg Designs and you can grab it on her blog here. This kit is awesome,thank you Dee!!!

Mask of choice,I am using Vix_Mask171 here.

Font of choice,I used Franklin Gothic Meduim,came with my psp program.
-This tutorial was written assuming you have working knowledge of PSP-

Dropshadow for tut:
Vertical 5
Horizonal 5
Opacity 54
Blur 7

 
Open mask,minimize.

Open a new 600x600 white image.

Paste paper16/right click on paper layer/new mask layer/from image/select mask/ok/layers/merge/merge group/layers/duplicate/image/mirror/image/flip.

Paste frame 4/position/click inside frame with magicwand/selections/modify/expand by 7.

Paste paper7 under frame layer/resize 30%/position so web is showing in top left corner/selections/invert/delete.

Paste close up/position/delete/deselect/dropshadow.

Hide mask and background layers/layers/merge/merge visible/dropshadow/unhide layers.

Paste cauldron/resize 50%/position/dropshadow.

Repeat with the black cat.

Click insdie frame with your magicwand where the spider web paper is we positioned/paste the spider web1/resize 50%/position/selections/invert/delete/deselect/dropshadow.

Paste spider1/resize 60%/edit/repeat resize/image/mirror/position on the web/dropshadow.

Paste LilCount/resize 60%/position/dropshadow.

Repeat with bat1.

Paste tube/psotion/double dropshadow.

Layers/merge/merge visible.

Image/resize all layers 12%.

Add copyrights.

Add name.

Save.

For my name,Iused paper1 for fill/black on foreground.
Hope you enjoyed my tut,would love to see your results.

Hugs,Mary

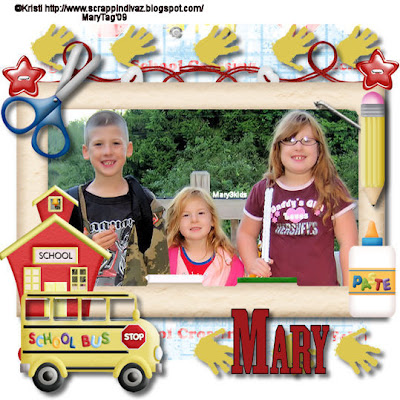
My First Day


Tube/image of choice,I'm using a picture of my kids first day of school :)


Scrapkit is My First Day from Kristi of Scrappin Divaz here and you can purchase this kit here. Love this kit Kristi,perfect for the school days memories!! Thank you!!


Mask of choice.


Font of choice,I'm using a school font lol,Athlectic Supporter here.


-This tutorial was written assuming you have working knowledge of PSP-


Dropshadow for tut:
Vertical 6
Horizonal 6
Opacity 61
Blur 9


Open mask,minimize.


Open a new 600x600 white image.


Paste paper10/right click on paper layer/new mask layer/from image/select mask/ok/layers/merge/merge group.


I'm using the chalk board as a frame,think it works well. Paste chalk board/resize 20%/click inside the chalk board with your magicwand/selections/modify/expand by 5/paste image/selections/invert/delete/deselect/right click on image/merge/merge down to chalk board/dropshadow.


Paste hand2 below merge layer/resize 50%/edit/repeat resize 2 times/position/layers/duplicate 4 times/position/right click on last copy of hand2/merge/merge down to first hand2/layers/duplicate/image/flip/dropshadow to both layers.


Paste string3/resize 50%/position on the left side of the tag using your pick tool/layers/duplicate/image/mirror/dropshadow.


Paste the bus/resize 50%/edit/repeat resize/position/dropshadow.


Repeat with the school house.


Paste scissors/resize 50%/position/dropshadow.


Paste button3/position/dropshadow/layers/duplicate/position copy.


Paste staple/using pick tool,position on a corner of the frame/dropshadow.


Paste pencil/resize 50%/edit/repeat resize/position/dropshadow.


Repeat with paste.


Layers/merge/merge visible.


Image/resize all layers 10%.


Add copyrights.


Add name.


Save.


Hope you enjoyed my tut,would love to see your results.


Hugs,Mary

Wednesday, September 16

Skullz Halloween

Photobucket

Tube of choice,I'm using Michael Landefeld,which you can purchase here,do not use unless you have a license to do so.

Halloween Packs is from Kissy at Taggin AngelsNScraps here and you can purchase it here. These are way cool Kissy,thank you!!

Template of choice,I'm using Bevs template44 from HorsePlays Pasture here. Thank you Bevie!

Font of choice,I am using Matisse ITC,came with my psp program.

Animation Shop(optional)
-This tutorial was written assuming you have working knowledge of PSP-

Dropshadow for tut:
Vertical 7
Horizonal 7
Opacity 47
Blur 6

Open your template/hit shiftD/close the orginal/delete/copyright layer.

Highlight boo/resize 20%/position/flood fill color of choice,I used #e36411/dropshadow.

Paste candle/resize 50%/position/open a new 600x600 white image/flood fill black/edit/copy/with candle layer highlighted/selections/select all/float/defloat/edit/paste black layer into selection/deselect.

Paste reaper/resize 40%/position/flood fill black.

Paste pumpkin12/resize 55%/repeat fill in with the steps we used for hte candle using color of choice, I used #f58a43/deselect.

Paste tube of choice/position/dropshadow.

Highlight pumpkin layer/hide tube and background layers/layers/merge/merge visible/unhide layers.

With your merged layer highlighted/layers/duplicate 2 times/rename 1,2 and 3.
Image/resize all layers 10%.

Add copyrights.

Add name.

Highlight 1 layer/adjust/add remove noise/add noise settings:
Random/monochrome checked
46% noise.

Repeat with 2 layer/changing the noise to 47% and 3 layer,noise to 48%.

Highlight 1 layer/hide 2&3 layers.
Edit/copymerged/paste into AS as a new animation.

Hide 1 layer/unhide and highlight 2 layer/edit/copy merged/paste into AS after current frame/repeat for 3 layer.

Save as gif.
Hope you enjoyed my tut,would love to see your results.

Hugs,Mary

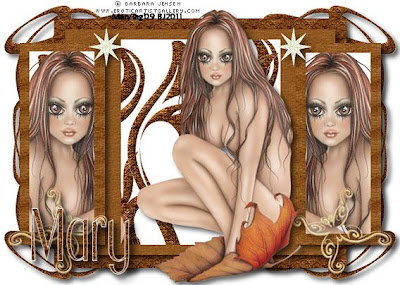
Back To Nature


Tube of choice,I'm using Barbara Jensen,which you can purchase here,do not use unless you have a license to do so.

Scrapkit is Back to Nature from Kissy at Taggin AngelsNScraps and you can find it on her blog here.

Template of choice,I am using Lorne's template6 from Simply Sensational Scraps here.

Font of choice.
-This tutorial was written assuming you have working knowledge of PSP-

Dropshadow for tut:
Vertical 5
Horizonal 5
Opacity 60
Blur 10
 
Open template/hit shiftD/close the orginal/delete/copyright layer.

Highlight large black rectangle/click on it with magicwand/paste paper5 into selection(edit)/deselect/dropshadow.

Repeat with large gray rectangle using paper1.

Repeat with left%right black rectangles using paper2.

Flood fill white on left&right gray rectangles,and center black rectangle.

Right click on center rectangle/merge/merge down to left rectangle/selections/select all/float/defloat/paste flower1 three times/position/selections/invert/delete/do not deselect.

Paste tube or tubes of choice 2 times/position/delete/deselect.
Hide white background layer/layers/merge/merge visible/unhide layer.

Paste doodle1 below merged layer/resize 50%/using pick tool/position to the right of the tag/layers/duplicate/image/mirror/layers/duplicate/image/flip/layers/duplicate/image/mirror/dropshadow to all doodle layers.

Paste butterfly2/resize 50%/edit/repeat resize/layers/duplikcate/position/dropshadow.

Repeat with star2,resizing only 50%.

Paste tube/resize if needed/position/dropshadow.

Layers/merge/merge visible.

Image/resize all layers 3%.

Add copyrights.

Add name.

Save.

For my name,I used paper5 for fill/white on foreground.
Hope you enjoyed my tut,would love to see your results.

Hugs,Mary

Tuesday, September 15

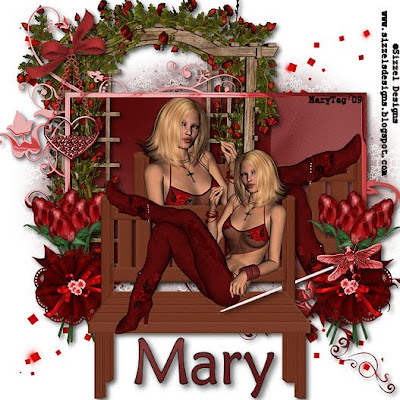
Love Of Roses


Scrapkit is Love Of Roses from Sizzel Designs here and you can purchase it here. This kit is stunning,love the poser!! Thank you Sizzel!

Mask of choice.

Font of choice,I'm using Maiandra GD,came with my psp program.
-This tutorial was written assuming you have working knowledge of PSP-

Dropshadow for entire tut:
Vertical 4
Horizonal 4
Opactiy 65
Blur 11

Open mask,minimize.

Open a new 700x700 white image,we will resize later.

Paste paper9/right click on paper in the side bar/new mask layer/from image/ok/layers/merge/merge group.

Paste chrome frame/click inside frame with magicwand/selections/modify/expand by 3.

Paste paper23 under frame layer/resize 25%/selections/imvert/delete.
Paste arbor/resize 33%/position/delete.

Paste poser/resize 27%/position/delete/deselect/dropshadow to poser&arbor layers.

Hide mask and background layer/layers/merge/mergevisible/dropshadow/unhide layers.

Paste arbor below merged layer/resize 33%/line up with arbor in merged layer/dropshadow.

Paste scatter/resize 20%/layers/duplicate/image/flip.

Moving up top/paste hanger1/resize 50%/edit/repeat resize/position/dropshadow.

Paste grouprose3/resize 40%/edit/repeat resize/position/dropshadow/layers/duplicate/image/mirror.

Paste sparlingflower1/resize 50%/edit/repeat resize/position on the left roses/dropshadow/layers/duplicate/image/mirror.

Paste poser again/resize 40%/position/dropshadow.

Paste stickpin/position/dropshadow.

Layers/merge/merge visible.

Image/resize all layers 25%.

Add copyrights.

Add name.

Save.

For my name,I used paper21 for fill/black on foreground.
Hope you enjoyed my tut,would love to see your results.

Hugs,Mary

Monday, September 14

Watching My Garden Grow


Tube of choice,I am using PinUpToons,which you can purchase here,do not use unless you have a license to do so.

Scrapkit is Autumn Garden from Shani at Wicked Princess Scraps here and you can purchase this kit here. This kit is gorgeous,thank you Shani!!

Mask of choice,I am using Babes Designs mask7 here.

Font of choice,I used Copperplate Gothic Bold,came with my psp program.
-This tutorial was written assuming you have working knowledge of PSP-

Dropshadow for entire tut:
Vertical 6
Horizonal 6
Opacity 61
Blur 9
 

Open your mask,minimize.

Open a new 600x600 white image.

Paste paper9/right click/new mask layer/from image/select mask/ok/layers/merge/merge group.

Paste frame3/click insdie frame with your magicwand/selections/modify/expand by 7.

Paste paper20 under frame layer/selections/invert/delete/do not deselect.
Paste fence/resize 25%/position/delete.

Paste birdhouse/resize 20%/position/delete.

Paste veggies1/resize 30%/delete.

Paste sunflower1/resize 28%/position on left side of fence/layers/duplicate 2 times/position copies/delete if needed/deselect/apply dropshadow to fence thru veggies layers.

Hide mask and background layers/layers/merge/merge visible/dropshadow/unhide layers.

Paste flower5 below merged frame layer/using the pick tool,move flowers up top left of the frame/layers/duplicate/image/mirror/layers/duplicate again/position in center of frame/right click on copy2 of flower/merge/merge down to first flower layer/layers/duplicate/image/flip/dropshadow to both layers.

Moving up top/paste bow4/resize 50%/layers/duplicate/image/mirror/dropshadow to both layers.

Paste mamabear5/resize 40%/position/dropshadow.

Paste wheelbarrel/resize 50%/position/dropshadow.

Paste bee2/resize 60%/layers/duplicate/position both/dropshadow.

Paste tube/position/dropshadow.

Layers/merge/merge visible.

Image/resize all layers 12%.

Add copyrights.

Add name.

Save.

For my name,I used paper6 for fill/black on foreground.
Hope you enjoyed my tut,would love to see your results.

Hugs,Mary

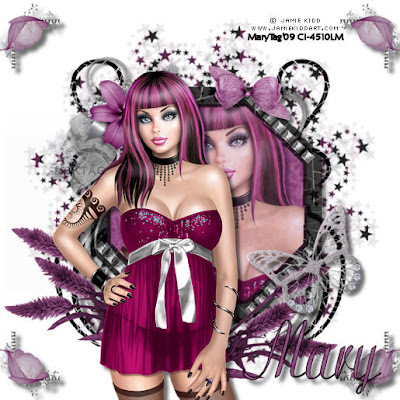
100% Female


Tube of choice,I am using Jamie Kidd,which you can purchase here,do not use unless you have a license to do so.

Scrapkit is 100% Female from Glenda&Brenda of JosDZigns here and you can purchase this kit here. I love this kit,the colors of everything is awesome!! Thank you Glenda&Brenda!!

Mask of choice,I am using Vix_Mask26 here.

Font of choice,I am using Ariston here.
-This tutorial was written assuming you have working knowledge of PSP-

Dropshadow for entire tut:
Vertical 6
Horizonal 6
Opacity 57
Blur 7

Open mask,minimize.

Open a new 600x600 white image.

Paste paper3 as a new layer/right click/new mask layer/from image/select your mask/ok/layers/merge/merge group.

Paste blackoctframe/resize 40%/click inside frame with your magicwand/selections/modify/expand by 6.
Paste paper12 under frame layer/resize 10%/selections/invert/delete.

Paste tube/position/delete/deselect/right click on tube layer/propertiesew/opacity by 25%/dropshadow.

Hide mask and background layers/layers/merge/merge visible/dropshadow/unhide layers.

Highlight mask layer/paste black silver accent/resize 42%/edit/repeat resize/position to the right of the frame/layers/duplicate/image mirror.

Paste fuzzy flora/resize 50%/edit/repeat resize/position/layers/duplicate/position that layer/dropshadow to both layers.
Moving up top,paste butterfly/position/dropshadow.

Paste silverleafed flower/resize 50%/edit/repeat resize/position/dropshadow.
Paste ltplummeshbow/resize 50%/edit/repeat resize/position on frame/dropshadow.

Paste tube/position/dropshadow 2 times.

Paste corner accent/resize 50%/edit/repeat resize/position in bottom right corner/layers/duplicate/image/flip/layers/duplicate/image/mirror/layers/duplicate/image/flip/dropshadow.
Layers/merge/merge visible.

Image/resize all layers 14%.

Add copyrights.

Add name.

Save.

For my name,I used paper12 for fill/black on foreground.
Hope you enjoyed my tut,would love to see your results.

Hugs,Mary

Sunday, September 13

Wickedly Cute


Tube/close-up of choice,I am using Ismael Rac,which you can now purchase here,do not use unless you have a license to do so.

Scrapkit is Wicked from Melissa here and you can purchase this kit here. This is an awesome kit!! The little poser witch is so cute! Thank you Melissa!!

Mask of choice,I'm using Vix_Mask144 here. Thank you Vix!

Fonts of choice,I used Copperplate Gothic Bold,came with my psp program and Jellyka Castles Queen here.
-This tutorial was written assuming you have working knowledge of PSP-

Open mask,minimize.

Open a new 600x600 white image.

Paste paper6/right click/new mask layer/from image/select mask/ok/layers/merge/merge group.

Paste skull circle/resize 10%/click insdie frame with your magicwand.

Paste paper12 under circle/selections/invert/delete.

Paste close up of choice/position/delete.

Paste tube/position/delete/deselect/dropshadow:

Vertical 6
Horizonal 6
Opacity 65
Blur 10

Hide mask and background layers/layers/merge/merge visible/same dropshadow/unhide layers.

Paste glitter spill3 below merged layer.

Paste pearls3/resize 25%/edit/repeat resize/position/dropshadow:
Vertical 4
Horizonal 4
Opacity 68
Blur 9

Paste bow2/resize 50%/edit/repeat resize/position/same dropshadow.

Repeat with moon3/positioning under merged frame layer.

Paste dead bush/position.

Moving up top/paste cookie witch2/resize 50%/position/dropshadow:

Vertical 5
Horizonal 5
Opacity 67
Blur 7

Paste sign post3/resize 60%/position/same dropshadow.

 
Layers/merge/merge visible.

Image/resize all layers 12%.

Add copyrights.

Add name.

Save.

For my name,I used paper8 for fill/black on foreground.
Hope you enjoyed my tut,would love to see your results.

Hugs,Mary

Saturday, September 12

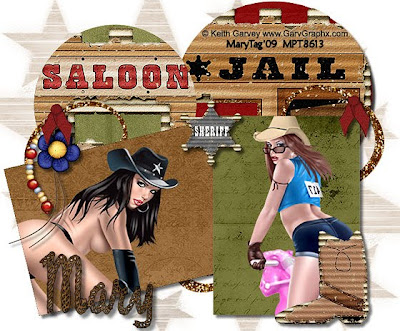
When The West Was Fun


Tubes of choice,I'm using Keith Garvey,which you can purchase here,do not use unless you have a license to do so.

Scrapkit is When The West Was Fun from Gina at Crafted By Gina here and you can purchase it here. This kit is awesome,made for every cowgirl&cowboy,thank you Gina!!

Template of choice,I'm using Ali's template10 here. Thank you Ali!!

Mask of choice,I used a star mask.

Font of choice,I'm using RopeMF here.
-This tutorial was written assuming you have working knowledge of PSP-

Dropshadow for entire tut:
Vertical 5
Horizonal 5
Opacity 55
Blur 6

 
Open template,hit shiftD,close the orginal and delete copyright layer.

Paste paper13/right click/new mask layer/from image/select mask/ok/layers/merge/merge group/layers/duplicate/image/mirror/image/flip.

Highlight circle1 layer/selections/select all/float/defloat/paste paper4/selections/invert/delete/paste jail/delete/deselect/right click on jail/merge/merge down to circle1 layer/position/dropshadow.

Repeat with circle2 layer using paper8 and saloon.

Highlight rectangle1 layer/selections/select all/float/defloat/paste paper1/selections/invert/delete/paste 1st tube of choice/position/delete/deselect/right click on tube layer/merge/merge down with rectangle1 layer/dropshadow.

Repeat with rectangle2 using paper14 and 2nd tube choice.

Paste swirl4 under rectangle layers/resize 20%/position with pick tool to the left of the tag/layers/duplicate/image/mirror.

Paste pendant2/resize 50%/position/dropshadow.

Paste bow6/resize 50%/edit/repeat resize/layers/duplicate/position both/dropshadow.

Paste badge/resize 60%/position/dropshadow.

Paste boot/resize 40%/position/dropshadow.

Layers/merge/merge visible.

Image/resize all layers 20%.

Add copyrights.

Add name.

Save.

For my name,I used paper1 for fill/black on foreground.
Hope you enjoyed my tut,would love to see your results.

Hugs,Mary

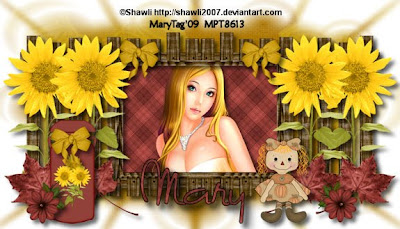
Fall Splendor


Tube of choice,I'm using Shawli,which you can purchase here,do not use unless you have a license to do so.

Scrapkit is Fall Splendor from Stacey at Staceys Designs here and you can purchase this gorgeous kit here. Thank you Stacey,love this kit!!

Mask of choice.

Font of choice.
-This tutorial was written assuming you have working knowledge of PSP-

Dropshadow for entire tut:
Vertical 6
Horizonal 6
Opacity 60
Blur 10

Open a new 700x400 white image.

Paste paper8/layers/load save mask/load mask from disk/select mask/ok/layers/merge/merge group.

Paste the fence frame as a new layer/resize 10%/click inside frame with magicwand/selections/modify/expand by 5.

Paste paper1 under frame layer/selections/invert/delete.

Paste tube of choice/position/delete/deselect/dropshadow to tube&frame layer.
Hide white background&mask layers/layers/merge/merge visible/unhide layers.

Paste sunflower w/leaf/resize 50%/position on the left of the frame/layers/duplicate 3 times/position/dropshadow.

Paste red leaf/resize 50%/edit/repeat resize/position/layers/duplicate 3 times/postion/dropshadow.

Paste milkcan/resize 45%/edit/repeat resize/position/dropshadow.
Paste raggedie fall doll/resize 50%/edit/repeat/resize/position/dropshadow.

Paste flower/resize 50%/edit/repeat resize 2 times/positon/layers/duplicate/position/dropshadow to both flowers.

Paste fat bow/resize 50%/edit/repeat resize 2 times/positon/layers/duplicate/position/dropshadow to all bow layers.
Layers/merge/merge visible.

Image/resize all layers 18%.

Add copyrights.

Add name.

Save.

For my name,I used paper1 for fill/black on foreground.
Hope you enjoyed my tut,would love to see your results.

Hugs,Mary

Thursday, September 10

Eek ABoo Night

Photobucket

Tube/image of choice,I'm using Luciano Angelo,which you can purchase here,do not use unless you have a license to do so.

Scrapkit is EEK from Kristi at Scrappin Divaz here and you can purchase this kit here. This is an awesome kit,could do tons with it!! Thank you Kristi!!

Template of choice,I'm using Bev's template45 at HorsePlays Pasture here. Thank you Bev for the awesome templates!
Mask of choice.

Font of choice,I'm using Mistral,came with my psp program.

Animation Shop(AS)(Optional)
-This tutorial was written assuming you have working knowledge of PSP-

Dropshadow for entire tut:
Vertical 6
Horizonal 6
Opacity 68
Blur 10

Open mask,minimize.

Open template.hit shiftD,close the orginal,delete the copyright info layer.

Highlight white background layer on your template/paste paper6 as a new layer/right click/new mask layer/from image/select mask/ok/layers/merge/merge group.

Highlight frame layer/selections/select all/float/defloat/paste tube/image as a new layer/selections/invert/delete/deselect/right click on tube layer/merge/merge down to frame layer/position/dropshadow.

Highlight spider1 layer/selections/select all/float/defloat/paste paper9 as a new layer/selections/invert/delete/deselect/right click/merge/merge down/resize 10%/dropshadow.

Repeat for spider2 layer using paper1.

Paste cauldron as a new layer/resize 50%/edit/repeat resize/position/dropshadow.

Paste bat as a new layer/resize 65%/position/dropshadow.

Paste ghost as a new layer below mask layer/resize 65%/using pick tool,position/dropshadow.

Moving up top/paste spider1 as a new layer/resize 50%/edit/repeat resize/position/dropshadow.

Paste tube/position/dropshadow.

Image/resize all layers 15%.

Add copyrights.

Add name.

Highlight spider web layer/layers/duplicate 2 times/rename sw1,sw2 and sw3.
Highlight sw1 layer/adjust/add remove noise/add noise settings:

Random/monochrome checked
44% noise.

Repeat with sw2 layer/changing the noise to 45% and sw3 layer,noise to 46%.
Highlight sw1 layer/hide sw2&sw3 layers.

Edit/copymerged/paste into AS as a new animation.

Hide sw1 layer.unhide and highlight sw2 layer/edit/copy merged/paste into AS after current frame/repeat for sw3 layer.

Save as gif.
Hope you enjoyed my tut,would love to see your results.

Hugs,Mary

Wednesday, September 9

Step Into The Dark

Photobucket

Tube of choice,I am using Michael Calandra,which you can purchase here,do not use unless you have a license to do so.

Scrapkit is Step Into The Darkness from Sizzels Designs here and you can purchase this kit here. I so love this kit,the colors and posers are awesome!! Thank you Sizzel!!

Mask of choice,I am using Vix_Mask233 here.

Font of choice.

Eye Candy 4000-fire(optional)

Animation Shop(optional)
-This tutorial was written assuming you have working knowledge of PSP-

Dropshadow for entire tut:
Vertical 6
Horizonal 6
Opacity 65
Blur 9

Open mask,minimize.

Open a new 600x600 white image.

Paste paper49 as a new layer/resize 30%/right click/new mask layer/from image/select mask/if using mask233,invert mask data unchecked/layers/merge/merge group.

Paste skull frame as a new layer/resize 15%/position.

Click inside frame with your magicwand/selections/modify/expand by 5/paste paper8 as a new layer under frame layer/selections/invert/delete.

Paste witchcastle as a new layer/resize 20%/position/delete/deselect/dropshadow.
Hide mask and background layer/layers/merge/merge visible/dropshadow/unhide layers.

Paste glitter doodle1 as a new layer below frame layer/resize 20%/layers/duplicate/image/flip/mirror/dropshadow.
Moving up top/paste castle candle as a new layer/resize 35%/edit/repeat resize/position/dropshadow.

Paste magic bag1 as a new layer/resize 50%/edit/repeat resize/position/dropshadow.

Paste dangler as a new layer/resize 50%/position/dropshadow.

Paste flower3 as a new layer/resize 50%/position/dropshadow.

Paste tube/position/dropshadow.

Image/resize all layers 12%.

Add copyrights.

Add name.

For my name,I used paper49 for fill/black on foreground.

Highlight catle candle layer/layers/duplicate 2 times/rename cc1,cc2 and cc3.
Highlight cc1 layer/using your magicwand,click on the candle wick/effects/eye candy 4000/fire/settings:

Direction 90*
Column Length 1062.1
Flame Width 34.35
Side Taper 60.99
Movement 40
Denser Flame Checked
Random Seed 567

Repeat for cc2&cc3,clicking on random seed ONCE for each layer/deselect.
Highlight cc1 layer/hide cc2&cc3 layers.

Edit/copy merged/paste into animation shop as a new animation.

Hide cc1 layer/unhide cc2 layer and highlight/edit/copy merged/paste into animation shop after current frame.

Repeat for cc3 layer.

Save as gif.
Hope you enjoyed my tut,would love to see your results.

Hugs,Mary

Rainbow Rockz

Photobucket

Tubes of choice,I using Elias Chatzoudis,which you can purchase here,do not use unless you have a license to do so.

Scrapkit is Rainbow Rockz from Susan at Hippie Daze Scrappin Stuff here and you can purchse the kit here. Love the colors,this kit rockz!! Thank you Susan!!

Mask of choice,I'm using Vix_Mask151 here.

Template of choice or mine here.

Font of choice,I used Impact,came with my psp program.

Eye Candy 4000(optional)
Animation Shop
-This tutorial was written assuming you have working knowledge of PSP-

Dropshadow for entire tut:
Vertical 5
Horizonal 5
Opacity 62
Blur 10

Open mask,minimize.

Open template,hit shiftD,close the orginal,delete my copyright info,minimize.
Open a new 600x600 white image.

Paste paper1 as a new layer/right click/new mask layer/from image/select mask/ok/layers/merge/merge group.

Open template /edit/copy merged/paste as a new layer on mask layer/resize 20%/dropshadow.

Paste element32 as a new layer/dropshadow.

Paste element 33 as a new layer/resize 50%/position on center template record/dropshadow/right click/merge/merge down to element layer.
Paste element4 as a new layer/reszie 50%/position/dropshadow.

Paste element10 as a new layer/resize 50%/layers/duplicate 2 times/position/dropshadow.

Paste element38 as a new layer/resize 50%/postion/dropshadow.

Paste element 33 as a new layer/resize 50%/position on center template record/dropshadow.

Paste tubes of choice/position/dropshadow.

Image/resize all layers 10%.

Add copyrights.

Add name.

Highlight merged32/33 layer/layers/duplicate 2 times/rename 1,2 and 3.

Highlight layer1/effects/eye candy 4000/HSB Noise/settings:

Hue Variation 25
Saturation 30
Brightness Variations 40
Opacity Variation 0
Lump Width 42
Lump Height 42
Pattern:Smooth
Seamless Tile Checked
Random Seed 1

Highlight layer2,same effects but click on random seed ONE time.

Highlight layer3/repeat/click random seed ONE time.

Highlight layer 1 again.close 2&3.

Edit/copy merged/paste into animation shop as a new animation.

Close layer 1/highlight layer2,unhide/edit/copy merged/paste into animation shop after current frame.

Repeat with layer 3.

Save as gif.

For my name,I used paper17 for fill/black on foreground/same eye candy 4000 HSB Noise.
Hope you enjoyed my tut,would love to see your results.

Hugs,Mary

Monday, September 7

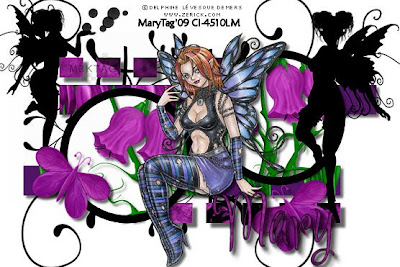
Silhouette Fairies


Tube of choice,I am using Delphine Demers,which you can purchase here,do not use unless you have a license to do so.

Scrapkit is Fairy Garden,a freebie from Terrys Treasures here and you can only get it at Butterfly Blush Designs here. Love purple and this kit is beautiful! Thank you Terry!

Template of choice,I am using template9 from Blissfully Beth here. Thank you Beth!

Font of choice.
-This tutorial was written assuming you have working knowledge of PSP-

Dropshadow for entire tut:
Vertical 4
Horizonal 4
Opacity 60
Blur 5
 

Open template,hit shiftD,close the orginal and delete copyright info.

Highlight dashes2 layer/selections/select all/float/deloat/paste paper10 as a new layer/selections/invert/delete.

Repeat with dashes1 layer/deselect/right click on paper layers/merge/merge down with dash layers/dropshadow to both layers.

Flood fill white to both circle layers.

Highlight circle1 layer/click on it with your magicwand/paste flower2 as a new layer/position/selections/invert/delete/deselect/dropshadow.

Repeat with circle2 layer.

Paste fairy silhouette2 as a new layer/resize 25%/position/dropshadow.

Repeat with fairy silhouette1.

Right click on purple strip1/merge/merge down with strip2.

Selections/select all.float/defloat/paste floaer1 as a new layer/resize 25%/position/selections/invert/delete/repeat 5 times/deselect/dropshadow to purple strips layer.

Paste tube of choice/position/dropshadow.

Paste butterfly1 as a new layer/resize 46%/layers/duplicate/position each layer/dropshadow.

Paste doodle1 as a new layer right above background layer/layers/duplicate/position both layewrs/right click on copy layer/merge/merge down with first doodle layer/layers/duplicate/image/flip.
Layers/merge/merge visible.

Image/resize all layers 7%.

Add copyrights.

Add name.

Save.
Hope you enjoyed my tut,would love to see your results.

Hugs,Mary

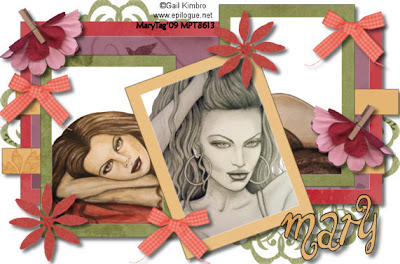
Gypsy's Indian Summer


Tubes of choice,I'm using Gail Kimbro,which you can purchase here,do not use unless you have a license to do so.


Scrapkit is Indian Summer,a freebie from Natahsa at Sticky Kisses here. Love the colors in this kit,thank you Natasha!


Template of choice,I am using template21 from Caitlin Creations here.


Font of choice,I'm using Unchanged Thoughts here.


-This tutorial was written assuming you have working knowledge of PSP-


Dropshadow for entire tut:
Verticqal 5
Horizonal 5
Opacity 57
Blur 8


Open template,hit shiftD,close the orginal and delete copyright info on the template you are using.


Highlight large grey rectangle/selections/select all/float/defloat/paste paper7 as a new layer/selections/delete/deselect.


Repeat with large white rectangle using paper4.


Repeat with the black lines layer,using paper 10.


Highlight black rectangles,repeat using paper1.


Repeat with the black square rotate layer,using the fringed paper.


Highlight white rectangles layer/selections/select all/float/defloat/paste tube of choice/selections/invert/delete.


Highlight white square rotate,repeat last steps with 2nd tube of choice.


Layers/new raster layer/right click on new layer/arrange/send to bottom/flood fill white.


Highlight top layer/Hide white background layer/layers/merge/merge visible/dropshadow/unhide layer.


Highlight background layer/paste mat as a new layer/resize 50%/position to the left/layers/duplicate/image/mirror/image/flip.


Moving up top/paste bow3 as a new layer/reszie 50%/layers/duplicate 2 times/position each bow/dropshadow.


Paste clip as a new layer/resize 50%/layers/duplicate 1 times/position both clips/dropshadow.


Paste flower2 as a new layer/resize 55%/layers/duplicate 1 time/postion each flower/dropshadow.


Add copyrights.


Add name.


*For my name,I used paper10 for fill/black on foreground.


Layers/merge/merge visible.


Image/resize all layers 15%.


Save.


Hope you enjoyed my tut,would love to see your results.


Hugs,Mary

Sunday, September 6

Autumn Morning

Photobucket

Tube of choice.I'm using Jennifer Janesko,which you can purchase here,do not use unless you have a license to do so.

Scrapkit is a freebie from jbs2designs here. Thank you Nicole for the beautiful kit!

A circle mask of choice.

Font of choice,I'm using Heather here.

Twinks here.

Animation Shop(AS)
-This tutorial was written assuming you have working knowledge of PSP-

Dropshadow for entire tut:
Vertical 7
Horizonal 6
Opacity 65
Blur 9
 
 
Open mask,minimize.

Open a new 500x500 white image.

Paste paper4 as a new layer/right click/new mask layer/from image/select mask/ok/layers/merge/merge group.

Paste frame3 as a new layer/click inside frame with your magicwand/selections/modify/expand by 7.

Paste paper7 as a new layer under your frame layer/selections/invert/delete.

Paste tube/position/delete/deselect/layers/duplicate/position behind the main tube/effects/user defined filter/Divisor 3,Bias 0,grayscales checked/dropshadow on main tube.

 
Paste tag1 as a new layer/resize 50%/position/dropshadow.

Paste flower4 as a new layer/resize 60%/position/dropshadow.

Paste flower9 as a new layer/resize 50%/position/dropshadow/layers/duplicate/position.

Paste butterfly4 as a new layer/resize 70%/layers/duplicate/position/dropshadow.

Add copyrights.

Add name.

For my name,I used paper4 for fill/black on foreground.

Layers/merge/merge visible.

Edit/copy/paste into animation shop.
Open twinks in AS/edit/select all/copy.

Hit ctrl and L at the same time 15 times,making 16 frames.

Edit/paste into selected frame/I added it 5 times,your choice on how many times.

Save as gif.
Hope you enjoyed my tut,would love to see your results.

Hugs,Mary

  © Blogger template Customization and Installation by Krissy's Scraps and Imaging 2011

Back to TOP