Sunday, August 30

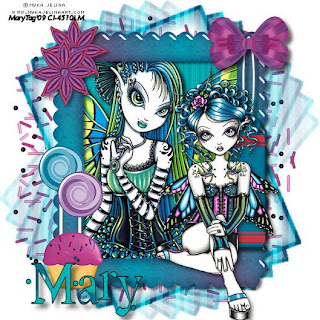
Sugar Shock


Tubes of choice,I am using Myka Jelina,which you can purchase here,do not use unless you have a license to do so.

Scrapkit is Sugar Shock from Aylssa's Scraps&Such here and you can purchse this kit here. I so love the colors in this kit,thank you Alyssa!!

Mask of choice.

Font of choice,I'm using Ugly Face here
-This tutorial was written assuming you have working knowledge of PSP-
Open mask,minimize.
Open a new 600x600 white image.

Paste paper15 as a new layer/right click/new mask layer/from image/select mask/ok/layers/merge/merge group.
Paste frame4 as a new layer/resize 30%/sition/click inside frame/selections/modify/expand by 7/paste paper8 as a new layer under frame layer/resize 35%/selections/invert/delete/apply dropshadow to frame:
Vertical 4
Horizonal 4
Opacity 57
Blur 7

Paste first tube as a new layer/position/delete/deselect/dropshadow
Vertical 7
Horizonal 7
Opacity 61
Blur 8

Paste tag3 as a new layer/resize 50%/position/same dropshadow.
Paste bow3 as a new layer/resize 67%/position/dropshadow
Vertical 5
Horizonal 5
Opacity 64
Blur 10

Paste 2 lollipops,colors of choice as a new layers/resize 67%/position/same dropshadow.

Paste cupcake1 as a new layer/resize 54%/same dropshadow.
Paste sprinkles1 as a new layer below the mask layer/layers/duplicate/image/flip.

Moving up top/paste 2nd tube of choice/postion/dropshadow:
Vertical 4
Horizonal 4
Opacity 50
Blur 10
 

Paste flower3 as a new layer/resize 71%/layers/duplicate/position both layers/same dropshadow.

Layers/merge/merge visible.

Image/resize all layers 12%.

Add copyrights.

Add name.

Save.

For my name,I used paper12 for fill/black on foreground.
Hope you enjoyed my tut,would love to see your results.
Hugs,Mary

Mystical Glitter

Photobucket

Tube of choice,I am using Zindy,which you can purchase here. Do not use unless you have a license to do so.

Scrapkit is Mystical Glitter Tagger AddOn,by Katelynns Designs here and you can purchase this kit here. And check out the full size kit to get so much more to make some awesome tags!! I love this kit,its gorgeous,thank you Christina!

Mask of choice,I am using Vix_mask23 here.

Font of choice,I'm using Dear Love here.

Animation Shop(AS)
-This tutorial was written assuming you have working knowledge of PSP-

Open a new 600x600 white image.

Paste paper7 as a new layer/right click/new mask layer/from image/select mask/invert mask data unchecked/layers/merge/merge group.

Layers/duplicate mask layer 1 time/image/mirror/image/flip/hide white background layer/layers/merge/merge visible/unhide layer.

Paste frame1 as a new layer/resize 25%/click inside frame with your magicwand/selections/modify/expand by 6.

Paste paper4 as a new layer under frame/selections/invert/delete/paste tube/position/delete/deselect.

Right click on tube layer/properties/opacity 60.

Paste unicorns as a new layer/resize by 50%/position/dropshadow

Vertical 3
Horizonal 3
Opacity 57
Blur 9

Moving up top,paste tube as a new layer/position/dropshadow:

Vertical 5
Horizonal 5
Opacity 62
Blur 10

Paste glitter doodle4 as a new layer right above mask layer/position on the left of the tag/layers/duplicate 1 time/image/mirror/position/same dropshadow.

Add copyrights.

Add name.

Image/resize all layers 12%.

Hide mask and white background layers/layers/merge/merge visible/unhide layers.

Highlight mask layer/layers/duplicate 2 times/rename m1,m2 and m3.
Highlight m1 layer/selections/select all/float/defloat/adjust/add remove noise/add noise

Random and monochrome checked
Noise 38%

Highlight m2/repeat effects with 39% noise and m3 at 40% noise/deselect.

Highlight m1 layer/hide 2&3/edit/copy merged.

Take to AS and paste as a new animation.

Back to psp,hide m1,unhide and highlight m2/edit/copy merged/paste in AS after current frame/repeat with m3 layer.

Save as gif.

For my name,I used paper11 for fill/black for the foreground.
Hope you enjoyed my tut,would love to see your results.
Hugs,Mary

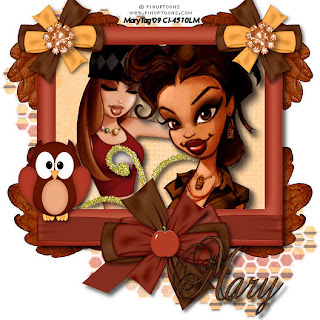
Autumn Spice


Tubes of choice,I am using Pin Up Toons,which you can purchase here,do not use unless you have a license to do so.


Scrapkit is Autumn Spice from Melissa here and you can purchase this kit here. I love this kit,prefect for Fall,thank you Melissa!!


Mask of choice,I am using WSL mask154 here.


Font of choice,I am using Precious here.


-This tutorial was written assuming you have working knowledge of PSP-


Open your mask,minimize.


Open a new 600x600 white image.


Paste paper3/paste as a new layer/right click/new mask layer/from image/select mask/invert mask data unchecked/layers/merge/merge group.


Move mask layer to the top left of your tag/layers/duplicate mask layer 1 time/image/mirror/image/flip/right click on copy layer/merge/merge down to first mask layer.


Paste wrapped frame2/click inside frame with your magicwand/selections/modify/expand by 7/paste paper7 as a new layer under your frame layer.


Selections/invert/delete.


Paste first tube/position/delete.


Paste gold doodle2as a new layer/resize 15%/position/delete.


Paste second tube/position/delete/deselect/dropshadow to both tube layers and gold doodle layer:

Vertical 6
Horizonal 6
Opacity 65
Blur 11


Hide mask and background layer/layers/merge/merge visible/same dropshadow/unhide layers.


Paste bow4 as a new layer/resize 50%/position/dropshadow:

Vertical 4
Horizonal 4
Opacity 53
Blur 8


Paste apple1 as a new layer/resize 67%/edit/repeat resize/position in center of the bow/dropshadow:

Vertical 3
Horizonal 3
Opacity 60
Blur 10


Paste leaf3 as a new layer under frame layer/resize 50%/using pick tool to position/layers/duplicate 3 times/position each layer around frame.


Paste bow6 as a new layer/resize 67%/position on the top left of the frame/layers/duplicate/image/mirror/same dropshadow as we last used.


Repeat the last steps with the Owl.


Paste gem2 as a new layer/resize 50%/position/layers/duplicate 1 time/position/dropshadow:

Vertical 6
Horizonal 6
Opacity 45
Blur 11


Layers/merge/merge visible.


Image/resize all layers 12%.


Add copyrights.


Add name.


Save.


For my name,I used paper4 for fill/black on foreground.


Hope you enjoyed my tut,would love to see your results.


Email me


Hugs,Mary

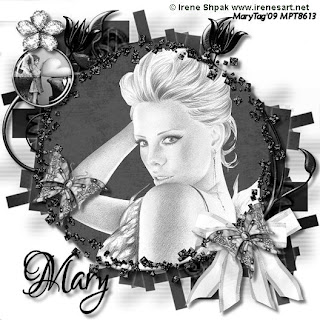
Gracious Beauty


Tube of choice,I am using Irene Shpak,which you can purchase here,do not use unless you have a license to do so.

Scrapkit is Gracious Beauty from Wicked Princess Scraps here and you can purchase this kit here or here. Gorgeous kit Shani,thank you!

Mask of choice,I am using WSL mask147 here.

Script font of choice.
-This tutorial was written assuming you have working knowledge of PSP-

Dropshadow for entire tut:
Vertical 6
Horizonal 6
Opacity 54
Blur 7
 
 
Open a new 600x600 white image/paste paper15 as a new layer/right click/new mask layer/from image/select mask/invert mask data unchecked/layers/merge/merge group.

Move mask layer to the left top of your tag/layers/duplicate/image/mirror/image/flip.

Paste glitter frame 6 as a new layer/paste paper24 under frame layer/using your eraser tool/erase all paper outside of frame.

Highlight paper layer/selections/float/defloat/paste tube as a new layer/selections/invert/delete/deselect.

Right click on frame layer/merge/merge down to paper layer/dropshadow.
Paste iron doodle5 as a new layer below frame layer/resize 10%/position to the right of the tag/layers/duplicate/image mirror/dropshadow.

Paste iron rose1 as a new layer/position/layers/duplicate/image/mirror/dropshadow.

Paste bow2 as a new layer/resize 33%/position/dropshadow.
Paste charm1 as a new layer/resize 50%/position/dropshadow.

Paste bling4 as a new layer/resize 58%/position/dropshadow.

Paste butterfly2 as a new layer/resize 67%/position/layers/duplicate/position copy/dropshadow to both layers.

Layers/merge/merge visible/effects/photo effects/black&white film by default/ok.

Image/resize all layers 12%.

Add copyrights.

Add name.

Save.
Hope you enjoyed my tut,would love to see your results.

Hugs,Mary

Friday, August 28

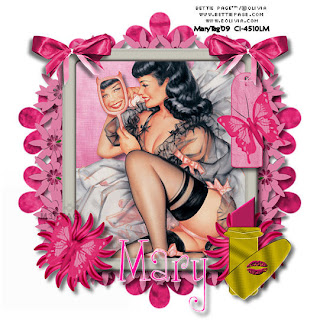
Love My Lipstick


Tube of choice,I am using Bettie Page/Olivia,which you can purchase here,do not use unless you have a license to do so


Scrapkit is Love My Lipstick from Terry's Treasures here and can be purchaed here. This ia a true girly girl kit,thank you Terry!!


Mask of choice,I am using Vix_Mask172 here


Font of choice,I am using Girls Are Weird here


-This tutorial was written assuming you have working knowledge of PSP-


Dropshadow for entire tut:
Vertical 6
Horizonal 6
Opacity 55
Blur 9


Open mask,minimize.


Open a new 600x600 white image.


Paste paper8 as a new layer/resize 20%.


Right click on paper layer/new mask layer/from image/select mask/invert data unchecked/ok/layers/merge/merge group.


Paste frame1/click inside frame with your magicwand/selections/modify/expand by 7.


Paste paper7 as a new layer under frame layer/resize 20%/selections/invert/delete.


Paste tube/position/delete/deselect/dropshadow.


Hide mask and background layer/layers/merge/merge visible/dropshadow/unhide layers.


Paste tag1 as a new layer/resize 50%/position/dropshadow.


Paste bow4 as a new layer/resize 50%/position/dropshadow/layers/duplicate/image/mirror.


Paste butterfly3 as a new layer/resize 50%/using your pick tool,slant the butterfly to the right some/layers/duplicate/image/mirror/position/dropshadow to both layers.


Paste flower9 as a new layer under frame layer/position to the left of the frame/layers/duplicate/image/mirror/layers/duplicate/image/flip/layers/duplicate/image mirror/erase any green stem you see/dropshadow/layers/duplicate/image/free rotate to the left 90*.


Merge both flower layers/resize 15%.


Paste flower13 as a new layer/resize 50%/layers/duplicate/image/mirror/dropshadow.


Moving up top/paste lipstick2 as a new layer/resize 50%/position/dropshadow.


Layers/merge/merge visible.


Image/resize all layers 10%.


Add copyrights.


Add name.


Save.


Hope you enjoyed my tut,would love to see your results.


Email me


Hugs,Mary

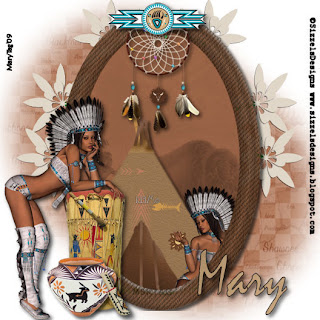
Indian Dreams


Scrapkit is from Sizzel Designs here and you can purchase the kit here. I so love this kit,love anything NA,thank you Sizzel!!
Mask of choice.

Font of choice,I am using Mistral,came with my psp program.
-This tutorial was written assuming you have working knowledge of PSP-

Open your mask,minimize.

 
Open a new 600x600 white image.

Paste paper1 as a new layer/right click/new mask layer/from image/select your mask/ok/layers/merge/merge group.

Using your move tool,move the mask to the left,top of the tag/layers/duplicate/move copy tot he bottom right of the tag.

Right click on copy mask layer/merge/merge down/image/resize 5%.

Paste frame2 as a new layer/resize 20%.

Click inside the frame with your magicwand/selections/modify/expand by 6.

Paste paper4 as a new layer below the frame layer/resize 30%/position/selections/invert/delete.

Paste posertent as a new layer/resize 33%/position/delete/deselect/dropshadow:

Vertical 6
Horizonal 6
Opacity 68
Blur 8

Hide mask and background layer/layers/merge/merge visible/same dropshadow/resize 6%/unhide layers.

Paste poserdrum as a new layer/resize 29%/position/dropshadow:
Vertical 4
Horizonal 4
Opacity 70
Blur 11

Paste dreamcatcher as a new layer/resize 45%/edit/repeat resize/position/same dropshadow.

Paste image9a as a new layer/resize 67%/same dropshadow.

Paste jug/resize 75%/position/dropshadow:

Vertical 5
Horizonal 5
Opacity 67
Blur 9

Paste the knife as a new layer/resize 75%/edit/repeat resize/position/same dropshadow.

Paste the weedflower as a new layer under frame layer/layers/duplicate/image/mirror/erase any green stem showing.

Layers/merge/merge visible.

Image/resize all layers 12%.

Add copyrights.

Add name.

Save.

For my name,I used paper6 for fill/black on foreground.
Hope you enjoyed my tut,would love to see your results.

Hugs,Mary

Thursday, August 27

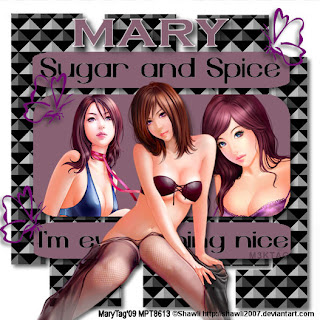
Sugar and Spice


Tubes of choice,I am using Shawli,which you can purchase here,do not use unless you have a license to do so.
Template of choice,I am using Bev's template 17 from HorsePlays Pasture here. Awesome Bev,thank you!
My cut glass layer here
Paper of choice,I used the layer from my tube.
Mask of choice.
Font of choice.
-This tutorial was written assuming you have working knowledge of PSP-

Dropshadow for entire tut:
Vertical 5
Horizonal 5
Opacity 58
Blur 10


Open mask,minimize.

Open template.hit shiftD,close the orginal,delete copyright layer.

Highlight white background layer/paste my cut glass layer as a new layer/right click/new mask layer/from image/select mask/ok/layers/merge/merge group.

Highlight large rectangle layer/selections/select all/float/defloat/paste paper of choice into selection.

Paste tubes as new layers/position/selections/invert/delete/deselect.

Repeat paper/color for top&bottom rectangles.

Paste tube/position/dropshadow.

Highlight butterfly layer/selections/select all/float/defloat/flood fill color of choice/deselect.

Layers/duplicate 2 times/position each butterfly/dropshadow.

Highlight wordart/selections/select all/float/defloat/flood fill black/deselect.
Layers/merge/merge visible.

Image/resize all layers 12%.

Add copyrights.

Add name.

Save.
Hope you enjoyed my tut,would love to see your results.
Hugs,Mary

Wednesday, August 26

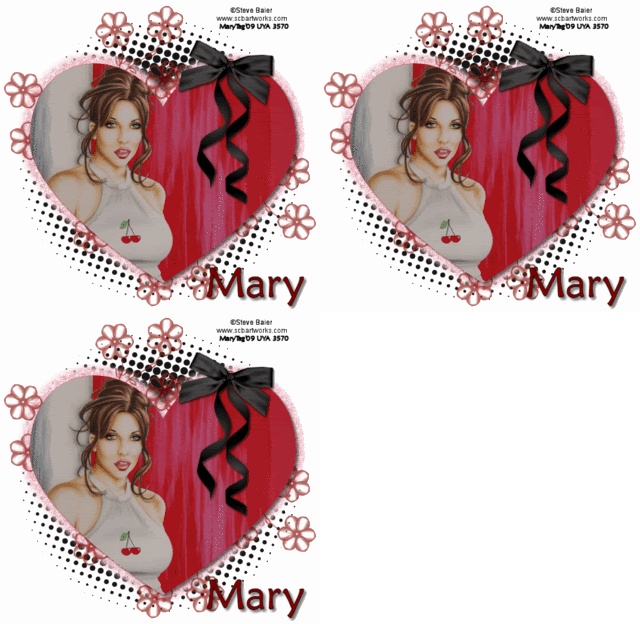
My Heart

Photobucket

Tube/image of choice,I am using Steve Baier,which you can purchase here,do not use unless you have a license to do so.

Template of choice,I am using Kirstys Misfit template8 here. Thank you Kirsty,awesome!

Bow of choice

Doodle of choice
Animation Shop

Font of choice,I am using Maiandra GD,came with my psp program.
-This tutorial was written assuming you have working knowledge of PSP-
Open template,shiftD,close the orginal and delete copyright layer.

Highlight heart layer/selections/select al/float/defloat/paste tube/image of choice as a new layer/position/selections/invert/delete/deselect.

Right click on tube layer/merge/merge down with heart/dropshadow
Vertical 4
Horizonal 4
Opacity 55
Blur 6
 

Highlight glow layer/layers/duplicate 2 times/rename glow1,glow2 and glow3.
Layers/new raster layer/right click/arrange/send to bottom/flood fill white.

 
Paste your bow/position/dropshadow

Vertical 6
Horizonal 6
Opacity 67
Blur 9
 
Highlight glow3 layer/paste doodle of choice as a new layer/position/layers/duplicate/position.

Highlight glow1 layer/adjust/add-remove noise/add noise/settings:
Uniform checked
Monochrome checked
Noise 35%

Repeat with glow2 layer changing the noise to 36%,and glow3 layer 37%.

Moving back to the top/add copyrights.

Add name.

Open animation shop.

Hide glow2 and glow3 layers/highlight glow1 layer.

Edit/copy merged/paste into AS as a new animation.

Back to psp.hide glow1 layer/unhide and highlight glow2 layer/edit/copy merged/take to AS/paste after current frame.

Repeat for glow3 layer.

Save as gif in Animation Shop.

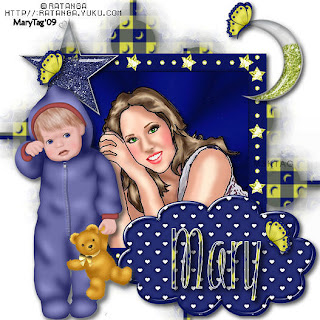
Nite Nite


Tubes of choice,I am usingFTU tubes from Ratanga here. Thank you for such awesome tubes!


Scrapkit is Starry Nite,a freebie from Stacey here.Love this kit,thank you Stacey!


Mask of choice,I am using Vix_mask 158 here.


Font of choice.


-This tutorial was written assuming you have working knowledge of PSP-


Dropshadow for entire tut:
Vertical 4
Horizonal 4
Opacity 71
Blur 11


Open your mask,minimize.

 
Open a 600x600 white image.


Paste blue yellow moon paper as a new layer/right click/new mask layer/from image/select mask/invert mask data unchecked/ok/layers/merge/merge group.


Paste yellow star frame as a new layer/resize 50%/move mask layer to the left of the frame/layers/duplicate/image/mirror/flip/right click on copy mask layer/merge/merge down.


Click inside frame with your magicwand/selections/modify/expand by 7.


Paste bluestar pattern paper under frame/selections/invert/delete.


Paste tube/position/delete/deselect/dropshadow.


Hide white background layer/layers/merge/merge visible/dropshadow/unhide layer.


Paste blueheart cloud as a new layer/resize 50%/position/dropshadow.


Paste dark blue glitterheart as a new layer/resize 50%/edit/repeat resize/position/dropshadow.


Paste yellow glitter filled moon/repeat last steps.


Paste butterfly3 as a new layer/resize 67%/edit/repeat resize/position/layers/duplicate 2 times/position/dropshadow.


Paste tube/position/dropshadow.


Layers/merge/merge visible.


Image/resize all layers 12%


Add copyrights.


Add name.


Save.


For my name I used the blue yellow moon paper for fill/white on foreground.


Hope you enjoyed my tut,would love to see your results.


Email me


Hugs,Mary

Tuesday, August 25

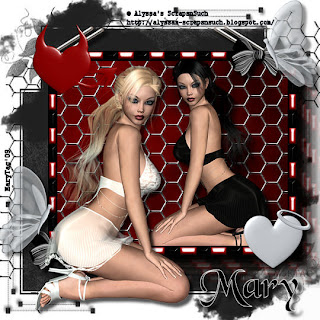
Good Vs Evil


Scrapkit is Good Vs Evil from Alyssa's Scraps&Such here and you can purchase this kit here. This is one awesome kit,thank you Alyssa!!
Mask of choice.

MuRa's Meister/Copies(optional)

Font of choice,I am using is Black Chancery here
-This tutorial was written assuming you have working knowledge of PSP-

Dropshadow for entire tut:
Vertical 7
Horizonal 7
Opacity 66
Blur 6

Open mask,minimize.

 
Open a new 600x600 white image.

Paste paper13 as a new layer/right click/new mask layer/from image/select mask/ok/layers/merge/merge group.

Paste wire2 below mask layer.

Paste frame3 as a new layer/resize 33%/position.

Click inside the frame with your magicwand/selections/modify/expand by 6.
Paste paper20 as a new layer under frame layer/selections/invert/delete.
Paste wire1/delete.

Paste Miss Evil as a new layer/resize 50%/delete/deselect/dropshadow.
Hide background,mask and wire layers/layers/merge/merge visible/same dropshadow/unhide layers.

Paste dark cloud as a new layer below frame layer/position/duplicate/position.
Highlight merged frame layer/effects/copies/settings:

Afterimage(linear)
Line
Tile Mode
Behind
BG Color:Black
Number 8
ShiftX 20
ShiftY 20
Angle 0
Rotation 0
Attenuation -100
Scale 100
FadeOut 100

 
Paste staples as a new layer/resize 10%/use your pick tool to slant the staples to the right/layers/duplicate/image/mirror/position/dropshadow.

Paste angelheart2/resize 67%/position/dropshadow.

Repeat with devilheart2.

Paste bow6 as a new layer/resize 50%/layers/duplicate/position/dropshadow.

Paste Miss Good as a new layer/resize 40%/position/dropshadow.

Paste butterfly5 as a new layer/resize 67%/position/duplicate/position copy/dropshadow.

Layers/merge/merge/visible.

Image/resize all layers 10%.

Add copyrights.

Add name.

Save.
Hope you enjoyed my tut,would love to see your results.
Hugs,Mary

Fairly Maelynne


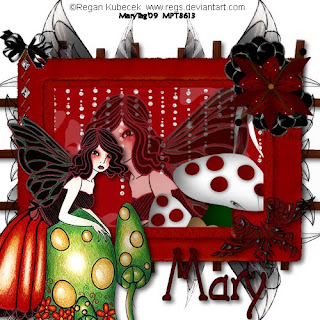
Tube of choice,I am using Reagan Kubecek,which is a FTU tube from here,but you will still need a license# in order to use it.

Scrapkit is Fairly Maelynne from Shani at Wicked Princess Scraps here and you can purchase the kit here. This kit is awesome,packed full of goodies! Thank you Shani!

Font of choice,I am using Grasshopper here
-This tutorial was written assuming you have working knowledge of PSP-

Dropshadow for entire tut:
Vertical 4
Horizonal 4
Opacity 57
Blur 9

Paste frame2/click inside frame with your magicwand/selections/modify/expand by 7.

Paste paper33 as a new layer under the frame layer/resize 40%/selections/invert/delete.

Paste blingrain6 as a new layer/position/delete.

Paste tube as a new layer/position/delete/right click/properties/opacity/65.
Paste toadstool2 as a new layer/resize 60%/position/delete/deselect/dropshadow.

Hide white background layer/layers/merge/merge visible/dropshadow/unhide layer.

Paste charm3 as a new layer/resize 50%/position/dropshadow.

Paste fence as a new layer below frame layer/resize 10%/dropshadow.

Paste wings2 as a new layer below frame layer/using pick tool,bring up to the left side of the frame/layers/duplicate 3 times/position around the frame as shown.

 
Paste flower10 as a new layer/resize 50%/edit/repeat resize/layers/duplicate/position/dropshadow.

Paste flower18 as a new layer/resize 7-%/position/dropshadow.

Paste tube/position/dropshadow.

Paste butterfly5 as a new layer/resize 60%/position/dropshadow.

Layers/merge/merge visible.

Add copyrights.

Add name.

Save.

 
For my name,I used paper46 for the fill/black on the foreground.
Hope you enjoyed my tut,would love to see your results.
Hugs,Mary

Blue Sky Mine


Scrapkit is Blue Sky Mine from KiKeKa Kits/Crafted by Gina here and be purchased here. This is such an adorable kit,love it! Thank you Gina!!

Mask of choice,I am using Vix_mask14 here. Thank you Vix!

Font of choice,I am using Matisse ITC,came with my psp program.
-This tutorial was written assuming you have working knowledge of PSP-

Open mask,minimize.

 
Open a new 600x400 white image.

Paste paper13/right click/new mask layer/from image/select your mask/invert mask data unchecked/ok/layers/merge/merge group/layers/duplicate/image/mirror/position.
Paste frame cluster as a new layer/resize 15%.

Click inside each section of the frame/selections/modify/expand by 5.

Paste blue sky hill as a new layer under frame/resize 10%/position/selections/invert/delete.

Paste the tree as a new layer/resize 50%/delete.

Paste the house as a new layer/resize 50%/position/deselect/apply dropshadow to tree&house layers:
Vertical 5
Horizonal 5
Opacity 60
Blur 11

Hide white background&mask layer/layers/merge/merge visible/same dropshadow/unhide layers.

Paste rainbow below frame/position/dropshadow:
Vertical 4
Horizonal 4
Opacity 62
Blur 10

Paste the sun as a new layer/resize 50%/position/same dropshadow.

Paste boy as a new layer/resize 33%/position/dropshadow
Vertical 6
Horizonal 6
Opacity 58
Blur 10

Repeat with girl2.

Paste bird2 as a new layer/resize 50%/edit/repeat resize/position/same dropshadow.

Paste butterfly4 as a new layer/resize 50%/edit/repeat resize/layers/duplicate 2 times/position each butterfly/same dropshadow.

Layers/merge/merge visible.

Image/resize all layers 5%.

Add copyrights.

Add name.

Save.

For my name,I used paper1 for fill/black on foreground.
Hope you enjoyed my tut,would love to see your results.

Hugs,Mary

Comfort


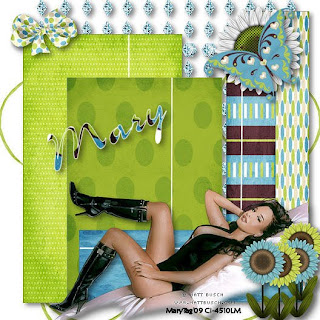
Tubes of choice,I am using Matt Busch,which you can purchase here,do not use unless you have a license to do so.

Scrapkit is My Comforter from Melissa here and you can purchase this kit here. I love the colors in this kit,thank you Melissa!!

Template of choice,I am using template36 from Bev at HorsePlays Pasture here. Thank you Bevie!

Font of choice,I am using AL Dreamboat here
-This tutorial was written assuming you have working knowledge of PSP-

Dropshadow for entire tut:
Vertical 5
Horizonal 5
Opacity 50
Blur 13

 
Open template,hit shiftD,close the orginal,delete copyright layer.

Highlight rec1/selections/select all/float/defloat.

Paste paper7 into selections(under edit)/deselect.

Repeat with rec2 using paper11/rec3 using paper1/rec4 using paper3 and horizonal rec using paper10.

Paste tube of choice/position/dropshadow.

Paste bow2 as a new layer/resize 50%/edit/repeat resize/position/dropshadow.
Paste diamond curtains as a new layer below all layers/position.

Paste sunflower6 as a new layer/resize 67%/position/dropshadow.

Paste butterfly1 as a new layer/resize 67%/position/dropshadow.

Paste sunflower3 as a new layer/resize 70%/layers/duplicate/position/dropshadow.

Repeat with sunflower1.

Hide white background layer/layers/merge/merge visible/dropshadow/unhide layer.

Paste rope element2 below merged layer/positionduplicate/image/mirror.
Layers/merge/merge visible.

Image/resize all layers 12%.

Add copyrights.

Add name.

Save.

For my name,I used paper2 for the fill/black on the foreground.
Hope you enjoyed my tut,would love to see your results.

Hugs,Mary

Saturday, August 22

Autumn Dreams


Tube of choice,I am using Karen Middleton,which you can purchase here,do not use unless you have a license to do so.

Scrapkit is An Autumn Romance from Alyssa's Scrap&Such here and can be purchased here. I love this kit,the colors are awesome!! Thank you Alyssa :)

Font of choice,I am using Autumn Nights here
-This tutorial was written assuming you have working knowledge of PSP-

Open a new white 600x600 image/paste ribbon frame1 as a new layer/resize 20%.

Click inside frame with your magicwand/selections/modify/expand by 4.
Paste paper9 below the frame layer/selections/invert/delete.

Paste tube of choice/position/delete/deselect/dropshadow
Vertical 6
Horizonal 6
Opacity 61
Blur 10

Hide white background layer/layers/merge/merge visible/same dropshadow/unhide layer.

Paste leaf4/position/layers/duplicate/image/mirror.

Paste swirly2/resize 50%/position/layers/duplicate 4 times/position each layer.
Paste bow4/resize 62%/position/dropshadow

Vertical 5
Horizonal 5
Opacity 55
Blur 8

Paste butterfly2 as a new layer/resize 62%/layers/duplicate/position/same dropshadow.

Paste sunflower as a new layer/resize 65%/position/layers/duplicate/position/same dropshadow.
 
Layers/merge/merge visible.

Image/resize all layers 10%.
Add copyrights.

Add name.

Save.

For my name,I used paper8 for the fill/black on foreground.

Hope you enjoyed my tut,would love to see your results.


Hugs,Mary

Frosted Velvet


Tube of choice,I am using Ida Larsen,which you can purchase here,do not use unless you have a license to do so.


Scrapkit is Frosted Velvet and you can purchase this kit from Dee at Dmg Designs here. This kit is beautiful,and my fav color lol Thank you Dee!!


Mask of choice.


Font of choice,I am using Gruenewald here


-This tutorial was written assuming you have working knowledge of PSP-


Dropshadow for entire tut:
Vertical 4
Horizonal 4
Opacity 67
Blur 11


Open mask,minimize.


Open a new 600x600 white image.


Paste paper3 as a new layer/right click/new mask layer/from image/select mask/ok/layers/merge/merge group.


Paste frame14 as a new layer/click inside frame with magicwand/selections/modify/expand by 7.


Paste paper10 as a new layer under frame/selections/invert/delete.


Paste tube of choice/delete/deselect/dropshadow.


Hide mask and background layers/layers/merge/merge visible/dropshadow/unhide layers.


Paste charm1 as a new layer/resize 58%/position/dropshadow.


Paste embellishment3 as a new layer below frame layer/resize 58%/use your pick tool to position to the left of the tag/layers/duplicate 5 times/position.


Moving up top/paste butterfly3 as a new layer/resize 71%/position/layers/duplicate/position/dropshadow.


Layers/merge/merge visible.


Image/resize all layers 10%.


Add copyrights.


Add name.


Save.


For my name,I used paper9 for fill/white on foreground.


Hope you enjoyed my tut,would love to see your results.


Email me


Hugs,Mary

Wednesday, August 19

My Grungy Crimson Heart


Scrapkit is My Grungy Crimson Heart from Terry's Treasures here and you can purchase this kit here. I so love this kit,wish I could use everything on one tag lol
Thank you Terry-its awesome!!

Mask of choice,I am using Vix_mask84 here

Font of choice,I am using Astigma Regular here
-This tutorial was written assuming you have working knowledge of PSP-
Dropshadow for entire tut:
Vertical 7
Horizonal 7
Opacity 70
Blur 11

Open mask,minimize.

Open a new 600x600 white image/paste paper9 as a new layer/right click on paper layer/new mask layer/from image/choose mask of choice/invert mask data unchecked/ok/layers/merge/merge group.

Paste frame2/hide mask layer/click inside frame with your magicwand/selections/modify/expand by 6.

Paste paper23 under frame layer as a new layer/selections/invert/delete/unhide mask layer.

Paste goth doll2/position/delete/deselect/dropshadow.

Hide mask and white background layer/layers/merge/merge visible/unhide layers.

Move merge layers to the right of the tag alittle.

Paste doodle6 as a new layer below merged layers/position to the left of the tag/layers/duplicate/image/flip/mirror.

Paste tag2 as a new layer/resize 40%/position/dropshadow.

Paste heartpin2 as a new layer/resize 15%/position/dropshadow.

Paste flower clip2/resize 50%/position/dropshadow.

Paste heart1 as a new layer/resize 50%/position/dropshadow.

Paste goth doll3/position/dropshadow.

Layers/merge/merge visible/image/resize all layers 12%.

Add copyrights.

Add name.

Save.

 
For my name,I used paper22 for fill/white on foreground.
Hope you enjoyed my tut,would love to see your results.

Hugs,Mary

Punk Rocker Chic

Photobucket

Tube of choice,I am using Brian Rood,which you can purchase here,do not use unless you have a license to do so.

Scrapkit is Punk Rocker Chic from Hippiedaze,check out her blogs here and here. This kit rocks Susan,thank you!!!

Template of choice,I am using Bev's template38,check out her blog for many awesome templates here. Thank you Bevie!

Mask of choice,I am using ButterflyFlutterby Creations mask68 here

Font of choice,I am using Angelic War here
Animation Shop(AS)
-This tutorial was written assuming you have working knowledge of PSP-

Dropshadow for entire tut:
Vertical 7
Horizonal 7
Opacity 57
Blur 8

 
Open template,hit shiftD,close the orginal and delete the copyrights from the one you are using.

Highlight the background layer/paste paper37 as a new layer/right click/new mask layer/from image/select mask/ok/layers/merge/merge group.

Using your move tool,position the mask to the left,top of the tag.

Highlight rec layer/selections/select all/float/defloat/paste paper47 as a new layer/selections/invert/delete/deselect/right click/merge/merge paper down to rec layer.

Paste tube of choice/using the eraser tool,erase any of the tube going off of the rec paper layer/right click/merge/merge down to paper rec layer only(I had to move my tube down in order to do this)/dropshadow/move to top.

 
Highlight stars layer/selections/select all/float/defloat/paste paper20 as a new layer/selections/invert/delete.

Highlight stars layer again/click inside stars with your magicwand/paste paper19 into selection(edit)/deselect/merge star layers.

Merge both staple layers/dropshadow.

Paste element32(music notes)/resize 50%/position/layers/duplicate/image/mirror/dropshadow to both layers.

Paste element41(circle tag)/resize 50%/position/dropshadow.

Highlight stars layer/layers/merge/merge down to mask layer. Layers/duplicate 2 times/rename layers mask1,mask2 and mask3.

Add copyrights.

Add name.

*For my name,I used paper45 for fill/black on foreground.

Image/resize all layers 12%.

Highlight mask layer1/effects/illumination/lights/settings:

light source:
darkness 83
color of choice
intensity 30
Direction 200
Horizonal 5
Vertical -87
Scale 10
Smoothness 28
Cone Size 45
Asymmetry 500

Highlight mask2/repeat effects,changing intensity to 33/repeat for mask3/intensity 36.

Highlight mask1/hide 2&3/edit/copy merged/take to AS/paste as a new animation.

Hide mask1 layer/highlight&inhide mask2 layer/edit/copy merged/paste in AS after current frame.

Repeat for mask3 layer.

Save as gif in AS.
Hope you enjoyed my tut,would love to see your results.
Hugs,Mary

Serenity


Scrapkit is Serenity from Staceys Designs here and can be purchased here. Love the colors and the 2 posers! Thank you Stacey!


Template of choice,I am using Missys template 47 here
Mask of choice.

Font of choice,I am using Maiandra GD,came with my psp program.
-This tutorial was written assuming you have working knowledge of PSP-

Open template of choicel,hit shiftD,close the orginal template and delete the copyright info from the template copy.

Open paper10,minimize.

Right click on your color palet/pattern/choose paper/using your flood fill tool,fill both rounded edge rectangle layers.

Right click on the top rounded rdge rectangle/merge/merge down/dropshadow
Vertical 4
Horizonal 4
Opacity 53
Blur 7

Open paper21,minimize/Hightlight frame1/flood fill with paper21. Repeat on frame 2&3.

Highlight frame background1/flood fill white. Repeat with frame background 2&3.

Right click on frames 1,2 and 3/arrange/move up top/right click on frame background 3/merge/merge down to frame background 1/selections/select all/float/defloat/paste fairie poser as a new layer/resize 30%/position/selections/invert/delete/deselect/dropshadow

Vertical 5
Horizonal 5
Opacity 57
Blur 8

Hide rounded edge rectangle layer and white background layer/layers/merge/merge visible/same dropshadow/unhide layers.

Paste paper1 right above white background layer/right click/new mask layer/from image/invert mask data unchecked/ok/layers/merge/merge group/image/resize 30%.

Using your move tool,move mask layer right about tag/layers/duplicate/image/flip.

Paste beads and heart hanging as a new layer/resize 50%/position/dropshadow

Vertical 7
Horizonal 7
Opacity 55
Blur 9

Paste the bow as a new layer/resize 56%/edit/repeat resize/position/layers/duplicate/image/mirror/position/same dropshadow.

Paste decorative flower as a new layer/resize 60%/edit/repeat resize/position/layers/duplicate 3 times/position/dropshadow

Vertical 6
Horizonal 6
Opacity 60
Blur 10

Paste the poser/resize 30%/position/same dropshadow.

Layers/merge/merge visible.

Add copyrights.

Add name.

Save.

For my name,I used paper21 for fill/white on foreground.
Hope you enjoyed my tut,would love to see your results.
Hugs,Mary

My Fantasy


Scrapkit is My Fantasy,a freebie from Kissy at Taggin AngelsNScraps here. This is such a beautiful kit Kissy,thank you!!

Mask of choice.

Font of choice.
-This tutorial was written assuming you have working knowledge of PSP-

Dropshadow for entire tut:
Vertical 4
Horizonal 4
Opacity 51
Blur 11
 

Remember to save often :)

Open polaroid1,hit shiftD,close the orginal.

Layers/new raster layer/right click/arrange/send to bottom.

Paste paper5 below polaroid layer/right click/new mask layer/from image/select mask/ok/layers/merge/merge group/flood fill very bottom layer white.

Click inside the polaroid with your magicwand/paste paper2 as a new layer/resize 30%/selections/invert/delete.

Paste the cinderella carriage/resize 15%/position/delete.

Paste KIK5/position/delete/deselect.

Apply dropshadow to layers(optional)

Hide mask and background layer/layers/merge/merge visible/unhide layers.

Paste bead doodle below frame layer/resize 10%/position.

Paste wand/resize 50/position/dropshadow.

Paste lily/resize 50%/position/layers/duplicate 1 time/image/mirror/dropshadow to both layers.

Paste belle as a new layer/position/dropshadow.

 
Layers/merge/merge visible/image/resize all layers 10%.
Add copyrights.

Add name.

Save.

For my name,I used paper5 for fill/black on foreground.
Hope you enjoyed my tut,would love to see your results.
Hugs,Mary

Tuesday, August 18

Simply Sassy-N-Pink


Tubes of choice,I am using Oren Kramek,which you can purchase here,do not use unless you have a license to do so.


Scrapkit is Simply Sassy from Shani at Wicked Princess Scraps here and you can purchase this kit here. Love this kit Shani,thank you!


Template of choice,I am using Kirsty's Misfit Template 6 here. Awesome Kirsty,thank you!


Mask of choice,I am using WSL38 from Chelle here


Font of choice,I am using Aquarelle here


-This tutorial was written assuming you have working knowledge of PSP-


Open your template of choice.hit shiftD,close the orginal,delete the copyright layer.


Layers/new raster layer/right click/arrange/send to bottom.


Paste paper2 above your new layer/right click/new mask layer/from image/invert mask data unchecked/ok/layers/merge/merge group.


Flood fill very bottom raster layer white.


Highlight glow layer/dropshadow

Vertical 8
Horizonal 8
Opacity 67
Blur 7


Highlight big heart layer/selections/select all/float/defloat/paste paper19 as a new layer/selections/invert/delete.


Paste tube/position/delete/deselect.


Right click on tube layer/merge/merge down to big heart layer/dropshadow

Vertical 3
Horizonal 3
Opacity 48
Blur 11


Paste babysbreath below merge layer/resize 20%/layers/duplicate 2 times/position.


Paste glitter2 right about babysbreath copy2/position/layers/duplicate 1 time/position.


Paste bow5 as a new layer/resize 67%/position/layers/duplicate 2 times/position/same dropshadow.


Paste butterfly11 as a new layer/resize 42%/layers/duplicate 1 time/position/dropshadow

Vertical 4
Horizonal 4
Opacity 50
Blur 9
 

Paste crown4 as a new layer/resize 54%/position/same dropshadow.


Paste heart1 as a new layer/resize 50%/same dropshadow.


Layers/merge/merge visible/image/resize all layers 5%.


Add copyrights.


Add name.


Save.
 

For my name,I used paper2 for fill and paper3 for the foreground.


Hope you enjoyed my tut,would love to see your results.


Email me


Hugs,Mary

Call Of The Wild


Tube of choice,I am using Jay Trembly,which you can purchase here,do not use unless you have a license to do so.


Scrapkit is The Great Outdoors from Alyssa's Scraps and Such here and can be purchased here. This kit is so cool Alyssa,thank you!


Font of choice,I am using Kolibri here.


-This tutorial was written assuming you have working knowledge of PSP-


Dropshadow for entire tut:
Vertical 6
Horizonal 6
Opacity 58
Blur 9


Open a new 700x700 white image.


Paste frame2 as a new layer/resize 10%.


Click inside frame with your magicwand/selections/modify/expand by 6/paste paper6 under frame layer as a new layer/selections/invert/delete.


Paste tree2/resize 20%/delete.


Paste tube of choice/position/delete/deselect/dropshadow.


Paste ax as a new layer/resize 50%/position/dropshadow.


Paste wolf as a new layer/resize 30%/position/dropshadow.


Paste bow6 as a new layer/resize 50%/position/dropshadow.


Paste bird1 as a new layer/resize 50%/position/dropshadow.


Hide white background layer/layers/merge/merge visible/unhide layer.


Highlight background layer/paste doodle2/layers/duplicate 2 times/position all layers/right click on 2nd copy layer/merge/merge down to first doodle.


Layers/duplicate/image/mirror.


Paste butterfly2 as a new layer/resize 65%/position/layers/duplicate/image/mirror/position/dropshadow.


Layers/merge/merge visible/image/resize all layers 25%.


Add copyrights.


Add name.


Save.


Hope you enjoyed my tut,would love to see your results.


Email me


Hugs,Mary

Monday, August 17

Autumn Beauty


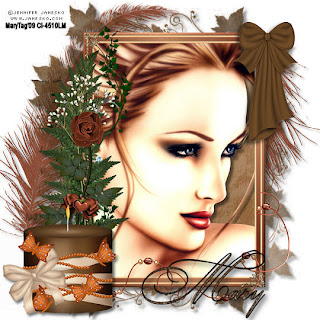
Tube of choice,I am using Jennifer Janesko,which you can purchase here,do not use unless you have a license to do so.

Scrapkit is Autumn Beauty(PTU) from Dee at Dmg Designs here. This kit is stunning,perfect for autumn! Thank you Dee!!

Mask of choice,I am using Vix_Mask 238 here

Script font of choice

-This tutorial was written assuming you have working knowledge of PSP-

Open mask,minimize.

Open a new 600x600 white image.

Paste paper14/right click/new mask layer/from image/select mask/invert mask data unchecked/ok/layers/merge/merge group.

Paste frame2/position/move mask layer slightly above frame/layers/duplicate/image/flip/right click on top mask layer/merge/merge down.

Hide mask layer/click inside frame using your magicwand/selections/modify/expand by 8/paste paper5 as a new layer under frame layer/selections/invert/delete.

Paste tube of choice/position/dropshadow

Vertical 6
Horizonal 6
Opacity 47
Blur 6

Unhide mask layer/hide white background layer/layers/merge/merge visible/same dropshadow/unhide layer.

Paste candle4/resize 50%/dropshadow
Vertical 4
Horizonal 4
Opacity 55
Blur 7

Paste feather3/position/layers/duplicate/image/mirror/flip/position/same dropshadow.

Paste bow6/resize 50%/position/dropshadow

Vertical 5
Horizonal 5
Opacity 60
Blur 11

Paste bead doodle3/position/same dropshadow.

Layers/merge/merge visible.

Image/resize all layers 10%.

Add copyrights.

Add name.

Save.

 
For my name,I used paper10 for fill/black on foreground.
Hope you enjoyed my tut,would love to see your results.

Hugs,Mary
Sunday, August 16

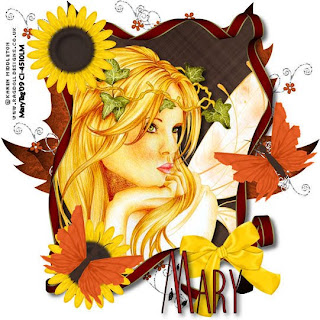
I Miss Your Kisses(In The Dark)


Tubes of choice,I am using Keith Garvey,which you can purchase here,do not use unless you have a license to do so.

Scrapkit is Kisses In The Dark(FTU) from Gina of Crafted By Gina here. This is a gorgeous kit,thank you Gina!!

My Wordart(optional) here.

Font of choice,I am ujsing Copperplate Gothic Light,came with my psp program.
-This tutorial was written assuming you have working knowledge of PSP-

Dropshadow for entire tut
Vertical 5
Horizonal 5
Opacity 65
Blur 9
 
 
Open a new 600x600 white image/paste frame1/image/resize 20%.

Click inside frame with your magicwand/selections/modify/expand by 6/paste paper7 under frame layer as a new layer/selections/invert/delete/right click/properties/opacity to 80.

Paste tube of choice/position/delete/right click//properties/opacity to 80.
Paste moon&stars/resize 50%/position/dropshadow.

Paste 2nd tube of choice/position/delete/deselect/dropshadow.

Hide background layer/layers/merge/merge visible/dropshadow/unhide layer.

Paste heart1/resize 33%position/dropshadow.

Paste bow3 as a new layer/image/flip/resize 33%/layers/duplicate/image/mirror/dropshadow.

Paste branch1/resize 50%/layers/duplicate/position/dropshadow.

Paste flower2/resize 67%/position/repeat with flower1/dropshadow.

Paste bling2 below merged frame layer/resize 50%/move to the left side of the tag/layers/duplicate 7 times/position/right click on layer7/merge/merge down to first bling layer/dropshadow.

 
Paste my wordart/position/dropshadow.
Layers/merge/merge visible/image/resize all layers 10%.

Add copyrights.

Add name.

Save.
Hope you enjoyed my tut,would love to see your results.

Hugs,Mary
Saturday, August 15

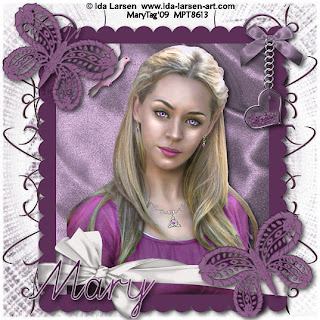
Daisy Blue


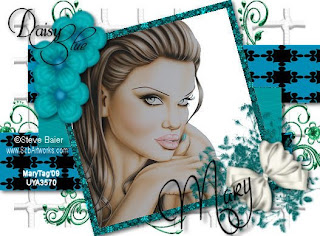
Tube of choice,I am using Steve Baier,which you can purchase here,do not use unless you have a license to do so.

Scrapkit is from Starving Artist Collab from Kissy at Taggin AngelsnScrap here and can be purchased here.

Template of choice,I am using Yvette's template 13 here

My wordart(optional) here


Script font of choice.
-This tutorial was written assuming you have working knowledge of PSP-

Dropshadow for entire tut:
Vertical 3
Horizonal 3
Opacity 65
Blur 9

 
Open template,hit shiftD,close the orginal and delete copyright info from the template.

 
Using your magicwand,click black rectangles/paste paper13 into the selection(edit)/deselect.

Magicwand/click the gray rectangle/paste paper8 into selection/deselect.
 
Magicwand/the outer edge of the square(frame)/paste paper10 into selection/deselect.

Magicwand/click inside large sqaure/flood fill white/paste tube as a new layer/position/selections/invert/delete/deselect.

Right click on tube layer/merge/merge down/dropshadow.

 
Paste leafy2glass/resize 40%/layers/duplicate/position/right click/merge/merge down/layers/paste leafy2glass/resize/image/flip/dropshadow.

Paste bow2/resize 40%/edit/repeat resize/position/dropshadow.

Highlight background layer/paste netting3 as a new layer/position.

Paste silver diamond doodle2/resize 50%/position/layers/duplicate/image/mirror/layers/duplicate/image/mirror/move down.

Moving up top/paste flower1/resize 50%/edit/repeat resize 2 times/position/layers/duplicate 2 times/position/dropshadow.

Paste my wordart/resize 40%/position/dropshadow.

Layers/merge/merge visible.

Add copyrights.

Add name.

Save.
Hope you enjoyed my tut,would love to see your results.

Hugs,Mary
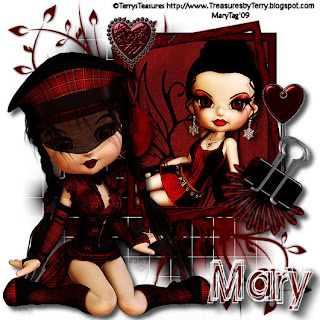
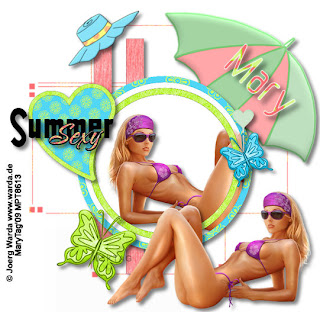
Summer Sexy


Tube of choice,I am using Joerg Warda,which you can purchase here,do not use unless you have a license to do so.

Scrapkit is Summer Heat from Hippiedaze,check out her blogs here and here. Love this kit,thank you Susan!!

Template of choice,I am using template82 from Blissfully Beth here. Thank you for the awesome templates!

Mask of choice,I am using Vixmask 231 here.

Font of choice,I am using SpaghettiniIkasumi here
-This tutorial was written assuming you have working knowledge of PSP-

Dropshadow for entire tut:
Vertical 7
Horizonal 7
Opacity 50
Blur 12
 
 
Open mask,minimize.

Open template,hit shiftD,close the orginal and delete copyright info.

Paste paper5 as a new layer/right click/new mask layer/from image/select mask/invert mask data unchecked/ok/layers/merge/merge group.

Highlight layer2/selections/select all/float/defloat/paste paper9 into selection(under edit)/deselect/repeat for layer1/right click on layer1/merge/merge down with layer2/dropshadow.

 
Highlight grey circle/flood fill white.

Highlight blue circle frame/selections/select all/float/defloat/paste paper3 into selections/deselect.

Repeat on the heart layer.

Highlight the black circle/selections/select all/float/defloat/papste paper10 into selection.

Repeat on heart frame layer.

Right click on heart frame/merge/merge down with heart/dropshadow.

Highlight the grey(now white)circle/selections/select all/float/defloat/paste tube as a new layer/position/selections/invert/delete/deselect/dropshadow.
Highlight black layer(now colorized)/right click/merge/merge down to white(grey)circle/dropshadow.

Paste butterfly3 as a new layer/resize 25%/position/dropshadow.

Paste hat2 as a new layer/resize 40%/edit/repeat resize/position/droshadow.

Paste umbrella1 as a new layer below merged circle layer/dropshadow.
Paste lolly2 as a new layer/resize 50%/edit/repeat resize/position/dropshadow.
Paste butterfly4 as a new layer/resize 50%/position/dropshadow.

Paste tube/position/dropshadow.

Highlight the summer sexy wordart/using your magicwand,click inside all the letters on sexy/paste paper2 into selections/position/deselect/dropshadow.
Layers/merge/merge visible/image/resize all layers 30%

Add copyrights

Add name.

Save.

For my name,I used paper2 for fill/white for the foreground.
Hope you enjoyed my tut,would love to see your results.

Hugs,Mary

Friday, August 14

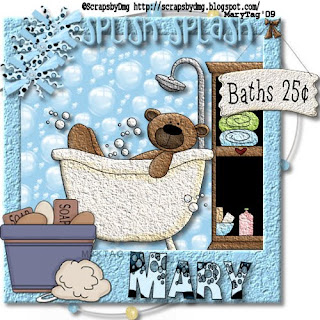
Splish Splash Bear


Scrapkit is Bathtime Fun,a freebie from Dee at Dmg Designs here,this is just the cutest kit! Thank you Dee!

Font of choice,I am using Bubble Man here
-This tutorial was written assuming you have working knowledge of PSP-

Dropshadow for entire tut:
Vertical 5
Horizonal 5
Opacity 52
Blur 8

Open a new white 500x500 image/paste frame3 as a new layer/click inside frame with your magicwand/selections/modify/expand by 5%.
 
Paste paper11 under frame/resize 10%/selections/invert/delete.

Paste bathtime bear3 as a new layer/resize 25%/position/delete/deselect/dropshadow.

 
Hide white background layer/layers/merge/merge visible all other layers/dropshadow/unhide layer.

Paste ribbonflower4 as a new layer/resize 40%/edit/repeat resize 2 times/position/layers/duplicate 2 times/position/dropshadow.

Paste swirlybeads1 below frame layer/using your pick tool,position to the right of the tag/layers/duplicate/using the pick tool again,position the beads/dropshadow to both layers.

Paste wordart1 as a new layer/resize 40%/position/dropshadow.

Layers/merge/merge visible.

Add copyrights

Add name.

Save.

For my name,I used paper12 for fill/black on the foreground.
Hope you enjoyed my tut,would love to see your results.

Hugs,Mary
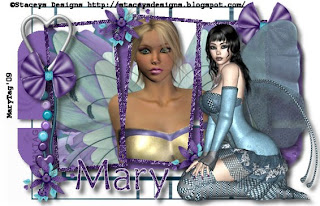
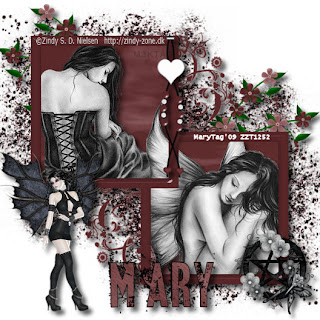
Gothic Rose


Tubes of choice,I am using Zindy,1 PTU,which you will need a license to use and one FTU you can get both here.

Scrapkit is Gothic Rose,you can purchase this kit from Dee at Dmg Designs here. I love this kit,it will bring out the gothic in you! Thank you Dee!!

Font of choice,I am using Bluebaby here
-This tutorial was written assuming you have working knowledge of PSP-

Dropshadow for entire tut:
Vertical 7
Horizonal 7
Opacity 64
Blur 11

Open a new white 600x600 image,paste frame6 as a new layer/click inside frame with your magicwand/selections/modify/expand by 4/paste paper7 under frame layer/selections/invert/delete.

Paste first tube in the frame/psotion/delete/repeat with second tube/deselect/dropshadow.

Highlight frame layer/right click/merge/merge down to paper layer/dropshadow.

Paste flower1 below frames/image/resize 25%/position/layers/duplicate/mirror/position/dropshadow.

Paste glitter2 below flowers layer/position/layers/duplicate/image/mirror/flip.
Paste beadstring2/resize 25%/position/dropshadow.

 
Paste obd176/resize 40%/position/dropshadow.

Paste pentagram2 as a new layer/resize 60%/position/dropshadow.

 
Layers/merge/merge visible/image/resize all layers 12%

Add copyrights
Add name
Save.
Hope you enjoyed my tut,would love to see your results.

Hugs,Mary
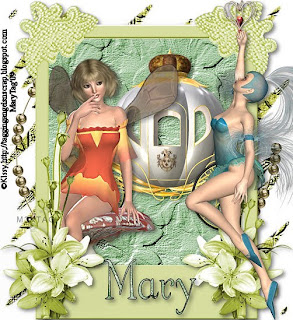
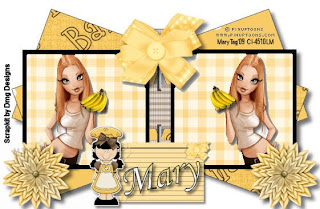
Go Banana's


Tube of choice,I am using PinUpToons,which you can purchase here,do not use unless you have a license to do so.


Scrapkit is Banana Cream Pie,a freebie by Dee at Dmg Designs here. This kit is so adorable,perfect for so many things! Thank you Dee!


Template of choice,I am using template77 by Ali here. Thank you Ali!


Font of choice,I am using Monotype Corsiva,came with my psp program.


-This tutorial was written assuming you have working knowledge of PSP-


Open template,hit shiftD,close the orginal,delete copyright info layer.


Using your magicwand,click on back shape 4/paste paper 2 as a new layer/selections/invert/delete/deselct/highlight back shape 1/magicwand/paste same paper as a new layer/selections/invert/delete/deselect.


Repeat last steps for back shape 2&3,using paper 5


Hightlight black middle boxes/selections/select all/float/defloat/paste paper4 into selection/deselect.


Hightlight shape1/selections/select all/float/defloat/paste paper2 as a new layer/selections/invert/delete/repeat for shape2


Hightlight frame1/flood fill black/repeat for frame 2.


Back to shape2/selections/select all/float/defloat/paste tube as a new layer/position/selections/invert/delete/deselect/layers/duplicate/image/mirror/dropshadow

Vertical 5
Horizonal 5
Opacity 60
Blur 9


Paste banana bunch/image/resize 65%/layers/duplicate/image/mirrir/same dropshadow.


Layers/new raster layer/right click/arrange/send to bottom/flood fill white/hide layer/merge all other layers visible/unhide layer/dropshadow

Vertical 8
Horizonal 8
Opacity 55
Blur 12


Paste bow1 as a new layer/image/resize 50%/position/same dropshadow.


Paste flower1 as a new layer/image/resize 65%/position/layers/duplicate/image/mirror/same dropshadow.


Paste recipe card 2/image/resize 65%/position/dropshadow


Vertical 4
Horizonal 4
Opacity 50
Blur 6


Paste girl1/image/resize 40%/edit/repeat resize/position/same dropshadow.


Layers/merge/merge visible/image/resize all layers 20%.


Add copyrights


Add name


Save.


Hope you enjoyed my tut,would love to see your results.


Hugs,Mary
Wednesday, August 12

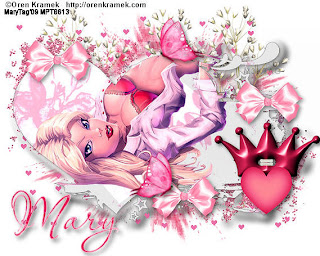
My Fairytale


Tube of choice,I am using Rebecca Cox,which you can purchase here,do not use unless you have a license to do so.

Scrapkit is My Fairytale from Terry's Treasures here and you can purchase it here. This kit is so awesome,a true fairytale! Thank you Terry!

Mask of choice,I am using WSL50 from Chelle here

Font of choice,I am using Astonished here
-This tutorial was written assuming you have working knowledge of PSP-

Dropshadow for entire tut:
Vertical 5
Horizonal 5
Opacity 52
Blur 8


Open a new 600x600 white image.

Open mask,minimize.

Paste paper8 as a new layer/right click/new mask layer/from image/select mask/invert mask data unchecked/ok/layers/merge/merge group/position/layers/duplicate/position 2 mask layer/merge both layers only.
Paste frame2 as a new layer/position to the left of the canvas/layers/duplicate/image/mirror/right click the frame copy layer/merge/merge down/hide mask layer/click inside frames with your magicwand/selections/modify/expand by 6/paste tube/position/selections/invert/delete/unhide layer.

Paste tower/resize 25%/position behind tube/delete.

Paste vine2/position/delete/deselect/layers/duplicate/position behind tower/apply dropshadows to all layers.

Hide white background layer/layers/merge/merge visible/unhide layer.
Paste tube behind frame layer/position so it lines up with the tube in the frame/using your erase tool,erase any of the tube below the bottom of the frame/dropshadow.

Highlight white background layer/paste frame 7 as a new layer/position to the left of the tag/layers/duplicate/image/mirror.

 
Going back to the top/paste flower4 as a new layer/resize 30%/position/edit/repeat resize/layers/duplicate/position/dropshadow/repeat with bow2.

Paste vine3/image/free rotate to the right 90*/resize 10%/layers/duplicate/image/mirror/dropshadow.

Paste butterfly4/resize 20%/edit/repeat resize 2 times/using pick tool/position/layers/duplicate/image/mirror/dropshadow.

Layers/merge/merge visible/image/resize all layers 15%

Add copyrights/name.

For my name,I used paper2 for fill/black for foreground
Hope you enjoyed my tut,would love to see your results.

Hugs,Mary

  © Blogger template Customization and Installation by Krissy's Scraps and Imaging 2011
Back to TOP