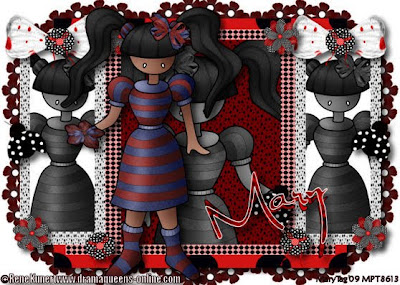
Tube of choice,I am using Rene Kunert,which you can purchase here,do not use unless you have a license to do so.
Scrapkit is Ladybug Ball from Debbie at Graphics By Poka Dot here and you can purchase it here. I so so love this kit,ladybugs are my fav!!! Thank you Debbie!!!
Template of choice,I am using template 6 from Lorne at Simply Sensational Scraps here.
Font of choice,I am using Al Sandra here.
-This tutorial was written assuming you have working knowledge of PSP-
Dropshadow for tut:
Vertical 6
Horizonal 6
Opciaty 62
Blur 10
Open template/delete credit layer.
Highlight large black rectangle/click on it with your magicwand/edit/paste paper1 into selection/deselect.
Repeat with large grey rectangle using paper 10.
Repeat on left&right black rectangles using paper 9.
Highlight right grey rectangle/flood fill white/magicwand/paste tube/resize 23% if needed/position/selections/invert/delete/deselect/effects/user defined filter/matrix modifiers 1,bias 0,grey values checked/ok.
Repeat for left grey rectangle.
Highlight center black rectangle/magicwand again/edit/paste paper 8 into selection/do not deselect.
Paste tube as a new layer/do not resize/position/selections/invert/delete/deselect/repeat used defined filter.
Hide white background layer/layers/merge/merge visible/dropshadow/unhide layer.
Paste flower frame below merged layers/resize 50%/edit/repeat resize/position with your pick tool/layers/duplicate 5 times/position around the merged layers.
Paste bow 1/resize 50%/edit/repeat resize/position to the left/layers/duplicate/image/mirror/dropshadow.
Paste bow 2/resize 50%/edit/repeat resize 3 times/layers/duplicate 3 times/position/dropshadow.
Repeat with spotted flower 2.
Repeat with black ladybug.
Paste tube/resize if needed,I resized mine 23%/position/dropshadow.
Layers/merge/merge visible.
Image/resize all layers 5%.
Add copyrights.
Add name.
*For my name,I wrote it out 2 times/ paper 4 for fill/black on the foreground on the bottom name/white on the foreground for the top name layer.
Save.
Hope you enjoyed my tut,would love to see your results.
Email me
Hugs,Mary


No comments:
Post a Comment