Sunday, November 15

Play Me A Lullaby


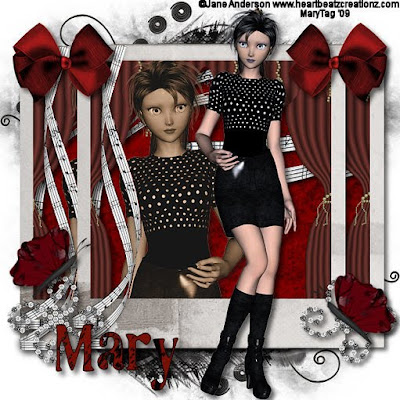
Tube is from Jay at Heartbeatz Creations and even though this tube isn't available,check out her many other awesome posers here.

Scrapkit is also from Jay,The 8th kit in her Twilight Series,Play Me A Lullaby Edward,check out her blog here and you can purchase this kit here.(at the time of this being posted,the kit is on sale!!) This kit is gorgeous Jay,just love it!! Thank you!!!!!
Mask of choice,I am using mask 159 from Insatiable Dreams here. Thank you for sharing!
Font of choice,I am using LL Cooper here.
-This tutorial was written assuming you have working knowledge of PSP-
Dropshadow for tut:
Vertical 5
Horizonal 5
Opacity 59
Blur 9

 
Open mask,minimize.

Open a new 600x600 white image.

Paste frame 2 as a new layer.

Paste paper 4 as a new layer below frame layer/right click/new mask layer/from image/select mask/ok/layers/merge/merge group/layers/duplicate 2 times/position.

Click inside your frame with the magicwand/selections/modify/expand by 6.
Paste paper 20 below frame layer/selections/invert/delete/do not deselect.
Paste element 7/position/delete/do not deselect.

Paste element 32/delete/do not deselect.

Paste tube/position/delete/deselect/apply dropshadow to last 3 layers.

Highlight tube layer/effects/photo effects/sepia toning/change settings to 80.
Hide masks layers and white background layer/layers/merge/merge visible/dropshadow/unhide layers.

Make sure merged layers is highlighted/layers/duplicate 2 times/rename 1,2 and 3/using pick tool/move layer 2 to the left alittle,layer 3 to the right and move layer 1 up top.

Right click on top layer/merge/merge down to last copy layer.

Paste element 34 below merged layers/position to the top left with your pick tool/layers/duplicate/image/mirror/image flip.

Paste element 22/resize 30%/image/free rotate to the right 90*/using pick tool position/layers/duplicate/image/flip.

Moving up top,paste element 14/resize 30%/layers/duplicate/position/dropshadow.

Paste element 42/resize 35%/layers/duplicate/position both/dropshadow.

Paste tube/resize if needed/position/dropshadow.

Paste element 37/resize 40%/edit/repeat resize/layers/duplicate/position both/dropshadow.

Layers/merge/merge visible.

Image/resize all layers 15%.

Add copyrights.

Add name.
*For my name,I used paper 9 for fill/black on foreground.

Save.
Hope you enjoyed my tut,would love to see your results.

Hugs,Mary

My Jammies


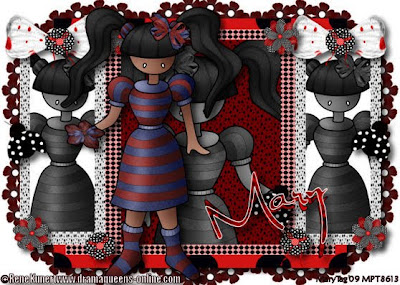
Tube of choice,I am using Rene Kunert,which you can purchase here,do not use unless you have a license to do so.

Scrapkit is Ladybug Ball from Debbie at Graphics By Poka Dot here and you can purchase it here. I so so love this kit,ladybugs are my fav!!! Thank you Debbie!!!

Template of choice,I am using template 6 from Lorne at Simply Sensational Scraps here.

Font of choice,I am using Al Sandra here.
-This tutorial was written assuming you have working knowledge of PSP-

Dropshadow for tut:
Vertical 6
Horizonal 6
Opciaty 62
Blur 10

Open template/delete credit layer.

Highlight large black rectangle/click on it with your magicwand/edit/paste paper1 into selection/deselect.

Repeat with large grey rectangle using paper 10.

Repeat on left&right black rectangles using paper 9.

Highlight right grey rectangle/flood fill white/magicwand/paste tube/resize 23% if needed/position/selections/invert/delete/deselect/effects/user defined filter/matrix modifiers 1,bias 0,grey values checked/ok.

Repeat for left grey rectangle.

Highlight center black rectangle/magicwand again/edit/paste paper 8 into selection/do not deselect.
Paste tube as a new layer/do not resize/position/selections/invert/delete/deselect/repeat used defined filter.

Hide white background layer/layers/merge/merge visible/dropshadow/unhide layer.

Paste flower frame below merged layers/resize 50%/edit/repeat resize/position with your pick tool/layers/duplicate 5 times/position around the merged layers.
Paste bow 1/resize 50%/edit/repeat resize/position to the left/layers/duplicate/image/mirror/dropshadow.

Paste bow 2/resize 50%/edit/repeat resize 3 times/layers/duplicate 3 times/position/dropshadow.

Repeat with spotted flower 2.

Repeat with black ladybug.

Paste tube/resize if needed,I resized mine 23%/position/dropshadow.

Layers/merge/merge visible.

Image/resize all layers 5%.

Add copyrights.

Add name.
*For my name,I wrote it out 2 times/ paper 4 for fill/black on the foreground on the bottom name/white on the foreground for the top name layer.

Save.
Hope you enjoyed my tut,would love to see your results.

Hugs,Mary

Friday, November 13

Noel


Tube of choice,I am using Shawli,which you can purchase here,do not use unless you have a license to do so.

Scrapkit is Noel,a freebie from Bev at HorsePlays Pasture here. Another awesome kit Bev,thank you!!

Mask of choice,I am using a mask 901 from Vix's September goodie bag here. Thank you Vix!

Font of choice,I am using Base:Christmas here.
-This tutorial was written assuming you have working knowledge of PSP-

Dropshadow for tut:
Vertical 7
Horizonal 7
Opacity 46
Blur 8

Open mask,minimize.

Open a new 500x500 white image.

Paste paper 3 as a new layer/right click/new mask layer/from image/select mask/ok/layers/merge/merge group/resize mask layer 25%/edit/repeat resize/layers/duplicate 3 times/position.

Paste frame 4/resize 15%/click inside frame with your magicwand/selections/modify/expand by 7.

Paste paper 9 below frame layer/resize 20%/edit/repeat resize/selections/invert/delete/do not deselect.

Paste dtring lights/resize 19%/position/delete/do not deselect.

Paste snowman 5/resize 20%/position/delete/deselect.

Dropshadow to snowman and string lights layers.
Apply dropshadow to frame layer 2 times.
Paste bow 5/layers/duplicate/position/dropshadow.

Paste holly berry 2/resize 50%/edit/repeat resize/layers/duplicate/position/dropshadow.

Paste present 1/resize 50%/position/dropshadow.

Repeat with candy cane.

Paste bow 6/resize 50%/edit/repeat resize/position/dropshadow.

Paste tube/position/dropshadow.
Layers/merge/merge visible.

Image/resize 5%.

Add copyrights.

Add name.
*For my name,I used paper 12 for fill/black on foreground.

Save.
Hope you enjoyed my tut,would love to see your results.

Hugs,Mary

Pink Ice


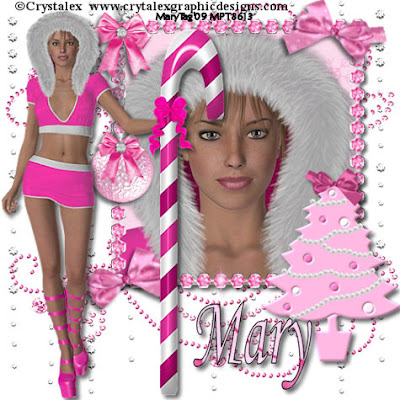
Tube of choice,I am using Crystalex,which you can purchase here,do not use unless you have a license to do so.

Scrapkit is Pink Ice,a freebie from Pink Princess Scraps here. This is such a gorgeous kit,thank you for sharing!!

Font of choice,I am using Monotype Corsiva,came with my psp program.
-This tutorial was written assuming you have working knowledge of PSP-

Dropshadow for tut:
Vertical 4
Horizonal 4
Opacity 59
Blur 7

Open element 49(frame)/image/canvas size/change to 500x500.

Layers/new raster layer/right click/arrange/send to bottom/flood fill white.

Frame fill:Paste paper 6 below frame layer/using your ereaser tool/erase all paper outisde of the frame.

Paste tube/resize if needed/erase any outside of the frame/dropshadow.

Hide white background layer/layers/merge/merge visible/dropshadow/resize 20%/position/unhide layer.

Paste element 9 below merged frame layer.

Paste element 34/resize 30%/layers/duplicate/psotion.

Moving up top/paste element 5/resize 50%/position/dropshadow.

Paste element 24(bow)/resize 50%/edit/repeat resize/layers/duplicate/position/dropshadow.

Paste element 22(tree)/resize 50%/position/dropshadow.

Paste tube/position/dropshadow.

Layers/merge/merge visible.

Image/resize all layers 5%.

Add copyrights.

Add name.

Save.
Hope you enjoyed my tut,would love to see your results.

Hugs,Mary

  © Blogger template Customization and Installation by Krissy's Scraps and Imaging 2011

Back to TOP