Saturday, July 31

Play Girls

Photobucket

2 tubes/close up of choice,I am using Keith Garvey,which you can purchase here,do not use unless you have a license to do so.

Scrapkit is Summer Playgirls by Bubble here. Thank you for the awesome kit!!

Font of choice,I am using Ariston here.
~This tutorial was written assuming you have working knowledge of PSP~

 
Open a new 550x550 transparent canvas.

Paste frame 3/resize 25%/image/flip/click inside frame with your magicwand/selections/modify/expand by 6.

Paste paper 15 below frame layer/selections/invert/delete/do not deselect.

Paste close up/resize if needed/position/delete/deselect/dropshadow of choice(use for entire tut).

Right click on frame layer/merge/merge down to paper layer/dropshadow.

Paste beads overlay below merged layers/resize 30%/layers/duplicate/position.
Paste fuzzy heart 2/resize larger by 40%/position.

Paste/position/dropshadow following:
Bow 2/resize 20%/edit/repeat resize

Bar 2/resize 20%

Bunny Diams/resize 30%/properties/change opacity to 70
Bunny heart/resize 50%
Tube(s)/resize as needed

Wordart

Image/resize all layers 10%.

Add copyrights.

Add name.

Layers/merge/merge visible.

Save.

Hope you enjoyed my tut :)

Hugs,Mary

Reflected Whispers

Photobucket

Tube of choice,I am using Myka Jelina,which you can purchase here,do not use unless you have a license to do so.

Scrapkit is Reflected Whispers by Chelle at Purple Dragonfly Creations here and you can purchase it here. Gorgeous colors in this kit,thank you Chelle!!

Font of choice.
~This tutorial was written assuming you have working knowledge of PSP~

 
Open a new 600x600 transparent image.

Paste element 23(frame) as a new layer/resize 25%.

Repeat with element 27/moving below frame layer.

Paste element 31 below layers/resize 15%.

Paste element 2/resize 50%/edit/repeat resize/layers/duplicate 1 time/position both layers.

Paste element 6/resize 60%/edit/repeat resize/layers/duplicate 3 times/position all layers.

Paste element 11/resize 70%/edit/repeat resize/layers/duplicate/position.

Paste tube/position.

Apply dropshadow of choice to all layers.

Image/resize all layers 15%.

Add copyrights.

Add name.

Layers/merge/merge visible.

Save.

Hope you enjoyed my tut :)

Hugs,Mary
Friday, July 30

Pawfully Perfect

Photobucket

Tube or image of choice,I am using Karen Middleton,which you can purchase here,do not use unless you have a license to do so.

Scrapkit is Pawfully Perfect by Stacey at Staceys Designs here and you can purchase it here. This kit is so adorable,perfect for all dog lovers!! Thank you Stacey!!

Mask of choice.

Font of choice,I am using Arista here.
~This tutorial was written assuming you have working knowledge of PSP~
 
 
Dropshadow of choice for tut.

Open mask,minimize.

Open a new 600x500 transparent canvas.

Paste bone shaped frame as a new layer/click inside center of frame/selections/modify/expand by 5.

Paste paper 14 below frame layer/resize 30%/edit/repeat resize/position/selections/invert/delete/deselect.

Highlight transparent background layer/paste paper 2/right click on layer/new mask layer/from image/ok/layers/merge/merge group/layers/duplicate 1 time/position both layers.

Paste/position/dropshadow following:

Water bowl/resize 55%

Pink bone/resize 50%/edit/repeat resize
Pink paw chain/resize 50%

Repeat with hanging heart

Repeat with rope ribbon

Paste tube/image

Brown fire hydrant/resize 50%

Pink bow/resize 55%
Image/resize all layers 12%.

Add copyrights.

Add name.

Layers/merge/merge visible.

Save.

Hope you enjoyed my tut :)

Hugs,Mary
Urban Chick

Photobucket

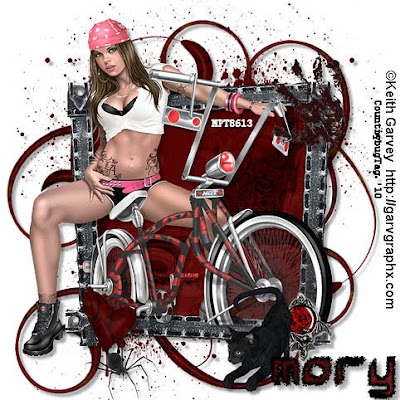
Tube of choice,I am using Keith Garvey,which you can purchase here,do not use unless you have a license to do so.

Scrapkit is Urban Chick,a freebie by Diane at Candy Treats here. Thank you for the awesome kit!

Font of choice.I am using Cumulus here.
~This tutorial was written assuming you have working knowledge of PSP~

 
Dropshadow for tut:

Vertical 7
Horizonal 1
Opacity 40
Blur 3

Open a new 550x600 transparent image/paste frame 4/image/free rotate to the right 70 degrees.

Click inside frame with your magicwand/selections/modify/expand by 5.

Paste paer 14 below frame layer/resize 25%/edit/repeat
resize/selections/invert/delete/deselect.

Paste green glitter 2 below paper layer/resize 30%/position.

Image/resize all layers 15%.

Paste bling 1 below green glitter layer/position.

Appy dropshadow to frame layer.

Paste/position/dropshadow following:

Journal page/resize 45%

Tag 4 small

Bow 1/resize 40%/edit/repeat resize

Charm 3/resize 30%

Dragonfly 2/resize 50%

Staples 2/layers/duplicate

Paste tube/postion/dropshadow/edit/repeat dropshadow.

Image/resize all layers 7%.

Add copyrights.

Add name.

Layers/merge/merge visible.

Save.

Hope you enjoyed my tut :)

Hugs,Mary

Shimmer

Photobucket

Tube of choice,I am using a ftu tube from Outlaw Designs here.

Scrapkit is Shimmer by Lisa at Aleahs Mommy Designs here and you can purchase it here. This kit is so awesome,thank you Lisa!!

Script font of choice.
~This tutorial was written assuming you have working knowledge of PSP~

Open frame 5/hit shiftD to duplicate/close orginal/image/canvas size/change to 700x700/layers/new raster layer/right click on new layer/move down.
Click inside frame with your magicwand/selections/modify/expand by 4.

Paste paper 46 below frame layer/resize 50%/position/selections/invert/delete/deselect.

Paste glitter spill 1 below paper layer/layers/duplicate 1 time/position both layers.

Paste glitter frame 3/resize 50%/layers/duplicate 1 time/position.

Paste pearl flake 1/resize 40%/position/dropshadow:

Vertical 4
Horizonal 4
Opacity 36
Blur 2

Paste bow 9/resize 50%/edit/repeat resize/layers/duplicate 1 time/position/dropshadow:
Vertical 3
Horizonal 3
Opacity 45
Blur 4

Paste diamond heart 2/resize 27%/position/same dropshadow.

Paste tube/if using the one I am/resize 64%/position/dropshadow:

Vertical5
Horizonal 5
Opacity 55
Blur 6

Paste tag 2/resize 60%/position/same dropshadow.

Paste sachet bag 1/resize 70%/position/same dropshadow.

Paste staple 3/position/same dropshadow.

Add copyrights.

Add name.

Image/resize all layers 28%.

Layers/merge/merge visible.

Save.

Hope you enjoyed my tut :)

Hugs,Mary

Gothic Nights

Photobucket

Tube of choice,I am using Anna Marine,which you can purchase here,do not use unless you have a license to do so.

Scrapkit is Gothic Nights by Dee at Scraps By Dmg here and you can purchase it here. This kit is awesome,packed full of elements and 2 posers!! Thank you Dee for letting me work with it!

Font of choice,I am using Wild Script here.
~This tutorial was written assuming you have working knowledge of PSP~
 
 
Open a new 600x600 transparent canvas.

Paste frame 6 as a new layer/resize 20%.

Click inside frame with your magicwand/selections/modify/expand by 5/paste paper 10 below frame layer/position/selectiosn/invert/delete/do not deselect.
Paste tube/position/delete/deselect/dropshadow of choice(use for entire tut).
Hide transparent background/layers/merge/merge visible/resize 15%/dropshadow/position.

Paste glitter 3 below merged layers/position.

Paste electric rush 1/position.

Moving up top/paste/position/dropshadow following:

Clip 2/resize 50%

Repeat with charm 4

Repeat with crystal ball

Repeat with hour glass

Repeat with book of shadows

Bow 5/resize 50%/edit/repeat resize/layers/duplicate 1 time

Flower 5/resize 60%/edit/repeat resize

Highlight crystal ball layer/selections/select all/float/defloat/paste tube as a new layer/position/selections/invert/delete/deselect/right click on tube layer/properties/change opacity to 40/merge both layers only.

Image/resize all layers 17%.

Add copyrights.
Add name.

Layers/merge/merge visible.

Save.

Hope you enjoyed my tut :)

Hugs,Mary

Tuesday, July 27

The Dance

Photobucket

Tube of choice,I am using Anna Marine,which you can purchase here,do not use unless you have a license to do so.

Scrapkit is Delightful,a freebie by Terry at Treasures By Terry here. Gorgeous kit Terry,thank you and welcome back!!

Font of choice,I am using Square Chalk here.
~This tutorial was written assuming you have working knowledge of PSP~

Dropshadow for tut:
Vertical 5
Horizonal 5
Opacity 42
Blur 4

Open a new 600x600 transparent canvas.

Paste frame 4/rotate to right 15 degrees/click inside frame with magicwand/selections/modify/expand by 6/paste paper 2 below frame layer/selections/invert/delete/deselect.

 
Paste frame 3/resize 3%/click insdie frame with magicwand/selections/modify/expand by 6/paste paper 1 below frame layer/resize 25%/edit/repeat resize/selections/invert/delete/do not deselect.

 
Paste tube/position/delete/deselect/dropshadow.

-Paste/position as follows-

Doodle 1/resize 15%/duplicate

Repeat with doodle 2

Bow 7/resize 60%/duplicate

Repeat with bow 8

Flower 1/resize 50%/duplicate

Repeat with flower 2

Butterfly 3/resize 40%/edit/repeat resize/duplicate

Ribbon 3/resize 60%/duplicate 2 times

Image/resize all layers 18%

Add copyrights.

Add name.

Layers/merge/merge visible.

Apply dropshadow.

Save.

Hope you enjoyed my tut :)

Hugs,Mary

Sunday, July 25

Girly Girl

Photobucket

Tube of choice,I am using Jamie Kidd,which you can purchase here,do not use unless you have a license to do so.

Scrapkit is Summer Girly Girl,a freebie by Bubble here. Thank you for the awesome kit!!

Template of choice,I am using template 97 from Bev at HorsePlays Pasture here.

Script font of choice.
~This tutorial was written assuming you have working knowledge of PSP~


Open template/hit shiftD to duplicate/close orginal/delete credit layer.

First we are going to work on the template:

Highlight thin stripes/selections/select all/float/defloat/paste paper 1 into selections(edit)/deselect.

Thick stripe/selections/select all/float/defloat/paste paper 19 as a new layer/selections/invert/delete/deselect.

Repeat on rectangle layer using paper 13/right click on paper layer/merge/merge down to rectangle layer.

Rectangle lines/repeat what we did on thin stripes using paper 1.

Repeat on small rectangle lines.

Repeat on raster 2 layer(small rectangle)using paper 17/right click/merge/merge down.

Repeat on arrow using paper 20/right click on paper layer/merge/merge down to arrow/resize 10%/position.

Highlight background layer/paste doodle/layers/duplicate 1 time/position.
Moving up top-paste/position following:

Flower branch/resize 45%/layers/duplicate 1 time

Beads rope/resize 50%

Wordart3/resize 20%

Bow 4/resize 40%

Butterfly 2/resize 55%/layers/duplicate 2 times

Tube/close up/resize if desired

Apply dropshadow to layers of choice.

Image/resize all layers 20%.

Add copyrights.

Add name.

Layers/merge/merge visible.

Save as png.jpg,etc.

Hope you enjoyed my tut :)

Hugs,Mary

Rock A-By

Photobucket

Tube of choice,I am using Justice Howard,which you can purchase here,do not use unless you have a license to do so.

Scrapkit is Rocker Chick,a freebie by Melissa at P&A Dezigns here. This kit rocks! Thank you Melissa!

Mask of choice.

Font of choice,I am using Kanis here.
~This tutorial was written assuming you have working knowledge of PSP~

 
Open a new 600x600 transparent canvas.

Paste frame 1 as a new layer/click inside frame with magicwand/selections/modify/expand by 6.

Paste paper 16 below frame layer/resize 35%/position/selections/invert/delete/deselect.
Highlight background layers/paste paper 10/right click/new mask/from image/select mask of choice/layers/merge/merge visible/layers/duplicate 3 times/position around frame.

Paste frame 1 below mask layers/resize 20%/using pick tool/position.

Paste bow 3/resize 50%/layers/duplicate/position.

BownSkull 1/resize 50%/edit/repeat resize/layers/duplicate/position.

Purple heart/resize 50%/position.

Butterfly 5/resize 55%/position.

Apply dropshadow of choice to all layers.

Image/resize all layers 17%.

Add copyrights.

Add name.

Layers/merge/merge visible.

Save as png,jpg,etc.

Hope you enjoyed my tut :)

Hugs,Mary

Oh Butterflies

Photobucket

Tube of choice,I am using Shawli,which you can purchase here,do not use unless you have a license to do so.

Scrapkit is Orange Denium by Crystal at Crystals Cottage Scraps here and you can purchase it here. Love this kit,thank you Crys!

Font of choice,I am using Chopin Script here.
~This tutorial was written assuming you have working knowledge of PSP~

 
Dropshadow of choice for tut.

Open a new 600x600 transparent canvas.

Paste frame 3 as a new layer/resize 50%.

Click inside center and all circles of frame with your magicwand/selections/modify/expand by 6.

Paste paper 7 below frame layer/selections/invert/delete/deselect/right click on frame/merge/merge down to paper layer/dropshadow.

Paste flower 2 below merged layers/resize 25%effects/texture effects/mosiac glass/default settings.

Paste tube/position/dropshadow.

Paste/position/dropshadow as follows below tube layer:

Orange bow/resize 60%

Denium bow/resize 65%
Heart clip 2/resize 55%/edit/repeat resize/layers/duplicate 1 time

Butterfly 2/resize 60%/edit/repeat resize/layers/duplicate 2 times

Image/resize all layers 17%

Add copyrights

Add name

Layers/merge/merge visible.

Save as png,jpg,etc.

Hope you enjoyed my tut :)

Hugs,Mary

Friday, July 23

Uptown Girl

Photobucket

Tube of choice,I am using Barbara Jensen,which you can purchase here,do not use unless you have a license to do so.

Scrapkit is Uptown Girl by Kristi at Scrappin Divaz here and you can purchase it here. I love this kit,its awesome! Thank you Kristi!!

Font of choice,I am using Movie Filmstrip here.
~This tutorial was written assuming you have working knowledge of PSP~


Open frame/hit shiftD to duplicate/close orginal/resize 10%/make sure all layers is unchecked.

Paste stars/resize 30%/position/delete/deselect.

Click in center of frame with your magicwand/paste cityscape/resize 20%/edit/repeat resize/position/selections/invert/delete/do not deselect.

Paste as follows:

Diamond border/resize 30%/edit/repeat resize/layers/duplicate 1 time/position(see my tag for reference).
Clapboard/resize 50%/edit/repeat resize/image/position/free rotate/free checked/to the left 10 degrees.
Doodle/resize 45%/image/free rotate to the left 90 degrees/position.
Flower/resize 48%/edit/repeat resize/position.
Repeat with film frame.
Repeat with shoe.
Bow/resize 42%/edit/repeat resize/position.
Paste tube/position.

Appy dropshadow of choice to all layers of choice.

Image/resize all layers 23%.

Add copyrights.

Add name.

Layers/merge/merge visible.

Save.

Hope you enjoyed my tut :)

Hugs,Mary

Whispers Of The Past

Photobucket

Tube or close up of choice,I am using Steve Baier,which you can purchase here,do not use unless you have a license to do so.

Scrapkit is Whispers Of The Past by Lynn of Moo Designs here and you can purchase it here. This kit is stunning!! Thank you Lynn!

Font of choice,I am using Vol here.
~This tutorial was written assuming you have working knowledge of PSP~

 
Open a new 600x700 transparent canvas.

Paste 3D frame/image/free rotate to the right 90 degrees.

Click inside frame using your magicwand/selections/modify/expand by 6.

Paste paper 11 below frame layer/selections/invert/delete/do not deselect.
Paste tube or close up/resize if desired/position/delete/deselect/dropshadow of choice(use for entire tut).

Right click on frame layer/merge/merge down to paper layer/dropshadow.

Working below merged layers-paste/position following:

Glitter splatter/layers/duplicate 1 time

Repeat with vintag blossom

Repeat with floral twig

Moving up top/highlight frame layer-paste/position following:

Babies breathe/resize 50%/layers/duplicate 1 time/dropshadow

Dried butterfly/resize 55%/edit/repeat resize/layers/duplicate 1 time/dropshadow

Double bow 1/resize 45%/edit/repeat resize/dropshadow

Button 3/resize 60%/edit/repeat resize/layers/duplicate/dropshadow

Image/resize all layers 25%.

Add copyrights.

Add name.

Layers/merge/merge visible.

Save as png,jpg,etc.

Hope you enjoyed my tut :)

Hugs,Mary

Wednesday, July 21

Ocean Breeze


3 tubes of choice,I am using Caron Vinson,which you can purchase here,do not use unless you have a license to do so.


Scrapkit is Ocean Breeze,a freebie by Jessica Art Designs here. Thank you for the awesome kit!!


Mask of choice.


Script font of choice.


~This tutorial was written assuming you have working knowledge of PSP~

 
Open element 32(frame)/hit shiftD to duplicate/close orginal/paste paper 4/right click/arrange/move down/layers/load save mask/load mask from disk/select mask/ok/layers/merge/merge group.


Highlight and click inside frames with magicwand/selections/modify/expand by 6.


Paste paper 3 below frame layer/selections/invert/delete/do not deselect.


Paste 2 tubes of choice/position/delete/deselect/using eraser tool/erase any tube showing in frame that doesn't belong/apply dropshadow of choice to tube layers.


Hide mask layer/layers/merge/merge visible/dropshadow/resize 20%/position/unhide layer.


Paste element 29 below merged layers/resize 50%/layers/duplicate 1 time/position both layers/dropshadow.


Element 19 /resize 40%/edit/repeat resize.


Moving up top/paste/position/dropshadow following:


Element 14/resize 55%

Element 20/resize 55%/edit/repeat resize/layers/duplicate.

Element 26/resize 60%/edit/repeat resize/layers/duplicate 1 time.


Paste 3rd tube/resize if desired/position/dropshadow.


Add copyrights.


Add name.


Layers/merge/merge visible.


Save as png,jpg,etc.


Hope you enjoyed my tut :)


Hugs,Mary

Wings Of An Angel

Photobucket

Tube of choice,I am using Anna Marine,which you can purchase here,do not use unless you have a license to do so.

Scrapkit is Wings Of An Angel,with 2 posers,by Dee at Dmg Designs here and you can purchase it here. This is a stunning kit!! Thank you Dee!

Font of choice.
~This tutorial was written assuming you have working knowledge of PSP~

Open a new 600x600 white canvas.
Paste frame 6 as a new layer/resize 10%/click inside frame with your magicwand(center only)/selections/modify/expand by 5.
Paste paper 10 below frame layer/position/selections/invert/delete/deselect.
Apply dropshadow to frame only:

Vertical 3
Horizonal 3
Opacity 46
Blur 4

Paste wings 2 below paper layer/position/right click on layer/properties/change opacity to 70.

Paste diamond rain/position/apply same dropshadow last used.

Paste leaves 4/right click on layer/properties/change opacity to 60.

Paste tube/position/dropshadow:

Vertical 0
Horizonal 5
Opacity 66
Blur 2

Paste cloud 2/layers/duplicate 1 time/position.

Paste flowers 1/right click on layer/properties/change opacity to 50/position.

Paste dove/resize 30%/right click on layer/properties/change opacity to 80/position.

Image/resize all layers 17%.
Delete white background layer(optional).
Add copyrights.
Add name.
Layers/merge/merge visible.
Save as png,jpg,etc.
Hope you enjoyed my tut :)
Hugs,Mary

Tuesday, July 20

Summer Dream

Photobucket

Tube/close up of choice,I am using Gennadiy Koufay,which you can purchase here,do not use unless you have a license to do so.

Scrapkit is Summer Dream,a freebie by Heike at FantasyDreams Designz here. Thank you for the gorgeous freebie Heike!!

Font of choice,I am using Abbeyline here.
~This tutorial was written assuming you have working knowledge of PSP~

 
Dropshadow for tut:
Vertical 4
Horizonal 4
Opacity 36
Blur 8

Open a new 600x700 white canvas.

Paste frame 5 as a new layer/resize 5%/click inside frame with your magicwand/selections/modify/expand by 5/image/resize all layers 25%.

Paste paper 4 below frame layer/selections/invert/delete/do not deselect.

Paste close up/position/delete/deselect/dropshadow.

Hide white background layer/layers/merge/merge visible/dropshadow/unhide layer.

Paste element 38 below merged layers/resize 40%/image/free rotate to the right 90 degrees/layers/duplicate/position using your pick tool/dropshadow to both layers/edit/repeat dropshadow.

Paste element 8/resize 50%/position/dropshadow.

Moving up top/paste/position/dropshadow following:

Element 1/resize 42%

Element 14/resize 50%/edit/repeat resize

Element 32/resize 40%/edit/repeat resize

Paste tube/position/dropshadow.

Delete white background layer(optional)

Add copyrights.

Add name.

Image/resize all layers 7%.

Layers/merge/merge visible.

Save as png,jpg,etc.

Hope you enjoyed my tut :)

Hugs,Mary

Naughty

Photobucket

2 tubes of choice,I am using Barbara Jensen,which you can purchase here,do not use unless you have a license to do so.

Scrapkit is Naughty by Sanie at Creations By Sanie here and you can purchase it here. Stunning kit Sanie,thank you!

Mask of choice,I am using mask 26 by Deanna here.

Font of choice.
~This tutorial was written assuming you have working knowledge of PSP~

 
Dropshadow of choice for tut.

Open mask,minimize.

Open element 27(frame)/resize 20%/make sure all layers is unchecked.

Paste paper 4/right click on paper layer/arrange/move down/right click on paper again/new mask layer/from image/select mask/ok/layers/merge/merge group.

Highlight and click inside frame with your magicwand/selections/modify/expand by 6.

Paste paper 8 below frame layer/selections/invert/delete/do not deselect.

Paste both tubes/position/delete/deselect/dropshadow.

Paste/position following:

Element 46/resize 30%/layers/duplicate 3 times/dropshadow.

Element 17/resize 17%/dropshadow.

Element 22/resize50%/edit/repeat resize/layers/duplicate 1 time/dropshadow.
Element 19/resize 50%/dropshadow.

Element 4/resize 60%/dropshadow.

Repeat with element 7.

Element 68/resize 45%/edit/repeat resize.

Image/resize all layers 18%.

Add copyrights.

Add name.

Layers/merge/merge visible.

Save as png,jpg,etc.

Hope you enjoyed my tut :)

Hugs,Mary

Steam Punk

Photobucket

Scrapkit is Steam Punk by Jay at Bello Scarto/Beautiful Scraps here and you can purchase it here.This kit is amazing!! Thank you Jay!

2 masks of choice,I am using lines&grids mask 2 by Lovely and 15wguig mask by Lady T at Creative Misfits Creations here.

Font of choice,I am using Wolfs Rain here.
~This tutorial was written assuming you have working knowledge of PSP~

Open masks,minimize.

Open element 27(frame)/hit shiftD to duplicate/close orginal/image/canvas size/change to 600x550.

Paste paper 9/right click on paper layer/arrange/move down/right click on paper layer again/new mask layer/from image/select mask 2/ok/layers/merge/merge group.

Repeat with paper 10 and mask 15wguig.

Highlight and click inside frame with your magicwand/selections/modify/expand by 6.

Paste paper 11 below frame layer/position/selections/invert/delete/do not deselect.

Paste element 23/position/delete/do not deselect.

Paste element 22/position/delete/deselect/dropshadow of choice to both layers(use for entire tut).

Paste/position/dropshadow following:

Element 7/layers/duplicate.

Element 3/resize 50%/edit/repeat resize.

Repeat with element 10.

Element 13/resize 52%/edit/repeat resize.
Repeat with element 14.

Repeat with element 33.

Element 42/resize 60%/edit/repeat resize.

Element 50(poser)/resize 55%.

Repeat with element 48(poser).

Element 7/resize 50%.

Element 20/resize 60%.

Image/resize all layers 13%.

Add copyrights.

Add name.

Layers/merge/merge visible.

Save as png,jpg,etc.

Hope you enjoyed my tut :)

Hugs,Mary

Wicked Intentionz

Photobucket

Tube/close up of choice,I am using Jose Cano,which you can purchase here,do not use unless you have a license to do so.

Scrapkit is Wicked Intentionz,a freebie by Gina at Ginas Gems Scraps here.Thank you for the gorgeous kit!

Template of choice,I am using template 114 by Missy at Divine Intentionz here.

Font of choice,I am using Chartrand here.
~This tutorial was written assuming you have working knowledge of PSP~
 
 
Open template/hit shiftD to duplicate/close orginal/delete credit layer/image/canvas size/change to 500x500/delete white background layer.
Highlight and click on square 1 with yhour magicwand/paste paper 4 into selections/deselect.

Repeat with circle layer using paper 3/deselect.

Repeat on square 2 layer using paper 1/do not deselect.

Paste close up as a new layer/position/selections/invert/delete/deselect.

Right click on close up layer/merge/merge down to square 2 layer/dropshadow(use for entire tut):
Vertical 3
Horizonal 3
Opacity 63
Blur 1

Apply dropshadow to all layers.

Staples can stay as is/I mirrored mine.

Highlight square 1 layer/paste glitter doodle as a new layer/right click on doodle layer/arrange/move down/resize 50%/layers/duplicate 5 times/position around frame.

Paste/position/dropshadow following:

Binder clip/resize 30%.

Bow charm/resize 40%/edit/repeat resize.
Star chain/resize 40%

Repeat with heart string.

Pearl flower/resize 50%

Paste tube/resize if needed/position/dropshadow.

Image/resize all layers 15%.
Add copyrights.

Add name.

Layers/merge/merge visible.

Save as png,jpg,etc.

Hope you enjoyed my tut :)

Hugs,Mary

Monday, July 19

To Sir With Love

Photobucket

Tube of choice,I am using Anna Marine,which you can purchase here,do not use unless you have a license to do so.

Scrapkit is To Sir With Love by Lynn at Moo Designs here and you can purchase it here. This is a stunning kit!! Thank you Lynn!

Font of choice,I am using Minya here.
~This tutorial was written assuming you have working knowledge of PSP~


Open a new 600x700 white canvas.

Paste scalloped frame/image/free rotate/to the right 90 degrees.

Paste lacey frame below scalloped frame layer/using pick tool/align frames&expand lace frame height direction/see my tag for reference/right click on scalloped frame/merge/merge down to lace frame.

Click inside frame using your magicwand/selections/modify/expand by 6.

Paste paper 5 below frame layer/selections/invert/delete/do not deselect.

Paste tower/position/delete/do not deselect.

Highlight tower layer/selections/select all/float/defloat/paste paper 4 into selections(edit)/do not deselect.

Paste tube/position/delete/deselect/dropshadow:

Vertical 4
Horizonal 4
Opacity 39
Blur 4/image/mirror/repeat dropshadow.

Paste floral swirl below merged layers/resize 20%/layers/duplicate 3 time/position.

Repeat with beads spill.
Paste/position following:
 
Divider/resize 30%/click inside all area's with magicwand,see my tag for reference/selections/modify/expand by 3/paste paer 7 below divider layer/selections/invet/delete/deselect/dropshadow:

Vertical 5
Horizonal 5
Opacity 45
Blur 3

Right click on divider layer/arrange/move down/layers/duplicate/position both layers.

 
Heart dangler/resize 60%/same dropshadow.
Repeat with tower charm.

Feather teaser/resize 40%/same dropshadow.

Repeat with lamp post.
Button 3/resize 50%/edit/repeat resize/same dropshadow.

Chair/resize 60%/same dropshadow.

Delete white background.

Image/resize all layers 28%.

Add copyrights.

Add name.

Save as png,jpg,etc.
Hope you enjoyed my tut :)

Hugs,Mary

Sunday, July 18

Happy Birthday America


Photobucket
Tube of choice,I am using Keith Garvey,which you can purchase here,do not use unless you have a license to do so.


Scrapkit is Happy Birthday America by Stacey at Staceys Designs here and you can purchase it here. Love this kit Stacey,thank you!


Animation Shop(optional)


Alien Skins Xenofex 2 Constellation,you can get the trail version here.


Font of choice.


~This tutorial was written assuming you have working knowledge of PSP~


Open a new 550 x 600 white canvas.


Paste frame/image/free rotate/rotate to the right 90 degrees/click inside frame with your magicwand/selections/modify/expand by 5.


Paste paper 5 below frame layer/position/selections/invert/delete/deselect.


Highlight white background layer/paste firework/layers/duplicate 3 times/position,see my tag for reference/right click on copy 3 of firework/merge/merge down to first fire work layer/layers/duplicate 2 times/rename f1,f2 and f3/we will come back to these shortly.


Paste/position following:


String stars/resize 20%

Blue star/resize 50%/edit/repeat resize

Repeat with hat

Firecracker/resize 50%

Repeat with USA block

Paste tube/resize if desired


Apply dropshadow of choice to all layers except f1,f2 and f3 layers


Image/resize all layers 15%


Add copyrights


Add name


If not animating/layers/merge/merge visible/save.


To animated:


Highlight f1 layer/effects/alien skins constellation:
Star size: 10.00
Size Variation: 60
Overall Star Density 45
Overdrive: 70
Twinkle Amount: 65
Twinkle Rotation: 68
Mark keep orginal image
Random Seed: 1
ok


Repeat on f2 and f3 layers,clicking on random seed 1 time on each layer.
 
Highlight f1 layer/hide 2&3/edit/copy merged.


Take to AS and paste as a new animation.


Back to psp,hide f1,unhide and highlight f2/edit/copy merged/paste in AS after current frame/repeat with f3 layer.


Save as gif.


Hope you enjoyed my tut :)


Hugs,Mary

Friday, July 16

Pink Poison

Photobucket
Tube/close ups of choice,I am using Jamie Kidd,which you can purchase here,do not use unless you have a license to do so.
Template 179 by Blissfully Beth here. Thank you Beth :)

Animation Shop/Dsb Flux/Bright Noise(optional).

Font of choice.
~This tutorial was written assuming you have working knowledge of PSP~
 
 
Open template/hit shiftD to duplicate/close the orginal/delete credit layer.

All current pink/wordart stays as is.

Click on black 2 layer/layers/duplicate 2 times/rename each layer b1,b2 and b3,we will come back to this later.

Highlight gray3 laye/using fill tool,colorize to match your tube.

Repeat on gray 1&2 layers.

Highlight the black circle layer/selections/select all/float/defloat/paste close up/position/selections/invert/delete/deselect.

Repeat on all 3 white circles/resize if needed for better fit.

Apply dropshadow of choice to wordart/position.

Apply dropshadow to pink stripe.

Paste tube/position/dropshadow.

Hide tube, b1.b2,b3 and raster 1 layers/layers/merge/merge visible/dropshadow/unhide layers.

Resize all layers 15%.

Add copyrights.

Add name.

If not animating/layers/merge/merge all layers/save.

To animated:

 
Highlight b1 layer/effects/dsb flux/bright noise/mixed checked at intensity at 44.

Repeat on b2 layer/intensity at 46.

Repeat on b3 layer/intensity at 48.
Highlight b1 layer/hide 2&3/edit/copy merged.

Take to AS and paste as a new animation.

Back to psp,hide b1,unhide and highlight b2/edit/copy merged/paste in AS after current frame/repeat with b3 layer.

 
Save as gif.
 
Hope you enjoyed my tut :)

Hugs,Mary

Keirsten Rain

Photobucket

Tube or close of choice,I am using Denis Rino,which you can purchase here,do not use unless you have a license to do so.

Scrapkit is Keirsten Rain by Jacki at Wishing Well Designs here and you can purchase it here. Love this kit,the colors are awesome! Thank you Jacki!

Font of choice,I am using Sketch Script here.
~This tutorial was written assuming you have working knowledge of PSP~
 
 
Dropshadow of choice for tut.

Open mask,minimize.

Open a new 550x500 white canvas.

Paste tag 2 as a new layer/resize 5%/position.

Paste flourish below tag 2 layer/resize 50%/layers/duplicate 3 times/position.
Paste frame 3/resize 50%/layers/duplicate/position both layers.

Highlight tag 2 layer/selections/select all/float/defloat/paste close up or tube choice/position/selections/invert/delete/deselect/right click on tube layer/properties/change opacity to 50/dropshadow/right click on close up layer/merge/merge down to tag layer/repeat dropshadow.

Paste/position following:

Teddy Bear/resize 30%/edit/repeat resize/dropshadow

Button 3/resize 60%/edit/repeat resize/dropshadow

Repeat with butterfly

Repeat with button 2/no dropshadow

Bow 1/resize 50%/edit/repeat resize/dropshadow

Delete white background(optional).

Image/resize all layers 12%.

Add copyrights.

Add name.

Layers/merge/merge visible.

Save as png,jpg,etc.

Hope you enjoyed my tut :)

Hugs,Mary

Thursday, July 15

Wilderness Christmas

Photobucket

Tube of choice,I am using Jay Trembly,which you can purchase here,do not use unless you have a license to do so.

Scrapkit is Christmas In July Winter Frost,a limited time freebie,July 12 - July 25,from The North Wing Christmas In July Treasure Trail,by Dee and you can see how to get it here. Awesome kit Dee,thank you!

Font of choice,I am using Amperzand here.
~This tutorial was written assuming you have working knowledge of PSP~

 
Open a new 600x600 white canvas.
Paste frame 1/resize 17%

Click inside frame with your magicwand/selections/modify/expand by 5

Paste paper 4 below frame layer/resize 25%/position/selections/invert/delete/do not deselect

Paste tube/position/delete/deselect/dropshadow:

Vertical -5
Horizonal -5
Opacity 40
Blur 8

Hide white background layer/layers/merge/merge visible/apply dropshadow of choice,use for entire tut/unhide layer

Paste snowflake 2 below merged layers/duplicate 1 times/position both layers/dropshadow

Paste doodle 2/layers/duplicate 2 times/position/dropshadow

Paste&position following:

Twig/resize 30%/dropshadow

Bells 2/resize 45%/dropshadow

Flower branch/resize 40%/layers/duplicate 1 time/dropshadow

Tree 2/resize 43%/dropshadow

Doe 2/dropshadow

Bow 1/resize 50%/edit/repeat resize/layers/duplicate/dropshadow
Repeat with bird

Delete white background layer

Image/resize all layers 15%

Add copyrights

Add name

Layers/merge/merge visible

Save as png.jpg,etc.

Hope you enjoyed my tut :)

Hugs,Mary

Monday, July 12

You Are My Sunshine

Photobucket

Tube of choice,I am using Paul John Ballard,this tube was part of CILM's xmas gift but you can check more Ballard tubes here,do not use unless you have a license to do so.

Scrapkit is You Are My Sunshine by Rieneke at Rieneke Designs here and you can purchase it here. I so love this kit,its so bright and colorful,thank you Rieneke!

Font of choice,I am using Amanda here.
~This tutorial was written assuming you have working knowledge of PSP~

Open element 37(frame)/resize 30%/make sure all layers are unchecked/layers/new raster layer/leave transparent/move below frame layer.
Highlight and click inside frame with magicwand/selections/modify/expand by 6.

Paste paper 6 below frame layer/selections/invert/delete/do not deselect.

Paste tube/resize if needed/position/delete/deselect/dropshadow:

Vertical 3
Horizonal 3
Opacity 50
Blur 6

Hide transparent background/layers/merge/merge visible/apply same dropshadow last used/unhide layer.

Working below merged layers/see my tag for reference:

Paste element 11/layers/duplicate 3 times/position around frame

Paste element 40/resize 28%/layers/duplicate 3 times/position

Paste element 2/resize 28%/layers/duplicate 1 time/position
Paste element 24/resize 40%/layers/duplicate 1 time/position
Moving up top/paste &position:

Element 3/resize 43%

Repeat with element 4,17 and 21

Element 38/resize 50%/edit/repeat resize

Element 63/resize 55%

Element 62/resize 55%/edit/repeat resize/layers/duplicate

Repeat with element 9/do not duplicate

Element 1/resize 55%/edit/repeat resize 2 times

Element 8/resize 55%/edit/repeat resize/layers/duplicate

Apply dropshadow of choice to all layers except element 11 layers

Image/resize all layers 17%

Layers/merge/merge visible

Add copyrights

Add name

Save as png.jpeg,etc.

Hope you enjoyed my tut :)

Hugs,Mary

Sunday, July 11

Simple Fairytale

Photobucket

Tube of choice,I am using Anna Marine,which you can purchase here,do not use unless you have a license to do so.

Scrapkit is Simple Fairytale by Amy at Ziggyfan Scraps here and you can purchase it here. This kit is awesome,thank you Ziggy!!

Font of choice,I am using Odstemplik here.
~This tutorial was written assuming you have working knowledge of PSP~

Open a new 600x600 white canvas.

Paste frame 1 as a new layer/resize 20%/click inside frame with your magicwand/selections/modify/expand by 5.

Paste paper 6 below frame layer/selections/invert/delete/do not deselect.

Paste tube/position/delete/deselect/dropshadow/right click on frame layer/merge/merge down to paper layer.

Paste castle below merged layers/resize 23%/position.

Paste crown 1/resize 47%/position.

Paste swirl/resize 50%/layers/duplicate 2 times/position.

Paste elements as follows/position:

Apple/resize 50%/edit/repeat resize

Balloon 2/resize 40%

Glitter leaves/resize 50%/layers/duplicate

Bird 1/resize 53%/edit/repeat resize

Bow 1/resize 25%/edit/repeat resize

Flower/resize 45%

Hearts/resize 60%

Apply dropshadow of choice to all layers.

Delete white background(optional).

Add copyrights.

Add name.

Image/resize all layers 15%.

Layers/merge/merge visible.
Adjust/sharpeness/sharpen.
Save as png,jpeg,etc.

Hope you enjoyed my tut :)

Hugs,Mary

Saturday, July 10

Wild Wild West

Photobucket

Tube/close up of choice,I am using Sebastien Serrano,which you can purchase here,do not use unless you have a license to do so.

Scrapkit is Wild Wild West by CrazyCarita Scraps here and you can purchase it here.

Mask of choice,I am using grunge mask 77 by AquaRebel315 at Creative Misfits Creations here.

Font of choice.
~This tutorial was written assuming you have working knowledge of PSP~

Open mask,minimize.

Open a new 600x600 white canvas.

Paste paper 4 as a new layer/right click on paper layer/new mask layer/from image/select mask/ok/layers/merge/merge group/selections/select all/float/defloat/paste close up/position/selections/invert/delete/deselect/layers/duplicate one time/right click on copy close up layer/merge/merge down to mask layer/image/resize all layers 12%.

Paste/position as follows:

Fence/resize 30%

Wheel tag/resize 15%

Ribbon/resize 50%

Flowers/resize 45%

Word art/resize 25%/edit/repeat resize.

Hay/resize 50%

Ribbon jewel/resize 50%/using selections tool/select part of ribbon to look like its hanging where you position it/delete/deselect.

Paste tube/position.

Apply dropshadow of choice to all layers but mask layer.

Delete white background layer.

Add copyrights.

Add name.

Image/resize all layers 6%.

Layers/merge/merge visible.

Save as png.
Hope you enjoyed my tut :)
Hugs,Mary

Dysfunction


Tube of choice,I am using Keith Garvey,which you can purchase here,do not use unless you have a license to do so.


Scrapkit is a freebie in the TNW Dysfunctional blog train,by Dee and you can grab it here. Awesome kit Dee,thank you!


Font of choice,I am using Accessories Urban here.


~This tutorial was written assuming you have working knowledge of PSP~


Open a new 600x600 white canvas.


Paste frame 2 as a new layer/paste tube of choice/using selections tool/select out anything on bottom of frame,see my tag for reference/deselect.


Click inside frame with magicwand/selections/modify/expand by 6.


Paste paper 3 below frame layer/selections/invert/delete/deselect.


Paste doodle below paper layer/layers/duplicate 2 times/position.


Repeat with blood splatter.


Now to add elements/paste&position:

Bleeding heart/resize 50%

Charm/resize 30%

Cat/resize 65%

Handprint/resize 55%

Spider/resize 50%/edit/repeat resize.


Apply dropshadow of choice to all layers.


Image/resize all layers 20%.


Add copyrights.


Add name.


Save.


Hope you enjoyed my tut :)


Hugs,Mary

Thursday, July 8

A Voice On The Beach

Photobucket

Scrapkit is A Voice On The Beach by Funky here and you can purchase it here. I sooo love this kit!!! Thank you Funky!!

Mask of choice,I am using grunge 1 mask by Tonya at Creative Misfits Creations here. Thank you!

Font of choice,I am using Post-it PenScript here.
~This tutorial was written assuming you have working knowledge of PSP~

Open mask,minimize.

Dropshadow of choice for tut.

Open a new 800x600 white image.

Paste frame/position/click inside frame with your magicwand/selections/modify/expand by 5.

Paste paper 19 below frame layer/selections/invert/delete/deselect.

Paste Cameron 3/resize 25%/position/dropshadow.
Right click on frame/merge/merge down to paper layer/dropshadow/unhide layer.

Paste paper 19 below merged layer/position/right click/new mask layer/from image/make sure invert data is unchecked/ok/layers/merge/merge group/layers/duplicate/position both layers.

Repeat with papers 20&1,positioning below paper 19,see my tag for reference.

Right click on top mask layer/merge/merge down to last mask layer/apply mask again/merge group/duplicate/position both layers.

Paste lighthouse/resize 25%/image/mirror/position by frame/dropshadow.

Paste boat/resize 25%/edit/repeat resize/position/dropshadow/right click on boat layer/properties/change opacity to 80.

Paste anchor/resize 50%/position/dropshadow.

Paste ship wheel/resize 50%/edit/repeat resize/position/dropshadow.

Paste reeds/resize 50%/edit/repeat resize/layers/duplicate/position both layers/dropshadow.

Paste fishing hook/resize 50%/image/flip/image/mirror/position/dropshadow.
Paste wooden fish/resize 50%/edit/repeat resize/image/mirror/position.
Delete white background.

Image/resize all layers 38%.

Add copyrights.

Add name.

Layers/merge/merge visible.

Save as png.
Hope you enjoyed my tut :)
Hugs,Mary

Tuesday, July 6

Pretty In Pink

Photobucket

Scrapkit is Pretty In Pink by Dee at Scraps by Dmg here and you can purchase it here. This kit is gorgeous,comes with 4 posers! Thank you Dee!!

Font of choice,I am using Luismi Murder here.
-This tutorial was written assuming you have working knowledge of PSP-

Open frame 2/layers/new raster layer/right click on new layer/arrange/move down.

Highlight and click inside frame with your magicwand/selections/modify/expand by 5.

Paste paper 8 below frame/selections/invert/delete/do not deselect.

Paste poser fairy 2/position/delete/deselect/apply dropshadow of choice,use this dropshadow for rest of tut.

Right click on frame layer/merge/merge down to paper layer/dropshadow/resize merged layers only by 20%.

Paste doodle 3 below merged layers/resize 25%/layers/duplicate/position/dropshadow to both layers.

Paste flowers 1/resize 55%/position/dropshadow.

Paste butterfly 1/resize 40%/edit/repeat resize/position/dropshadow.

Repeat with bird.

Repeat with flower 2&3.

Paste poser fairy 2_3/resize 20%/position/dropshadow.

Hide transparent background/layers/merge/merge visible/resize 5%/delete hidden layer.

Paste stickpin 1/resize 50%/position/dropshadow.
Paste tag/resize 50%/edit/repeat resize/position/dropshadow/using font of choice,type out PINK/position.

Add copyrights.

Add name.

Layers/merge/merge visible.

Save as png.
Hope you enjoyed my tut :)
Hugs Mary

Summer Fun

Photobucket

Tube of choice,I am using Jamie Kidd,which you can purchase here,do not use unless you have a license to do so.

Scrapkit is Summer Fun by Von at Soaring Hawks Nest here and you can purchase it here. This kit is awesome,love the bright colors,thank you Von!!

Template of choice,I am using template 99 by Bev at HorsePlays Pasture here.Thank you Bev!

Mask of choice,I am using mask 29 by Deanna here. Thank you Deanna!
-This tutorial was written assuming you have working knowledge of PSP-

Dropshadow for tut:
Vertical 0
Horizonal 4
Opacity 55
Blur 3

Open mask,minimize.

Open template/hit shiftD to duplicate/close out orginal/delete credit layer.

Highlight and click on small rectangle 1 with your magicwand/paste paper 6 into selections/deselect.

Repeat for small rectangle 2.

Repeat for following:

large rectangle using paper 4

stripes using paper 2

hearts using paper 10

Dotted lines-selections/select all/float/defloat/paste paper 3 into selections/deselect.

Hide white background/layers/merge/merge visible/dropshadow/unhide background layer.

Paste paper 9 below merged layers/right click on paper layer/new mask layer/from image/select maks/make sure invert mask data is checked/ok/layers/merge/merge group/resize mask layer 17%.

Paste bead string/resize 25%/position/dropshadow.

Paste bow 1/resize 50%/edit/repeat resize/position/dropshadow.

Paste tube/position/dropshadow.

Paste beachball/resize 35%/edit/repeat resize/position/dropshadow.

Repeat with pool.

Paste flower 8/resize 50%/edit/repeat resize/layers/duplicate 2 times/position/dropshadow.

Repeat with butterfly 1.

Delete white background.

Image/resize all layers 20%.

Add copyrights.

Add name.

Save as png.
Hope you enjoyed my tut :)


Hugs,Mary

  © Blogger template Customization and Installation by Krissy's Scraps and Imaging 2011

Back to TOP