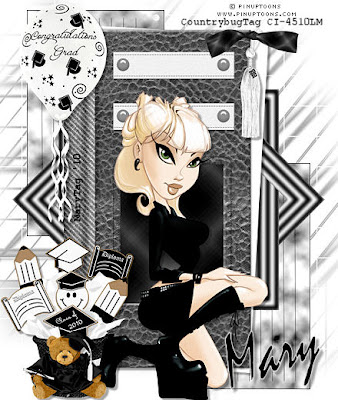
Friday, May 28

Class Of 2010


Tube of choice,I am using PinUpToons,which you can purchase here,do not use unless you have a license to do so.

Scrapkit is Class Of 2010 by Stacey at Staceys Designs here and you can purchase it here. I love this kit,there is so much more than what I used,thank you Stacey!

Mask of choice,I am using WSL mask 84 here.

Font of choice.
-This tutorial was written assuming you have working knowledge of PSP-

Dropshadow for tut:
Vertical 4
Horizonal 4
Opacity 35
Blur 3

Open a new 550x650 white image.

Paste book frame as a new layer/click inside frame with your magicwand/selections/modify/expand by 5.

Paste paper 3 below frame/selections/invert/delete/deselect/right click on frame/merge/merge down to paper layer/dropshadow.

Paste paper 8 below merged layers/apply mask/layers/merge/merge group.
Paste journal tag/layers/duplicate/position.

Paste diamond frame below book frame.

Paste tube/position/dropshadow.

Paste cookie basket/resize 50%/position/dropshadow.

Repeat with white balloon.

Repeat with white tassel.

Repeat with tied knot ribbon.

Repeat with black bear.

Add copyrights.

Add name.

Layers/merge/merge visible.

Resize all layers 20%.

Save.
Hope you enjoyed my tut,would love to see your results and show it off in my gallery :)

Email me here

Hugs,Mary

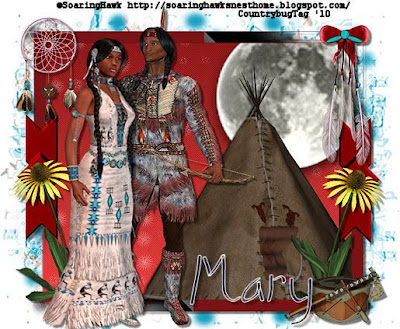
Tuesday, May 25

Love 4 Always


Scrapkit is Mary's 4 Always by Von at Soaring Hawks Nest here and you can purchase it here. Awesome kit Von,you did outstanding on it,thank you!!


Mask of choice.


Font of choice,I am using Qick Marker here.


-This tutorial was written assuming you have working knowledge of PSP-


Dropshadow for tut:choice.


Open the frame/hit shiftD to duplicate/close orginal/layers/new raster layer/flood fill white/right click on new layer/arrange/move down.


Highlight and click inside frame with your magicwand/selections/modify/expand by 6.


Paste paper 2 below frame layer/selections/invert/delete/do not deselect.


Paste moon/resize 40%/position/delete/do not deselect.


Paste teepee/resize 25%/position/deselect/apply dropshadow to teepee layer.


Hide white background layer/layers/merge/merge visible/dropshadow/unhide layer.


Paste paper 5 below merged layers/apply mask of choice.


Paste corn flower 1/resize 50%/layers/duplicate/position/dropshadow.


Paste dream catcher 2/resize 50%/edit/repeat resize/position/dropshadow.


Paste leather feather/resize 50%/layers/duplicate/position/dropshadow.


Paste bow 1/resize 60%/edit/repeat resize/position/dropshadow.


Repeat with drum.


Repeat with drumstick.


Paste tomahawk/resize 50%/edit/repeat resize/position/dropshadow.


Paste indian man/resize 23%/position/dropshadow.


Paste maiden/resize 20%/position/dropshadow.


Add copyrights.


Add name.


Layers/merge/merge visible.


Resize all layers 20%.


Save.


Hope you enjoyed my tut,would love to see your results and show it off in my gallery :)


Email me here


Hugs,Mary
Thursday, May 20

By The Waves Of The Sea


2 tubes of choice,I am using Carlos Cartagena,which you can purchase here,do not use unless you have a license to do so.


Scrapkit is The Waves Of The Sea by Wilma at Wilma 4ever here and you can purchase it here. This kit is stunning,was awesome to work with it! Thank you Wilma!!


Template of choice or mine here.


Mask of choice,I am using mask 23 from AquaRebel315 here.


Font of choice,I am using Post-It Penscript here.


-This tutorial was written assuming you have working knowledge of PSP-


Dropshadow of choice for tut.


Open mask,minimize.


Open template,hit shiftD to duplicate/close orginal/delete ties and credit layers.


Resize template back&frame layers
Highlight white background layer/paste paper 2 as a new layer/right click on paper layer/new mask layer/from image/select mask/ok/layers/merge/merge group/selections/select all/float/defloat/paste lighthouse below mask layer/hit delete/do not invert/resize 23%/right click on layer/properties/change opacity to 50/position.


Paste boat/resize 40%/position/right click on layer/properties/change opacity to 40.


Highlight back layer/click on one section at a time using your magicwand/paste a paper of choice as a new layer/position/selections/invert/delete/deselect( I used 4 papers,see my tag for reference:
paper 20
paper 3
paper 7
paper 15/right click on top paper layer/merge/merge down to back layer.


Highlight frame layers/selections/select all/float/defloat/paste paper 12 into selections(edit)/deselect/right click on frame layer/merge/merge down to back layer/dropshadow.


Paste paper 19 below merged layers/resize 60%/using your pick tool/adjust the paper layer more narrow to fit behind template/image/free rotate to the right 10 degrees/dropshadow.


Paste lifesaver/resize 55%/position/dropshadow.


Repeat with rope.


Paste bow/resize 55%/edit/repeat resize/layers/duplicate/position/dropshadow.


Paste birds/resize 50%/edit/repeat resize/position/dropshadow.


Repeat with grass.


Paste sand/resize 50%/layers/duplicate/position.


Paste tubes/resize 25%/postion/dropshadow.


Paste sea star shell/resize 60%/edit/repeat resize/position/dropshadow.


Repeat with shell 2&5.


Right click on sea star layer/merge/merge down to shell 5/layers/duplicate/position.


Add copyrights.


Add name.


Layers/merge/merge visible.


Resize all layers 3%.


Save.


Hope you enjoyed my tut,would love to see your results and show it off in my gallery :)


Email me here


Hugs,Mary

Tuesday, May 18

Pirate's World


Scrapkit is Pirates World by Sizzel at Sizzels Designs here and you can purchase it here. This kit is awesome and the posers are stunning! Thank you Sizzel!

Mask of choice.

Font of choice,I am using Riesling here.
-This tutorial was written assuming you have working knowledge of PSP-

Dropshadow for tut:
Vertical 4
Horizonal 4
Opacity 43
Blur 3

Open mask,minimize.

Open a new 600x600 white image/paste wheel 3 as a new layer/click inside wheel with your magicwand/selections/modify/expand by 6.
Paste paper 4 below wheel layer/selections/invert/delete/deselect.

Paste beads below paper layer/resize 40%/layers/duplicate 3 times/poisition around wheel/dropshadow.

Highlight white background layer/paste paper 8/right click on paper layer/new mask layer/from image/select mask/ok/layers/merge/merge group/layers/duplicate/image/flip/dropshadow.

Paste anchor/position/dropshadow.

Paste staple/layers/duplicate/position/dropshadow.

Paste chain/resize 60%/position/dropshadow.

Paste flower/resize 50%/edit/repeat resize 2 times/layers/duplicate 2 times/position/dropshadow.

Paste map/resize 60%/position/dropshadow.

Paste first poser of choice/resize 15%/position/dropshadow.

Repeat with second poser choice.
Add copyrights.

Add name.

Layers/merge/merge visible.

Resize all layers 15%.

Save.
Hope you enjoyed my tut,would love to see your results and show it off in my gallery :)

Email me here

Hugs,Mary

Monday, May 17

African Dancing Queen


Scrapkit is African Dancing Queen by Funky at Wishing On Starr here and you can purchase it here. This kit is gorgeous,thank you Funky!!

Template of choice,I am using template 24 by AquaRebel315 here.

Font of choice,I am using Journal here.
-This tutorial was written assuming you have working knowledge of PSP-

Open template/hit shiftD to duplicate/close orginal/delete credit layer.

Highlight and click on raster 1 layer with your magicwand/paste paper of choice into selection(edit)/deselect.

Repeat on raster 2&3 layers.

Repeat on raster 5 and copy 5 layer/do not deselect.

Paste dancer tube 2 times as a new layer/position/selections/invert/delete/deselect/dropshadow of choice(use this for entire tut).

Right click on copy 4 raster layer/merge/merge down to raster 4 layer/selections/select all/float/defloat/paste paper of choice into selection/deselect/right click on frames layer/merge/merge down to frame paper layer/apply dropshadow/position.

Highlight white background layer/paste jewel tree/resize 20%/layers/duplicate 3 times/position.

Paste glitter/layers/duplicate/position.

Paste head dress below double frames/layers/duplicate/position/dropshadow.

Repeat with bling,heart&key.

Paste poser/resize 30%/position/dropshadow.

Hide white background layer/layers/merge/merge visible/resize 5%/unhide layer.

Add copyrights.

Add name.

Layers/merge/merge visible.

Save.
Hope you enjoyed my tut,would love to see your results and show it off in my gallery :)

Email me here

Hugs,Mary
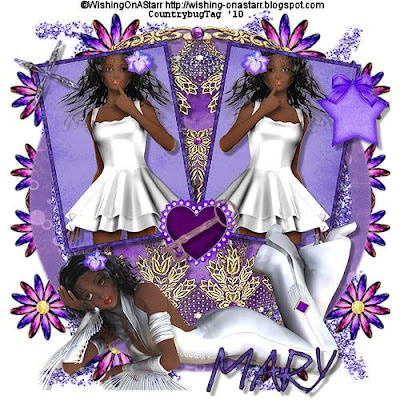
Thursday, May 13

Summer Squeeze

Photobucket

Tube of choice,I am using Jessica Doughtery,which you can purchase here,do not use unless you have a license to do so.

Template of choice,I am using template 34 from Bev at HorsePlay's Pasture here. Thank you Bevie!

Doodles/elements of choice.

Mask of choice,I am using Insatiable Dreams mask 159 here.

Animation Shop

DSB Flux/bright noise

Font of choice,I am using Summertime Oblique here.
-This tutorial was written assuming you have working knowledge of PSP-

Open mask,minimize.

Open template/hit shiftD to duplicate/close orginal/delete credit layer.

Highlight white background layer/layers/new raster layer/flood fill color of choice,I am using #e8e62c/right click on layer/new mask layer/from image/select mask/ok/layers/merge/merge group/layers/duplicate/position.

Highlight and click on layer 2 with your magicwand/flood fill white/paste tube as a new layer/resize and position as needed/selections/invert/delete/deselect/dropshadow of choice.

Highlight raster 3 layer/selections/select all/float/defloat/flood fill with color of choice,I used #c9c71b/deselect/right click on raster 3 layer/merge/merge down to raster 2/apply dropshadow of choice.

Add any elements of choice.

Image/resize all layers 15%.

Add copyrights.

Add name.

Highlight layer 1/selections/select all/float/defloat/flood fill color of choice,I am using #a1fba1/layers/duplicate 2 times/rename layers 1,2 and 3/effects/dsb flux/bright noise/mixed checked/intensity 27/ok.

Repeat for layer 2/intensity 30 and layer 3 intensity 35/deselect.

Highlight 1 layer/hide 2&3/edit/copy merged.

Take to AS and paste as a new animation.

Back to psp,hide 1,unhide and highlight 2/edit/copy merged/paste in AS after current frame/repeat with 3 layer.

Save as gif.
Hope you enjoyed my tut,would love to see your results and show it off in my gallery :)

Email me here

Hugs,Mary
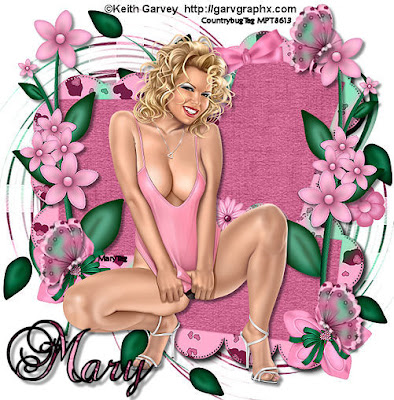
Pink Passion


Tube of choice,I am using Keith Garvey,which you can purchase here,do not use unless you have a license to do so.

Scrapkit is by Rene at Rebels Dezigns here and you can purchase it here. Make sure to check more of Rene's work here. Gorgeous kit,love the colors!! Thank you Rene!!

Mask of choice.

Font of choice,I am using Precious here.
-This tutorial was written assuming you have working knowledge of PSP-

Dropshadow for tut:
Vertical 4
Horizonal 4
Opacity 48
Blur 5

Open mask,minimize.

Open frame 3/hit shiftD to duplicate/cloase the orginal/resize 15%/layers/new raster layer/flood fill white/right click on new layer/arrange/move down.

Highlight and click inside frames with your magicwand/selections/modify/expand by 6.

Paste paper 1 below frame layer/selections/invert/delete/deselect/right click on fram elayer/merge/merge down to paper layer/dropshadow 2 times.

Paste paper 9 below merged layers/right click on paper layer/new mask layer/from image/select mask/ok/layers/merge/merge group/layers/duplicate 1 time/position both layers.

Paste element 28/resize 40%/layers/duplicate 3 times/position.
Paste element 6/resize 25%/layers/duplicate 1 time/position both layers/dropshadow.

Paste element 4/resize 30%/layers/duplicate/position both layers/dropshadow.
Paste element 11/resize 40%/edit/repeat resize/layers/duplicate 2 times/position all layers/dropshadow.

Paste element 22/resize 50%/position/dropshadow.

Paste element 26/resize 60%/position/dropshadow.

Add copyrights.

Add name.

Layers/merge/merge visible.

Resize all layers 15%.

Save.
Hope you enjoyed my tut,would love to see your results and show it off in my gallery :)

Email me here

Hugs,Mary
Tuesday, May 11

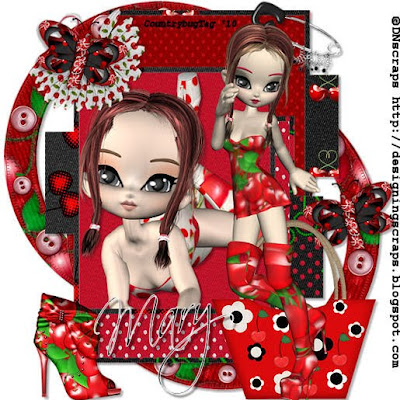
Sweet Cherry


Scrapkit is Sweet Cherry by Conchi at Designing Scraps here and you can purchase it here. This kit is gorgeous,the posers are awesome!! Thank you Conchi!!

Template of choice,or the one I made here.

Font of choice.
-This tutorial was written assuming you have working knowledge of PSP-

Open template/hit shiftD to duplicate/close orginal/delete credit layer.

We are going to fill in all layers first with papers as follows/selections/select all/float/defloat/select paper/paste into selection/deselect/when you get to back 3 do NOT deselect after paper fill.

frame 1=paper 3
frame 2=paper 7
frame 3=paper 9
back 1=paper 6
back 2=paper 8
back 3=paper 5

Paste poser Duna 6 as a new layer/resize 10%/position/selections/invert/delete/deseelct/dropshadow of choice(use for entire tut)/hide white background layert/layers/merge/merge visible/apply dropshadow/unhide layer.

Paste button frame 2 below merged layers/resize 30%/layers/duplicate/position both layers/dropshadow.

Paste blinder clip/resize 50%/edit/repeat resize/position/dropshadow.

Repeat with sunboot.

Paste butterfly 4/resize 55%/edit/repeat resize/layers/duplicate/position both layers/dropshadow.

Paste bag 2/resize 60%/position/dropshadow.

Paste safety pin 2/resize 60%/edit/repeat resize/using selections tool/draw out a small part of pin,to make it look like its going thru where you position/dropshadow/position.

Paste Melanie 5 poser/resize 20%/position/dropshadow.

Add copyrights.

Add name.

Layers/merge/merge visible.

Resize all layers 5%.

Save.
Hope you enjoyed my tut,would love to see your results and show it off in my gallery :)

Email me here

Hugs,Mary
Monday, May 10

Butterfly Love

Photobucket
Tube of choice,I am using Anna Marine,which you can purchase here,do not use unless you have a license to do so.

Scrapkit is Pretty&Playful by Terry at Terry's Treasures here and you can purchase it here. Gorgeous kit,gorgeous colors! Thank you Terry!!

Font of choice,I am using Abbeyline here.
-This tutorial was written assuming you have working knowledge of PSP-

Open a new 600x600 transparent image.

Paste frame 12/click inside the frame with your magicwand/selections/modify/expand by 6.

Paste paper 26 below frame layer/selections/invert/delete/do not deselect.

Paste tube of choice/resize if needed/position/delete/deselect/dropshadow:
Vertical -4
Horizonal -4
Opacity 38
Blur 4

Hide white background/layers/merge/merge visible/dropshadow:

Vertical 5
Horizonal 5
Opacity 45
Blur 5/unhide layer.

Paste frame matting 1 below merged layers/image/free rotate to the left 7 degrees.

Paste doodle 1/layers/duplicate/position/same dropshadow last used.
Repeat with doodle 4.

Paste glitter dots 1/resize 33%/layers/duplicate 3 times/position around frame/right click on last copy layer/merge/merge down to first dots layer/right click/properties/change opacity to 70.

Paste butterfly 2/resize 40%/layers/duplicate/position both layers/dropshadow:

Vertical 2
Horizonal 2
Opacity 30
Blur 3

Paste bow 2/resize 50%/position/same dropshadow.

Paste butterfly dangler 1/resize 40%/position/same dropshadow.

Paste flower 2/resize 30%/layers/duplicate/position/same dropshadow.
Add copyrights.

Add name.

Layers/merge/merge visible.

Resize all layers 15%.

Save.
Hope you enjoyed my tut,would love to see your results and show it off in my gallery :)

Email me here

Hugs,Mary

Saturday, May 8

Spunky

Photobucket

Poser is Sunshine Sally,a freebie from Funky at Wishing-On A Starr here and be sure to check out all of Funky's awesome products here. Thank you Funky,she is beautiful!!

Scrapkit is Spunky Misfit from Mirella at Creative Misfits Creations here. Thank you for the fabby kit Mirella!!

Font of choice,I am using Funky Regular here.

-This tutorial was written assuming you have working knowledge of PSP-

Dropshadow for tut:
Vertical 3
Horizonal 3
Opacity 37
Blur 3

Open a new 500x600 transparent image.

Paste element 26(frame)/resize 30%/click inside frame with your magicwand/selections/modify/expand by 6.

Paste paper 2 below frame layer/resize 30%/selections/invert/delete/deselect/right click on frame layer/merge/merge down to paper layer/dropshadow.

Paste element 20 below merged layers/layers/duplicate/position/dropshadow.
Paste element 17/position/dropshadow.

Paste element 28(glitter)/layers/dupilcate/position/dropshadow.

Paste element 21(spunky wordart)/resize 20%/image/free rotate to the left/position/dropshadow.

Paste element 40(tag)/resize 50%/position/dropshadow.

Paste element 11(bow)/resize 50%/layers/duplicate/position/dropshadow.

Paste element 1(butterfly)/resize 40%/layers/duplicate/position/dropshadow.
Paste Sunshine Sally/resize 40%/edit/repeat resize/position/dropshadow.

Add copyrights.

Add name.

Layers/merge/merge visible.

Resize all layers 15%.

Save as png.
Hope you enjoyed my tut,would love to see your results and show it off in my gallery :)

Email me here

Hugs,Mary

Monday, May 3

Fantasy Forest

Photobucket

Tube of choice,I am using Anne Marine,which you can purchase here,do not use unless you have a license to do so.

Scrapkit is Fantasy Forest by Lynn at Moo Designs here and you can purchase it here. Stunning kit Lynn,love it! Thank you!

Font of choice,I am using Ephesis here.
-This tutorial was written assuming you have working knowledge of PSP-

Dropshadow of choice for tut.

Open funky frame/hit shiftD to duplicate/close orginal/image/free rotate all layers 90 degrees/image/canvas size/change to 650x550/resize frame 20%(make sure all layers is unchecked).

Click inside frame with your magicwand/selections/modify/expand by 6.

Paste paper 12 as a new layer/right click on layer/arrange/move down/selections/invert/delete/do not deselect.

Paste bushy tree/resize 30%/position/do not deselect.
Paste mushroom 3/resize 50%/edit/repeat resize/position/delete/do not deselect.

Paste pond/resize 40%/position/delete/do not deselect.

Paste tube/position/delete/deselect/apply dropshadow to last 4 layers/layers/merge/merge visible/dropshadow.

Paste doodle 1/right click on layer/arrange/move down/resize 25%/position above frame/layers/duplicate/image/flip/dropshadow to both layers.

Paste doodle 2/resize 25%/image/free rotate to the left 90 degrees/position to side of frame/layers/duplicate/image/dropshadow to both layers.

Paste glitter/layers/duplicate 3 times/position.

Paste callalilies/resize 25%/layers/duplicate/position/dropshadow.

Paste vine/resize 15%/position/dropshadow.

Paste skinny tree/resize 20%/position/dropshadow.

Paste tree stump/resize 60%/position/dropshadow.

Paste bluebird 2/resize 60%/edit/repeat resize/position/dropshadow.

Repeat with butterfly 2.

Add copyrights.

Add name.

Layers/merge/merge visible.

Resize all layers 20%.

Save as png.
Hope you enjoyed my tut,would love to see your results and show it off in my gallery :)

Email me here

Hugs,Mary

Spring Petals

Photobucket

Tube/close up of choice,I am using Jose Cano,which you can purchase here,do not use unless you have a license to do so.

Scrapkit is Spring Petals by Crystal at Crystal's Cottage Scraps here and you can purchase it here. I so love this kit,just so colorful&springy! Thank you Crys!

Frame of choice,I am using frame 3 by Bev at HorsePlay's Pasture here. Thank you Bevie!

Font of choice,I am using Amanda here.
-This tutorial was written assuming you have working knowledge of PSP-

Open frame/hit shiftD to duplicate/close orginal/delete credit layer/image/flip frame/selections/select all/float/defloat/paste paper 7 into selection(edit)/deselect.

Click inside frame with your magicwand/selections/modify/expand by 6.

Paste paper 2 below frame layer/resize 30%/selections/invert/delete/do not deselect.

Paste close up/position/delete/deselect/hide white background layer/layers/merge/merge visible/dropshadow:

Vertical 3
Horizonal 3
Opacity 48
Blur 2/unhide layer/image/mirror/apply dropshadow again/image/mirror back.

Paste paper 8/right click/new mask layer/from image/select mask/layers/merge/merge group/layers/duplicate 3 times/position around frame.

Paste blue flower 1 below mask layers/layers/duplicate 3 times/position around frame.

Repeat with yellow flower 1 pasting below blue flower 1 layers.

Paste green heart ribbon/resize 50%/layers/duplicate/position/same dropshadow we last used.

Paste bead string/resize 25%/position/dropshadow:

Vertical 4
Horizonal 4
Opacity 35
Blur 5

Paste yellow heart/resize 50%/position/same dropshadow.

Repeat with purple potted.

Paste tube/position/dropshadow:

Vertical 2
Horizonal 2
Opacity 57
Blur 6

Delete white background layer.

Add copyrights.

Add name.

Layers/merge/merge visible.

Resize all layers 15%.

Save as png.
Hope you enjoyed my tut,would love to see your results and show it off in my gallery :)

Email me here

Hugs,Mary

Sweet Angel

Photobucket

Tube of choice,I am using PinUpToons,which you can purchase here,do not use unless you have a license to do so.

Scrapkit is Sweet Lil Angel by Kristi at Scrapin Divaz here and you can purchase it here. This kit is gorgeous,thank you Kristi!

Mask of choice.

Font of choice.
-This tutorial was written assuming you have working knowledge of PSP-

Dropshadow for tut:
Vertical 4
Horizonal 4
Opacity 35
Blur 4

Open a new 500x500 transparent image.

Paste paper 10/right click on paper layer/new mask layer/from image/select mask/ok/layers/merge/merge group/position.

Repeat using paper 6.

Paste frame 3/resize 50%/edit/repeat resize/click inside frame using your magicwand/selections/modify/expand by 5/paste paper 8 below frame layer/selections/invert/delete/deselect/right click on frame 3 layer/merge/merge down to aper layer/dropshadow.

Repeat using frame 4 and paper 14.

Paste tag 3/resize 10%/position/dropshadow.

Paste cloud/resize 50%/edit/repeat resize/position/dropshadow.

Paste pin/resize 50%/position/dropshadow.

Paste heart 2/resize 50%/edit/repeat resize 2 times/position/dropshadow.

Paste flower 1/resize 50%/edit/repeat resize/position/dropshadow.

Paste bow 1/resize 50%/edit/repeat resize/image/free rotate to the right 90 degrees/position/dropshadow.

Paste tube/resize if desired/position/dropshadow.

Add copyrights.

Add name.


Layers/merge/merge visible.

Resize all layers 3%.

Save as png.
Hope you enjoyed my tut,would love to see your results and show it off in my gallery :)

Email me here

Hugs,Mary

Sunday, May 2

Rockin Together


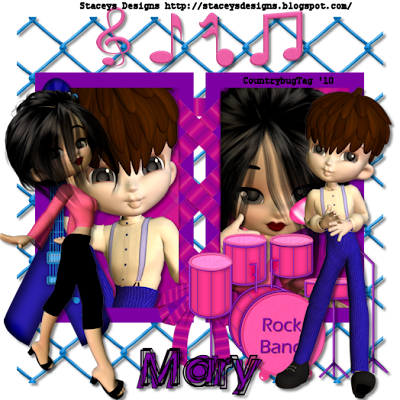
Scrapkit is Rock On by Stacey at Stacey's Designs here and you can purchase it here. This kit so rocks Stacey,love the cookies!!! Thank you!

Font of choice,I am using Astigma Regular here.
-This tutorial was written assuming you have working knowledge of PSP-

Dropshadow of choice for tut.

Open frame 4/hit shiftD to duplicate/close orginal/resize all layers 25%/layers/new raster layer/flood fill white/right click on new layer/arrange/move down/resize frame(make sure all layers is unchecked) 10%.
Click inside frame with your magicwand/selections/modify/expand by 6.

Paste paper below frame layer/selections/invert/delete/do not deselect.

Paste chip 32/position/delete.

Paste punky 2/resize 30%/position/deselect/apply dropshadow to both layer.

Paste fence 1/resize 33/dropshadow.

Paste guitar 3/resize 25%/position/dropshadow.

Paste music notes 3/resize 60%/position/dropshadow.

Paste chip 34/resize 15%position/dropshadow.

Repeat with punky 4.

Add copyrights.

Add name.

Layers/merge/merge visible.

Save.
Hope you enjoyed my tut,would love to see your results and show it off in my gallery :)

Email me here

Hugs,Mary

  © Blogger template Customization and Installation by Krissy's Scraps and Imaging 2011

Back to TOP