Monday, November 30

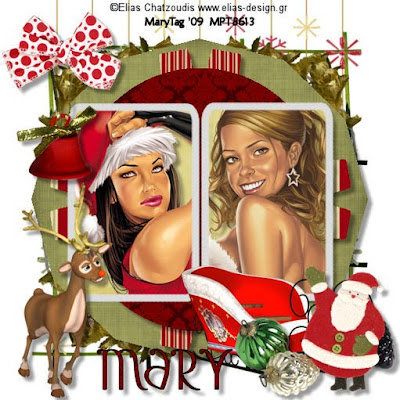
Wonderful Christmas


Tubes of choice,I am using Elias Chatzoudis,which you can purchase here,do not use unless you have a license to do so.

Scrapkit is Wonderful Christmas from Wilma at Wilma4ever here and you can purchase it here. Gorgeous kit Wilma,thank you!

Template of choice,I am using template 52 from Aqua Rebel315 and you can get her awesome templates here. Thank you!

Font of choice,I am using Chiquita Banana here.
-This tutorial was written assuming you have working knowledge of PSP-

Dropshadow for tut:
Vertical 6
Horizonal 6
Opacity 40
Blur 6

Open template/delete credit layer.

Highlight raster 1 layer/click on it with your magicwand/edit/paste paper 13 into selection/deselect/dropshadow.

Repeat with raster 5 and copy 5 layers/using paper 2.

Repeat with raster 4 layer/using paper 8.

Repeat for raster 3 and copy 3 layers/using paper 14/do not deselect layers.

Paste your 2 tubes of choice as new layers/selections/invert/delete/deselect/dropshadow.

Raster 2 layer and copy I am leaving white.

Hide white background layer/layers/merge/merge visible/unhide layer.

Highlight white background layer/paste frame 3/resize 30%.

Paste curtain 2/resize 20%/edit/repeat resize/position.

Paste branch 3/resize 40%/position to the right of the tag/layers/duplicate/image/mirror/layers/duplicate/image/flip.
Moving up top/paste the bell/resize 40%/position/dropshadow.

Paste bow 1/resize 50%/position/dropshadow.

Paste sleigh/resize 50%/position/dropshadow.

Paste balls 1/resize 50%/position/dropshadow.

Paste santa 2/resize 50%/position/dropshadow.

Paste reindeer 3/resize 50%/position/dropshadow.

Add copyrights.

Add name.

Layers/merge/merge visible.

Image/resize all layers 7%.

Save.
*Make sure to name yur tag/not as the template.
Hope you enjoyed my tut,would love to see your results.

Hugs,Mary

Sunday, November 29

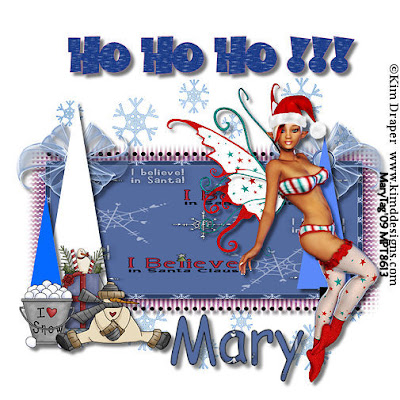
I Believe In Santa


Tube of choice,I am using Kim Draper,this tube is from MPT's xmas gift but you can see more of Kim's tubes here.


Scrapkit is Wynter Thyme from Tracy at Freebie Friends Scraps & More here. Thank you Tracy!! (link fixed)


Template of choice,I am using template 121 from Blissfully Beth here. Thank you Beth!


Font of choice.


-This tutorial was written assuming you have working knowledge of PSP-


Dropshadow for tut:
Vertical 6
Horizonal 6
Opacity 54
Blur 7


Open template/delete credit and background layers.


Layers/new raster layer/right click/arrange/send to bottom/flood fill white.


Highlight blue snowflakes layer/selections/select all/float/defloat/paste paper 12 into selection(under edit)/deselect/layers/duplicate/position.


Repeat with pink blurred layer using paper 13.


Repeat with pink rectangle layer/dropshadow.


Repeat with white rectangle frame using paper 15.


Black dotted lines and trees I am using as is/apply dropshadow.


Highlight ho ho ho layer/selections/select all/float/defloat/paste paper 10 into selection(edit)/deselect/position/dropshadow.


Paste bow 1/resize 50%/position below tree layers/layers/duplicate/position/dropshadow.


Paste decoration 1/resize 50%/edit/repeat resize/position/dropshadow.


Repeat with bucket 1.


Repeat with snowman 1.


Paste tube/position/dropshadow.


Add copyrights.


Add name.


Layers/merge/merge visible.


Image/resize all layers 27%.


Save.


Hope you enjoyed my tut,would love to see your results.


Email me


Hugs,Mary

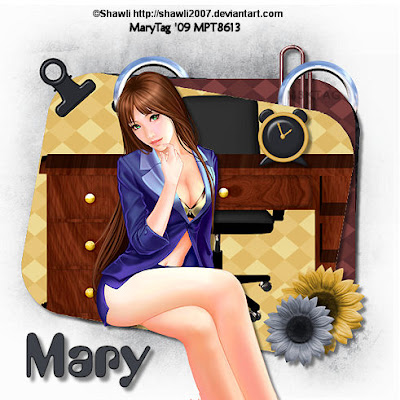
At The Office


Tube of choice,I am using Shawli,which you can purchase here,do not use unless you have a license to do so.

Scrapkit is a freebie,At The Office,from Nikki at Creative Intentionz here. Love it Nikki! Thank you!

Template of choice,I am using template 33 from Bev at HorsePlays Pasture here. Thank you Bevie!

Mask of choice,I am using grunge mask 5 from Ella at Creative Misfits Creations here. Thank you for the awesome masks!

Font of choice.
-This tutorial was written assuming you have working knowledge of PSP-

Dropshadow for tut:
Vertical 5
Horizonal 5
Opacity 46
Blur 5

Open mask,minimize.

Open template/delete credits.

Highlight white background layer/paste paper 11/right click on paper layer/new mask layer/from image/select mask/ok/layers/merge/merge group.

Highlight rounded rec 1/selections/select all/float/defloat/paste paper 11 into selection(edit)/deselect.

Repeat with rounded rec 2 using paper 1.

Repeat with rounded rec 3 with paper 2/do not deselect.

Paste desk as a new layer/resize 20%/position/selections/invert/delete/do not deselect.

Paste chair below desk layer/resize 20%/edit/repeat resize/position/delete/deselect/right click on desk layer/merge/merge down to rounded rec 3/dropshadow.

Paste clock 3/resize 60%/position/dropshadow.

Paste paperclip 5/position/dropshadow.

Paste paperclip 7/resize 50%/position/dropshadow.

Paste flower 3/reszie 50%/position/dropshadow.

Paste flower /resize 60%/position/dropshadow.

Paste tube/position/dropshadow.

Add copyrights.

Add name.

Layers/merge/merge visible.

Image/resize all layers 18%.

Save.
Hope you enjoyed my tut,would love to see your results.

Hugs,Mary

Saturday, November 28

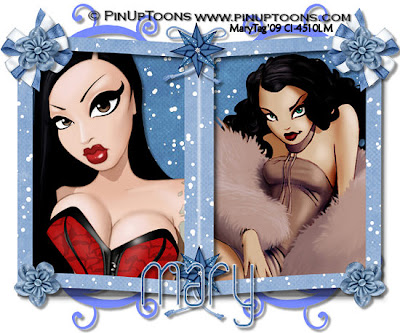
Snow Sexy


Tubes of choice,I am using PinUpToons,which you can purchase here,do not use unless you have a license to do so.

Scrapkit is Snow Drift,a freebie from Chelle at Weescotslass Creations here. Thank you Chelle for the beautiful kit!

Font of choice,I am using Paperclip here.
-This tutorial was written assuming you have working knowledge of PSP-
Dropshadow for tut:
Vertical 4
Horizonal 4
Opacity 42
Blur 4

Open a new 600x500 white image.

Paste frame 1/resize 5%.

Click inside frame with your magicwand/selections/modify/expand by 6.

Paste paper 3 below frame layer/selections/invert/delete/do not deselect.
Paste tubes in each side of the frame/selections/invert/delete/deselect/dropshadow.

Apply dropshadow to frame layer 2 times.

Highlight white background layer/paste doodle/resize 15%/to colorize:
Adjust:
Color
Channel Mixer
Output Channel-Blue
Red % 96
Green % 103
Blue % 180
Constant 134
ok

Layers/duplicate 3 times/position/dropshadow.

Moving up top/paste bow/reszie 57%/layers/duplicate/position both layers/dropshadow.

Paste little flower 2/resize 50%/edit/repeat resize/layers/duplicate 3 times/position all flowers/dropshadow.

Paste rope/resize 50%/edit/repeat resize/layers/duplicate/position both/dropshadow.

Repeat with star.

Add copyrights.

Add name.

Layers/merge/merge visible.

Image/resize all layers 8%.

Save.
Hope you enjoyed my tut,would love to see your results.

Hugs,Mary

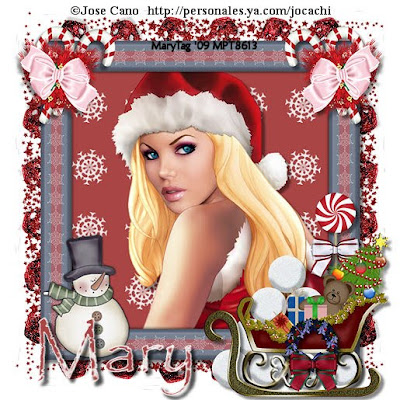
Twas The Night Before Xmas


Tube of choice,I am using Jose Cano,this tube is from MPT's xmas gift but you can see more of Jose's tubes here.

Scrapkit is Twas The Night Before Xmas from Kissy at Taggin AngelsNScraps here and you can purchase it here or here. I love this kit,its packed full for many projects!! Thank you Kissy!

Font of choice.
-This tutorial was written assuming you have working knowledge of PSP-

Dropshadow for tut:
Vertical 5
Horizonal 5
Opacity 47
Blur 5

Open a new 600x600 white image.

Paste frame 2/resize 40%/click insdie frame with your magicwand/selections/modify/expand by 7.

Paste paper 10 below frame layer/resize 30%/selections/invert/delete/do not deselect.

Paste tube/position/delete/deselect/dropshadow.

Hide white background layer/layers/merge/merge visible/dropshadow/unhide layer.

Paste snowflake below merged layers/position with your pick tool to the top left/layers/duplicate 2 times/position those 2 layers/right click on copy 2 layer/merge/merge down to 1st snowflake/layers/duplicate/image/flip/layers/duplicate that layer/image/free rotate to the left 90*/position/layers/duplicate/image/mirror.

Repeat with glitter tree 3 only duplicating 1 time to go around frame.

Moving up top/paste candy canes/resize 50%/edit/repeat resize 3 times/layers/duplicate/position both layers/dropshadow.

Paste snowballs/resize 50%/edit/repeat resize/position/dropshadow.

Repeat with candy 1.

Repeat with bow.

Repeat with sled.

Repeat with bow 2.

Paste wreath/resize 50%/edit/repeat resize 3 times/position/dropshadow.
Add copyrights.

Add name.

Layers/merge/merge visible.

Image/resize all layers 15%.

Save.
Hope you enjoyed my tut,would love to see your results.

Email me.

Hugs,Mary

Friday, November 27

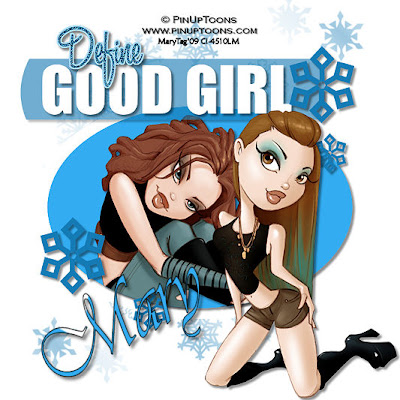
Define Good Girl


Tubes of choice,I am using PinUpToons,which you can purchase here,do not use unless you have a license to do so.

Template of choice,I am using template 130 from Blissyfully Beth here. Thank you for the templates Beth,just awesome!

Mask of choice,I am using Vix_mask 301 here.

Font of choice.
-This tutorial was written assuming you have working knowledge of PSP-

This wil be quick&easy lol

Open mask,minimize.

Open template/delete credit layer.

Layers/new raster layer/right click/arrange/send to bottom/flood fill white.
Highlight raster 1 layer/right click/new mask layer/from image/select mask/layers/merge/merge group/layers/duplicate/position both layers.

Highlight blue oval/selections/select all/float/defloat/paste tube of choice as a new layer/position/selections/invert/delete/deselect/dropshadow:

Vertical 4
Horizonal 4
Opacity 45
Blur 5

Reposition blueline,wordart and snowflakes where desired/same dropshadow.

Paste 2nd tube of choice/position/same dropshadow.

Add copyrights.

Add name.

Layers/merge/merge visible.

Image/resize all layers 24%.

Save.
Hope you enjoyed my tut,would love to see your results.

Hugs,Mary

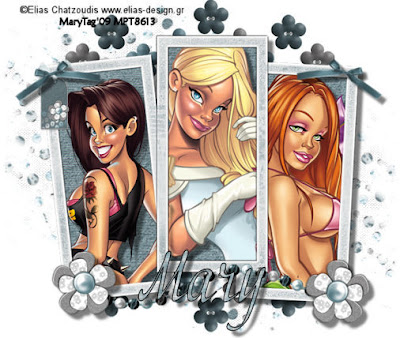
SweetNSassy


Tubes of choice,I am using Elias Chatzoudis,which you can purchase here,do not use unless you have a license to do so.

Scrapkit is SweetNSassy from Amy of Ziggyfan Scraps here. Thank you Amy for an awesome kit!

Mask of choice,I am using grunge mask 2 from Rose at Creative Misfits Creations here. Thank you Rose!

Font of choice,I am using Adventure here.
-This tutorial was written assuming you have working knowledge of PSP-

Dropshadow for tut:
Vertical 7
Horizonal 7
Opacity 50
Blur 4

Open mask,minimize.

Open frame/image/resize 20%/make sure resize all layers is not checked.

Layers/new raster layer/right click/arrange/send to bottom/flood fill white.
Paste paper 6 as a new layer below frame layer/right click/new mask layer/from image/select mask/ok/layers/merge/merge group/layers/duplicate/position both mask layers.

Click inside frames with your magicwand/selections/modify/expand by 6.

Paste paper 5 below frame layer/resize 20%/selections/invert/delete/do not deselect.

Paste tubes in each frame:

position/delete/deselect/dropshadow.

Hide mask layers and white background layer/layers/merge/merge visible/dropshadow/unhide layers.

Paste buttons below merged layers/resize 60%/layers/duplicate 2 times/position along the top of the tag/right click on copy 2 of buttons/merge/merge down to orginal button layer/layers/duplicate/image/flip.

Paste tag/resize 50%/edit/repeat resize/position/dropshadow.

Paste blue bow/resize 50%/edit/repeat resize/layers/duplicate/position both/dropshadow.

Paste beads/resize 50%/position/dropshadow.
Paste flower/resize 60%/layers/duplicate/position both/dropshadow.
Add copyrights.

Add name.
*For my name,I used paper 4 for fill/black on foreground.

Layers/merge/merge visible.


Image/resize all layers 8%.

Save.
Hope you enjoyed my tut,would love to see your results.

Hugs,Mary

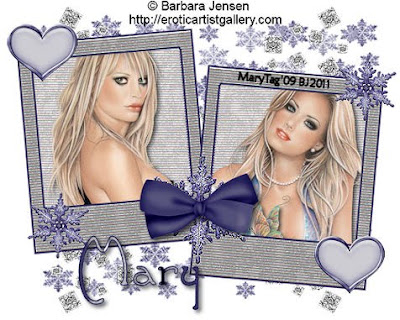
Snowflake


Tubes of choice,I am using Barbara Jensen,which you can purchase here,do not use unless you have a license to do so.

Scrapkit is Snowflake from Amy at Ziggyfan Scraps here. Thank you for this awesome kit!

Mask of choice,I am using snowflake 3 from Faith at Creative Misfits Creations here. Thank you!

Font of choice,I am using Santa's Sleigh here.
-This tutorial was written assuming you have working knowledge of PSP-

Dropshadow for tut:
Vertical 3
Horizonal 3
Opacity 66
Blur 7

Open mask,minimize.

Open a new 500x400 white image.

Paste frames/resize larger by 8%.

Paste paper 1 below frames layer/right click/new mask layer/from image/select mask/ok/layers/merge/merge group/resize 10%/position.

Paste gem scatter/resize 20%/layers/duplicate/image/mirror.

Highlight frames layer/click inside frames with your magicwand/selections/modify/expand by 6.

Paste paper 2 below frames/selections/invert/delete/do not deselect.

Paste tubes/position in each frame/delete/deselect/dropshadow.

Paste bow/resize 50%/edit/repeat resize/position/dropshadow.

Repeat with heart/duplicating 1 time.

Repeat with snowflake.

Add copyrights.

Add name.

Layers/merge/merge visible.

Image/resize all layers 5%.

Save.
Hope you enjoyed my tut,would love to see your results.

Hugs,Mary

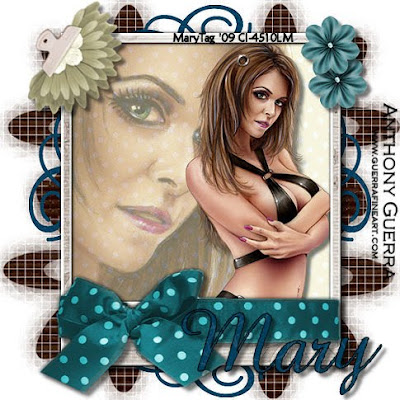
Natural Girl


Tube/close up of choice,I am using Anthony Guerra,which you can purchase here,do not use unless you have a license to do so.

Scrapkit is Natural Girl from Amy at Ziggyfan Scraps here. Thank you for the great kit!!

Doodle of choice.

Mask of choice,I am using Vix_Mask 160 here.

Font of choice,I am using Abbeyline here.
-This tutorial was written assuming you have working knowledge of PSP-

Dropshadiow of choice for tut.

Open mask,minimize.

Open frame/image/canvas size 500x500.

Layers/new raster layer/right click/arrange/send to bottom/flood fill white.

Paste paper 11/right click/new mask layer/from image/layers/merge/merge group/resize 30%/layers/duplicate 3 times/position.

Highlight frame layer/click inside frame with magicwand/selections/modify/expand by 7.

Paste paper 13 below frame layer/selections/invert/delete/do not deselect.

Paste close up/position/delete/do not deselect.

Paste tube of choice/position/delete/deselect/dropshadow.

Moving up top/paste ribbon 4/resize 30%/position/dropshadow.

Paste flower 9/resize 50%/layers/duplicate/position/dropshadow.

Paste clip flower 3/resize 50%/position with pick tool/dropshadow.
Paste doodle below the paper layer/resize if needed/layers/duplicate 3 times/position around frame.

Add copyrights.

Add name.

Layers/merge/merge visible.

Image/resize all layers 3%.

Save.
Hope you enjoyed my tut,would love to see your results.

Hugs,Mary

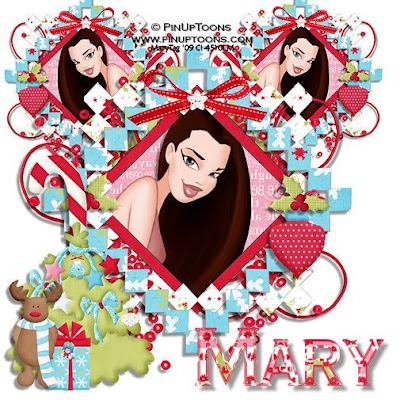
Holly Jolly Joy


Tube of choice,I am using PinUpToons,which you can purchase here,do not use unless you have a license to do so.

Scrapkit is Holly Jolly Joy from Kristi from Scrapin Divaz here and you can purchase it here. Such a gorgeous,colorful kit! Thank you Kristi!
Template of choice,I am using a template from Poppy,diamond template 1,at Creative Misfits Creations here. Thank you Poppy!

Font of choice,I am using Snowflake Letters here.
-This tutorial was written assuming you have working knowledge of PSP-

Dropshadow for tut:
Vertical 6
Horizonal 6
Opacity 42
Blur 5

Open template/highlight inside diamond/click on it with your magicwand/paste paper 14 into selection(under edit)/deselect.

Highlight square diamond frame/selections/select all/float/defloat/paste paper 9 into selection/deselect/dropshadow.

Repeat with diamond frame using paper 3.

Highlight inside diamond back/selections/select all/float/defloat/paster paper 8 into selection/do not deselect.

Paste tube of choice as a new layer/position/selections/invert/delete/deselect/dropshadow.
Highlight white background layer/paste dring 2/layers/duplicate 2 times/position both layers/dropshadow.

Paste beads 2/layers/duplicate 3 times/position/dropshadow.

Moving up top/paste bow 2/resize 50%/position/dropshadow.

Repeat with button 2.

Paste holly/resize 50%/layers/duplicate/position both/dropshadow.

Paste ornament 2/resize 50%/edit/repeat resize/position/dropshadow.
Paste candy cane/resize 50%/position/dropshadow.

Paste tree/resize 50%/position/dropshadow.

Paste reindeer/resize 50%/edit/repeat resize/position/dropshadow.

Repeat with gift 2.

Hide white background layer/layers/merge/merge visible/position merged layers/unhide layer.

Layers/duplicate/on orginal merged layer/resize 50%/position with pick tool/layers/duplicate/image/mirror.

Highlight copy layer of tag(should be at the top)/resize 5%/position.

Add copyrights.

Add name.
*For my name,I used paper 7 for fill/paper 2 on foreground.

Layers/merge/merge visible.

Image/resize all layers 28%.

Save.
Hope you enjoyed my tut,would love to see your results.
Hugs,Mary

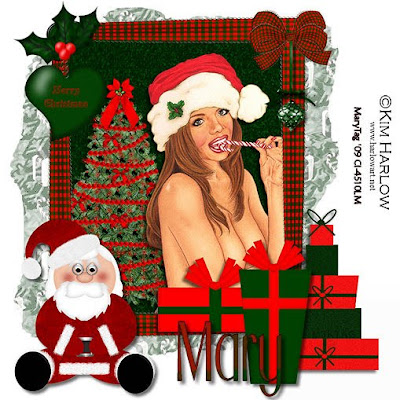
Christmas Morning


Tube of choice,I am using Kim Harlow,which you can purchase here,do not use unless you have a license to do so.

Scrapkit is Christmas Morning from Stacey at Staceys Designs here and you can purchase it here. Love everything in this kit,its awesome!! Thank you Stacey!

Mask of choice,I am using mask 25 from Aqua Rebel315 at Creative Misfits Creations here. Thank you!

Font of choice.
-This tutorial was written assuming you have working knowledge of PSP-

Dropshadow for tut:
Vertical 4
Horizonal 4
Opacity 58
Blur 6

Open mask,minimze.

Open button ribbon frame/image/canvas size 600x600.

Layers/new raster layer/right click on new layer/arrenage/send to bottom/flood fill white/paste paper 7 as a new layer/right click on paper layer/new mask layer/from image/select mask/layers/merge/merge group/position.

Click inside frame using your magicwand/selections/modify/expand by 7.
Paste paper 9 below frame layer/selections/invert/delete/do not deselect.
Paste christmas tree/resize 50%/position/delete/do not deselect.

Paste tube/position/delete/deselect/apply dropshadow to tube&tree layers.
Moving up top/paste present 1/resize 50%/position/dropshadow.
Repeat with present 2.

Paste stack of presents/position/dropshadow.

Paste merry christmas hanging heart/resize 25%/position/dropshadow.

Paste green ornament/resize 50%/edit/repeat resize/position/dropshadow.
Paste bow/resize 40%/position/dropshadow.

Paste santa/resize 50%/position/dropshadow.

Add copyrights.

Add name.

Layers/merge/merge visible.

Image/resize all layers 15%.

Save.
Hope you enjoyed my tut,would love to see your results.
Hugs,Mary

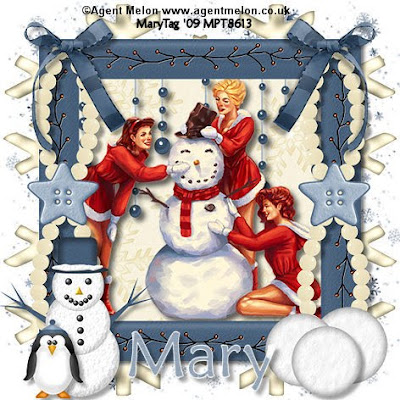
Snow Friends


Tube of choice,I am using Agent Melon,part of MPT's xmas gift but you can find more of Agent Melon's tubes here,must have a license to use.

Scrapkit is Snow Friends from Crazed's Creations here and you can purchase it here. I love this kit,so wintery! Thank you Katie!!

Mask of choice,I am using winter mask 2 from Jenny at Creative Misfits Creations here. Thank you!

Font of choice,I am using Maiandra GD,came with my psp program.
-This tutorial was written assuming you have working knowledge of PSP-

Open mask,minimize.

Open a new 500x500 white image.

Paste paper 4 as a new layer/right click/new mask layer/from image/select mask/ok/layers/merge group.

Paste frame 3/resize 20%/click inside frame with your magicwand/selections/modify/expand by 6.

Paste paper 3 below frame layer/selections/invert/delete/do not deselect.

Paste tube of choice/resize if needed to fit in the frame better/delete/deselect/dropshadow:

Vertical 5
Horizonal 5
Opacity 61
Blur 9

Paste beads 1 below tube layer/resize 30%/edit/repeat resize/position/same dropshadow.

Hide mask and background layers/layers/merge/merge visible/dropshadow:

Vertical 4
Horizonal 4
Opacity 56
Blur 7
Unhide layers.

Paste snowflake 3 below merged layers//layers/duplicate 3 times/position around frame.

Paste beads 5/resize 50%/image/free rotate to the left 90*/layers/position copy over first beads like I did/right click on copy layer/merge/merge down/layers/duplicate/image/mirror/dropshadow:

Vertical 6
Horizonal 6
Opacity 40
Blur 5

Paste button 1/resize 15%/edit/repeat resize/layers/duplicate/position both/same dropshadow.

Paste snowman 1/resize 50%/position/dropshadow:
Vertical 5
Horizonal 5
Opacity 36
Blur 6

Paste penguin 1/resize 50%/edit/repeat resize/position/same dropshadow.
Paste bow 1/resize 35%/edit/repeat resize/layers/duplicate/position both/same dropshadow.

Paste snowball/layers/duplicate 2 times/resize 1st snowball 35%/position/same dropshadow/resize 2nd snowball 38%/position/same dropshadow/resize 3rd snowball 41%/position/same dropshadow.

 
Add copyrights.

Add name.

Layers/merge/merge visible.

Image/resize 6%.

Save.
Hope you enjoyed my tut,would love to see your results.

Hugs,Mary

Tuesday, November 24

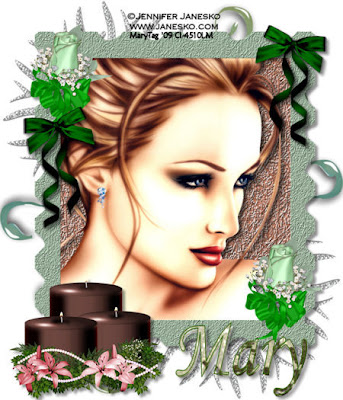
Shades of Hope


Tube of choice,I am using Jennifer Janesko,which you can purchase here,do not use unless you have a license to do so.


Scrapkit is a freebie,Shades of Hope,from Kissy at Taggin AngelsNScraps here. Beautiful kit Kissy,thank you!


Bow of choice.


Font of choice,I am using Monotype Corsiva,came with my psp program.


-This tutorial was written assuming you have working knowledge of PSP-


Dropshadow for tut:
Vertical 5
Horizonal 5
Opacity 43
Blur 6

 
Open a new 600x700 white image.


Paste frame 2/resize 38%/edit/repeat resize/click inside frame using your magicwand/selections/modify/expand by 7.


Paster paper 1 below frame layer/resize 30%/right click/properties/change opacity to 85/selections/invert/delete/do not deselect.


Paste tube of choice/position/delete/deselect/dropshadow 2 times.


Hide white background layer/layers/merge/merge visible/dropshadow/unhide layer.


Paste doodle 1 below merged layers/resize 50%/position with the pick tool/layers/duplicate/position copy.


Repeat with snowflake 3.


Moving up top/paste your bow/resize if desired/layers/duplicate/position both/dropshadow.


Paste candles/resize 50%/edit/repeat resize 2 times/position/dropshadow.


Add copyrights.


Add name.
*I used paper 5 for fill and #32640a on the foreground.


Layers/merge/merge visible.


Image/resize all layers 25%.


Save.


Hope you enjoyed my tut,would love to see your results.


Email me


Hugs,Mary

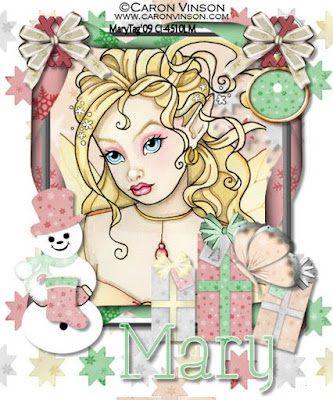
Shiney Happy Christmas


Tube of choice,I am using Caron Vinson,which you can purchase here,do not use unless you have a license to do so.

Scrapkit is Shiney Happy Christmas by Vella at Wench Designs here and you can purchase it here. I so love the colors in this kit,just gorgeous!!! Thank you Vella!!

Font of choice,I am using Happy Phantom here.
-This tutorial was written assuming you have working knowledge of PSP-

Dropshadow for tut:
Vertical 4
Horizonal 4
Opacity 44
Blur 5

Open a new 500x600 white image.

Paste frame 5/resize 5%.

Click inside frame with your magicwand/selections/modify/expand by 6.

Paste paper 5 below frame layer/resize 12%/selections/invert/delete/do not deselect.

Paste tube of choice/position/delete/do not deselect.

Paste doodle tree lights below tube layer/resize 25%/position/delete/deselect/apply dropshadow to tree and tube layers.

Hide white background layer/layers/merge/merge visible/dropshadow/unhide layer.

Paste doodle tree lights below merged layer/position so the square doesn't show/layers/duplicate/image/flip/position that layer.

Moving up top/paste charm 7/resize 20%/edit/repeat resize/position/dropshadow.

Paste snowflake 1/resize 50%/edit/repeat resize/layers/duplicate/position/dropshadow.

Paste bow 3/resize 50%/position over charm/layers/duplicate/image/mirror/dropshadow to both layers.

Paste presents/resize 35%/edit/repeat resize/position/dropshadow.

Paste butterfly 9/resize 50%/position/dropshadow.

Paste snowlady/resize 40%/position/dropshadow.

Paste stocking/resize 50%/edit/repeat resize 2 times/position/dropshadow.

Add copyrights.

Add name.
*For my name,I used paper 2 for fill/white on foreground.

Layers/merge/merge visible.

Image/resize all layers 15%.

Save.
Hope you enjoyed my tut,would love to see your results.

Hugs,Mary

Sunday, November 22

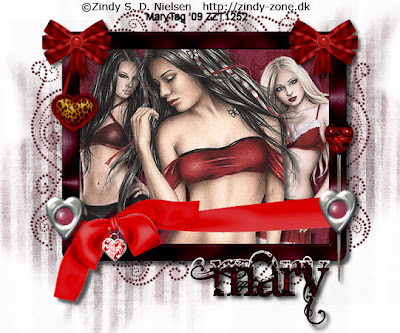
Heartbreakers Club


3 tubes of choice,I am using Zindy,which you can purchase here,do not use unless you have a license to do so.

Scrapkit is Gothic Valentine from Mary at Barking Penguin Scraps here and you can purchase it here. This kit is awesome,love the colors!! Thank you Mary!

Mask of choice,I am using grunge 1 mask from Ella at Creative Misfits Creations here. Thank you for the cool masks!

Font of choice,I am using Angelic War here.
-This tutorial was written assuming you have working knowledge of PSP-

Open mask,minimize.

Open a new 600x500 white image.

Paste frame/resize 15%/edit/repeat resize.

Paste burgandy silk paper below frame layer/right click/new mask layer/select mask/ok/layers/merge/merge group/position to the left/layers/duplicate/image/mirror.

Highlight frame layer/click inside with magicwand/selections/modify/expand by 7/paste damask brocade paper below frame layer/resize 20%/selections/invert/delete/do not deselect.

Paste 3 tubes of choice/position/deselect/dropshadow:
Vertical 6
Horizonal 6
Opacity 62
Blur 6

Hide white background and masks layers/layers/merge/merge visible/same dropshadow/unhide layers.

Paste ruby bead doodle below merged layers/resize 45%/using pick tool/position to the right of the tag/layers/duplicate/image/mirror/layers/duplicate/image/free rotate to the right 90*/position on top of tag/layers/duplicate/image/flip/position.

Paste leopard pillow/resize 50%/edit/repeat resize/position/dropshadow:
Vertical 3
Horizonal 3
Opacity 45
Blur 5

Paste bow 2/resize 40%/edit/repeat resize/position on the left of the frame/layers/duplicate/image/mirror/dropshadow:

Vertical 4
Horizonal4
Opacity 55
Blur 7

Paste heart pin/position/same dropshadow.

Paste silver heart charm/resize 50%/layers/duplicate/position/same dropshadow.

Add copyrights.

Add name.

Layers/merge/merge visible.

Image/resize all layers 10%.

Save.
Hope you enjoyed my tut,would love to see your results.

Hugs,Mary

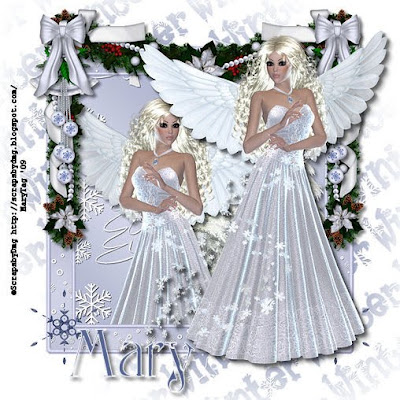
Snowflake Angel


Scrapkit is Blue Ice from Dee at Scraps by Dmg and you can purchase it on her blog here. Couldn't help but tut this gorgeous kit again,love it! Thank you Dee!


Mask of choice,I am using Vix_Mask 40 here.


Font of choice,I am using Fantasy One here.


-This tutorial was written assuming you have working knowledge of PSP-


Dropshadow for tut:
Vertical 4
Horizonal 4
Opacity 50
Blur 6


Open mask,minimize.


Open a new 600x600 white image.


Paste frame 1/resize 40%.


Paste paper 7 below frame layer/right click/new mask layer/from image/select mask/ok/layers/merge/merge group/resize 17%/layers/duplicate/position both mask layers.


Click inside frame with your magicwand/selections/modify/expand by 7.


Paste paper 6 below frame layer/selections/invert/delete/do not deselect.


Paste winter tree 2/resize 6%/position/delete/do not deselect.


Repeat with winter tree 1.


Paste poser/position/delete/deselect/apply dropshadow to poser and tree layers.


Moving up top/paste swag 3/resize 20%/position/dropshadow.


Paste bells 1/resize 50%/position on the left of the frame/layers/duplicate/image/mirror/dropshadow to both layers.


Paste bow 1/resize 50%/edit/repeat resize/position to the left/layers/duplicate/image/mirror/dropshadow to both layers.


Repeat with snowflake 1.


Paste poser/position/dropshadow 2 times.


Add copyrights.


Add name.


Layers/merge/merge visible.


Image/resize all layers 15%.


Save.


Hope you enjoyed my tut,would love to see your results.


Email me


Hugs,Mary

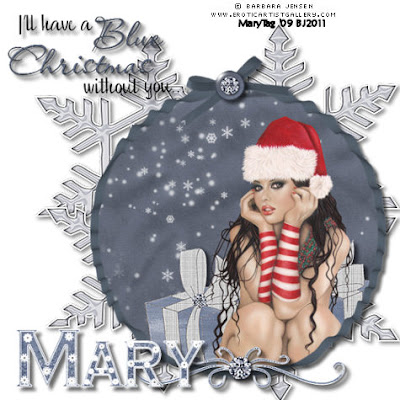
Blue Christmas


Tube of choice,I am using Barbara Jensen,which you can purchase here,do not use unless you have a license to do so.

Scrapkit is a freebie,Blue Christmas,from Ziggyfan Scraps here. Thank you Amy!!

Font of choice,I am using Snowflake Letters here.
-This tutorial was written assuming you have working knowledge of PSP-

Dropshadow for tut:
Vertical 5
Horizonal 5
Opacity 59
Blur 6

Open a new 500x500 white image.

Paste ribbon frame/resize 20%/edit/repeat resize.

Click inside frame using your magicwand/selections/modify/expand by 4.

Paste paper 5 below frame layer/resize 25%/selections/invert/delete/do not deselect.

Paste gift/resize 25%/layers/duplicate/position/delete/do not deselect.

Paste tube/position/delete/deselect/dropshadow.

Apply dropshadow to gifts.

Hide white background/layers/merge/merge visible/dropshadow/unhide layer.
Resize merged layers 15%/position.

Paste snowflake 2 below merged layers/layers/duplicate 3 times/position.
Paste elements/resize 30%/erase everything but the wordart/position/dropshadow.

Repeat with elements leaving diamond accent only.

Paste ornament button/erase bulb/resize button 40%/edit/repeat resize/position/dropshadow.

Add copyrights.

Add name.

Layers/merge/merge visible.

Image/resize all layers 5%.

Save.
Hope you enjoyed my tut,would love to see your results.

Hugs,Mary

Saturday, November 21

Blue Ice

Photobucket

Scrapkit is Blue Ice from Dee at Scraps by Dmg and you can purchase it on her blog here. This kit is stunning Dee,thank you!

VanDerLee Snowflakes here.

Font of choice,I am using Vivaldi,came with my psp program.

Animation Shop
-This tutorial was written assuming you have working knowledge of PSP-

Dropshadow for tut:
Vertical 5
Horizonal 5
Opacity 45
Blur 7

Open a new 700x600 white image.

Paste window 3/resize 30%

Repeat with window 1.

Paste frame 3 below window layers/layers/duplicate 2 times/position/right click on copy 2/merge/merge down/layers/duplicate/image/flip/position.

Paste bells 4/resize 35%/layers/duplicate/position/dropshadow.

Paste boe 6/resize 50%/edit/repeat resize/layers/duplicate/position both/dropshadow.

Repeat with poinsetta 2.

Paste poser/resize 50%/position/dropshadow.

Add copyrights.

Add name.

Open a new 490x420 transparent image/layers/duplicate 2 times/rename snow 1,snow 2 and snow 3.

Highlight snow 1/effects/vanderlee snowflakes:
amount 44
Max size 9
random seed 1

Snow 2 layer change random seed to 3.

Snow 3 change random seed to 5.

Highlight top window layer/back to our snow layers/highlight snow 1 layer/hide other 2/edit/copy merged/paste over window layer.
Back to snow layers/hide snow 1/highlight and unhide snow 2/edit/copy merged/paste above snow 1 layer.

Repeat with snow 3 layer.

Image/resize all layers 20%.

Rename them snow 1,snow 2 and snow 3 now in your tag/highlight snow 1 layer/hide other 2/edit/copy merged/paste in animation shop as a new animation.

Back to snow layers/hide snow 1/highlight and unhide snow 2/edit/copy merged/paste after current frame in animation shop.

Repeat with snow 3 layer.

Save as gif.
Hope you enjoyed my tut,would love to see your results.

Hugs,Mary

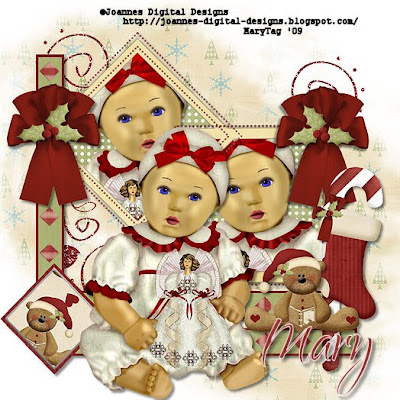
Baby's Beary Christmas


Tube of choice,I am using a freebie,Baby Joanelle.from Crystal at Crystals Cottage Scraps here. She is soooo precious Crys! Thank you!


Scrapkit is Beary Christmas from Kristi from Scrapin Divaz here and you can purchase it here. This kit is just too adorable,great for so many things!! Thank you Kristi!!


Template of choice,I am using a template from Poppy,diamond template 2,at Creative Misfits Creations here. Thank you Poppy!


Mask of choice,I am using mask 40 from Linda also at Creative Misfits Creations here.


Font of choice.


-This tutorial was written assuming you have working knowledge of PSP-


Dropshadow for tut:
Vertical 4
Horizonal 4
Opacity 46
Blur 6


Open mask,minimize.


Open template/paste paper 5/right click/new mask layer/from image/select mask/ok/layers/merge/merge group/layers/duplicate/position both layers.


Highlight left strip/magicwand/papste paper 15 into selection(under edit)/deselect.


Repeat on bottom&top strips.


Rpeat on left,top and bottom diamond strips using paper 9.


Repeat with all strip borders using paper 4.


Highlight dots layer/selections/select all/float/defloat/paste paper 14 into selection/deselect.


Repeat with frames using paper 16.


Highlight small diamond/click on the border with your magicwand/paste paper 14 into selection/deselect/then click inside of the diamond/paste paper 19 as a new layer/position/selections/invert/delete/deselect/right click on paper layer/merge/merge down to diamond layer.


Click inside frames with your magicwand/selections/modify/expand by 4.


Paste paper 6 below frame layer/resize 10%/selections/invert/delete/do not deselect.


Paste tube/if using the one I am/resize 57%/position/delete/repeat for 2nd frame/deselect/dropshadow.


Hide masks and white background layer/layers/merge/merge visible/dropshadow/unhide layers.


Paste doodle 1 below merged layers/layers/duplicate/position both.


Moving up top/paste bear 2/resize 40%/position/dropshadow.


Paste bow 2/resize 40%/position on the left/layers/duplicate/image/mirror/position copy over first bow/right click/merge/merge down/dropshadow/layers/duplicate/image/mirror.


Paste holly/resize 50%/layers/duplicate/position both/dropshadow.


Paste candy cane 1/resize 50%/position/dropshadow.


Paste stocking 1/resize 50%/position/dropshadow.


Paste tube/resize 60%/position/dropshadow.


Add copyrights.


Add name.


Layers/merge/merge visible.


Image/resize all layers 25%.


Save.


Hope you enjoyed my tut,would love to see your results.


Hugs,Mary

Friday, November 20

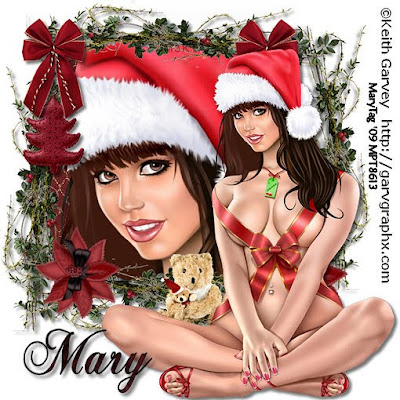
UnWrap


Tube of choice,I am using Keith Garvey,which you can purchase here,do not use unless you have a license to do so.

Scrapkit is Xmas Night Addon from Yarrow at Fallen3Angel Scrapz here. Thank you!

Font of choice,I am using Chopin Script here.
-This tutorial was written assuming you have working knowledge of PSP-

Dropshadow for tut:
Vertical 4
Horizonal 4
Opacity 54
Blur 6

Open frame2/image/canvas size/change the settings to 600x600.

Layers/new raster layer/right click/arrange/send to bottom/flood fill white.

 
Click inside frame with your magicwand/selections/modify/expand by 8.

Paste paper 5 below frame layer/selections/invert/delete/do not deselect.

Paste close up/position/delete/deselect/dropshadow.

Hide white background layer/layers/merge/merge visible/dropshadow/unhide layer/position to the left alittle,see my tag for reference.

Name and save your tag at this point as a psp image.

Open frame 2/paste below merge layers/image/free rotate to the right 90*/layers/duplicate/image/mirror/position/dropshadow.

Paste bow 5/resize 50%/position on the left of the tag/layers/duplicate/image/mirror/dropshadow to both layers.

Paste tree/resize 50%/position/dropshadow.

Paste flower/resize 20%/edit/repeat resize/layers/duplicate/position both/dropshadow.

Paste bear/resize 50%/position/dropshadow.

Paste tube/position/dropshadow.

Add copyrights.

Add name.

Layers/merge/merge visible.

Image/resize 15%.

Save.
Hope you enjoyed my tut,would love to see your results.

Hugs,Mary

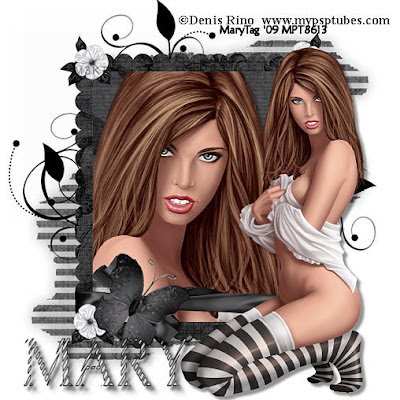
Oh So Stripey


Tube/close up of choice,I am using Denis Rino,which you can purchase here,do not use unless you have a license to do so.

Scrapkit is Obsidian,a freebie addon from Yarrow here. Thank you Yarrow!

Mask of choice,I am using mask 50 from Aqua Rebel315 here.

Doodle of choice.

Font of choice,I am using Boldly Go here.
-This tutorial was written assuming you have working knowledge of PSP-

Dropshadow for tut:
Vertical 5
Horizonal 5
Opacity 43
Blur 5

 
Open mask/minimize.

Open frame 2/image/change canvas size to 600x600/layers/new raster layer/right click/arrange/send to bottom/flood fill white.

Paste paper 5 below frame layer/right click/new mask layer/from image/select mask/ok/layers/merge/merge group.

Highlight frame layer/click insdie frame with your magicwand/selections/modify/expand by 6.

Paste paper 2 below frame layer/resize 25%/selections/invert/delete/do not deselect.

Paste close up/resize if needed/position/delete/deselect/dropshadow.

Hide mask and background layers/layers/merge/merge visible/dropshadow/unhide layers.

Paste doodle below merged layers/resize if needed/layers/duplicate/position.

Moving up top,paste flower 1/resize 50%/edit/repeat resize/layers/duplicate 2 times/position/dropshadow.

Paste butterfly/resize 50%/position/dropshadow.

Paste tube/position/dropshadow.

Layers/merge/merge visible.

Image/resize all layers 15%.

Add copyrights.

Add name.

Save.
Hope you enjoyed my tut,would love to see your results.
Hugs,Mary

Thursday, November 19

Crimson Christmas

Photobucket

Tube of choice,I am using Elias Chatzoudis,which was from MPT's xmas gift,you will still need your license to use,check out other awesome tubes here.

Scrapkit is Crimson Christmas from Kesha at KnC Scraps here and you can purchase it here. Love everything in this kit! Thank you Kesha!

Twink here.

Font of choice,I am using Santa's Sleigh here.

Animation Shop
-This tutorial was written assuming you have working knowledge of PSP-

Dropshadow for tut:
Vertical 5
Horizonal 5
Opacity 56
Blur 10

Open a new 600x600 white image.

Paste frame 3/resize 28%/click inside frame with your magicwand/selections/modify/expand by 6.

Paste paper 2 below frame layer/resize 30%/edit/repeat resize/position/selections/invert/delete/do not deselect.

Paste tree/resize 50%/edit/repeat resize/position/delete/do not deselect.

Paste santa/resize 50%/edit/repeat resize/position/delete/deselect/dropshadow to santa and tree layers.

Hide white background layer/layers/merge/merge visible/dropshadow/unhide layer.

Paste swirl below merged layers/resize 30%/position.

Paste glitter item/resize 37%/layers/duplicate 2 times/position.

Moving up top/paste bow/resize 50%/edit/repeat resize 2 times/position to the left of the frame/layers/duplicate/image/mirror/dropshadow to both layers.

Repeat with poinsetta.

Repeat with charm.

Repeat with ornament 4/resizing 1 extra time.

Paste tube/position/dropshadow 2 times.

Add copyrights.

Add name.

Layers/merge/merge visible.

Image/resize all layers 15%.

Open animation shop/open snow twink/edit/select all.

Back to psp/edit/copy tag/paste into animation shop as a new animation/hit ctrl and L 14 times/making a total of 15 frames/edit/select all/edit/copy twink/paste twink into selected frame/position.

Save as gif.
Hope you enjoyed my tut,would love to see your results.

Hugs,Mary

Wednesday, November 18

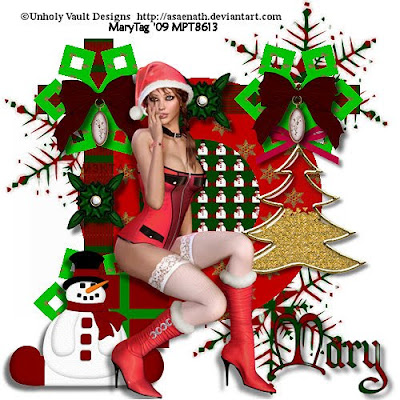
Christmas Joy


Tube of choice,I am using Unholy Vault Designs,which was from MPT's xmas gift,but you will still need your license to use,check out other awesome tubes here.

Scrapkit is a freebie,Christmas Joy,from Von at Soaring Hawks Nest here. Thank you for the awesome freebie Von and welcome back!

Template of choice,I am using template 17 from Beth at Blissfully Beth here. Thank you Beth!

Mask of choice,I am using Vix_Mask 304 here. Thank you Vix!

Font of choice,I am using Christmas Card here.
-This tutorial was written assuming you have working knowledge of PSP-

Open mask,minimize.

Open template/delete credit layer.

Highlight white background layer/paste paper 8 as a new layer/right click/new mask layer/from image/select mask/ok/layers/merge/merge group/resize 50%/layers/duplicate 2 times/position.

Highlight lg circle/click on it with your magicwand/edit/paste paper 5 into selection/deselect.

Repeat with white circle using paper 6.

Repeat with vertical and horizonal layers using paper 7.

Repeat with the snowflakes using paper 3.

Right click on top snowflake layer/merge/merge down to vertical layer/image/free rotate to the right 90*.

Paste tree/resize 50%/position/dropshadow:

Vertical 4
Horizonal 4
Opacity 50
Blur 5

Paste bow 1/resize 50%/edit/repeat resize/layers/duplicate/position both bows/dropshadow:

Vertical 5
Horizonal 5
Opacity 63
Blur 8

Paste flower 2/resize 50%/edit/repeat resize/position to the left/layers/duplicate/image/mirror/position over first flower layer/right click/merge/merge down/alyers/duplicate/position/dropshadow:

Vertical 6
Horizonal 6
Opacity 57
Blur 6

Paste gift box 1/resize 50%/edit/repeat resize/position/same dropshadow.

Paste snowman 1/resize 40%/edit/repeat resize/position/same dropshadow.
Paste tube of choice/resize if needed/position/dropshadow:

Vertical 6
Horizonal 6
Opacity 46
Blur 7

Layers/merge/merge visible.

Resize if desired.

Add copyrights.

Add name.
*For my name,I used paper 8 for fill/black on foreground.

Save.
*Make sure ot name your tag,don't save as template.
Hope you enjoyed my tut,would love to see your results.

Hugs,Mary

Winter Wonderland Lane

Photobucket

Tube of choice,I am using PinUpToons,which you can purchase here,do not use unless you have a license to do so.
Scrapkit is Winter Wonderland from Stacey at Staceys Designs here and you can purchase it here. Just had to do another tut with this gorgeous kit! Thank you Stacey!!

Mask of choice,I am using Vix_Mask306 here.

Font of choice.

Animation Shop

VanDerLee Snowflakes here.
-This tutorial was written assuming you have working knowledge of PSP-

Dropshadow for tut:
Vertical 5
Horizonal 5
Opacity 58
Blur 8

Open mask,minimize.

Open a new 600x600 white image.

Paste paper 11/right click/new mask layer/from image/select mask/ok/layers/merge/merge group/resize layer 30%/position to the right of the tag/layers/duplicate/image/flip/right click on copy layer/merge/merge down to first mask layer/layers/duplicate/image/flip.

Paste window frame/resize 20%/click inside frame with your magicwand/selections/modify/expand by 3.

Paste paper 2 below window frame layer/resize 30%/position/selections/invert/deletdo not deselect.

Paste winter sign/resize 30%/position/delete/deselect/dropshadow.

Moving up top/paste hat/resize 50%/edit/repeat resize/layers/duplicate/position both hats/dropshadow.

Paste bow/resize 50%/layers/duplicate/position both bows/dropshadow.
Paste snowflake 1/layers/duplicate 4 times/position/dropshadow.
Highlight winter sign layer/with font of choice,type out what you want on the sign,or use what I did/dropshadow.

Paste tube/position/dropshadow.

Add copyrights.

Image/resize all layers 15%.

Add name.

Highlight paper layer/layers/duplicate 3 times/rename 1,2 and 3.

On layer 1/effects/vanderlee snowflakes/settings:
Amount 31
All others default
Random seed 1

Layer 2 change random seed to 2 and layer 3 to 3.

Highlight layer 1,hide layer 2 and 3.

Edit/copy merged.

Take to animation shop/paste as new animation.

Back to psp,hide layer 1/highlight and unhide layer 2/edit/copy merged/paste after current frame/repeat with layer 3.

Save as gif.
*To adjust snow speed in animation shop/edit/select all/animation/properties/change display time to what you want,I changed mine to 21.
Hope you enjoyed my tut,would love to see your results.

Hugs,Mary

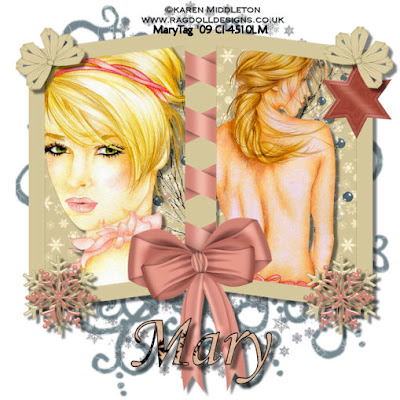
Winter Dreams


Tubes of choice,I am using Karen Middleton,which you can purchase here,do not use unless you have a license to do so.

Scrapkit is Winter Wonderland from Stacey at Staceys Designs here and you can purchase it here. This kit is absolutely gorgeous!!!! Thank you Stacey!!

Mask of choice,I am using Insatiable Dreams mask 173 here. Thank you!

Font of choice,I am using Monotype Corsiva,came with my psp program.
-This tutorial was written assuming you have working knowledge of PSP-

Dropshadow for tut:Vertical 6
Horizonal 6
Opacity 50
Blur 4

Open mask,minimize.

Open a new 600x600 white image.

Paste paper 4/right click/new mask layer/from image/select mask/ok/layers/merge/merge group/right click/properties/change opacity to 73.

Paste double frame/resize 5%/position.

Click inside frame with your magicwand/selections/modify/expand by 7.

Paste paper 1 below frame layer/resize 15%/selections/invert/delete/do not deselect.

Paste beary branch/position in 1frame/delete/repeat for 2nd frame/do not deselect.

Paste 1st tube/position/delete/do not deselect.

Repeat with 2nd tube/deselect/dropshadow to both tube layers.

Hide mask and white background layers/layers/merge/merge visible/dropshadow/unhide layers.

Paste snowflake frame below merged frame layer/layers/duplicate/position.

Moving up top/paste star 3/resize 40%/position/dropshadow.

Paste bow 2/resize 50%/edit/repeat resize/layers/duplicate/position both bows/dropshadow.

Paste snowflake 2/layers/duplicate/position both/dropshadow.

Repeat with snowflake 3 /resizing 7%.

Layers/merge/merge visible.

Image/resize all layers 15%.

Add copyrights.

Add name.
*For my name,I used paper 5 for fill/black on foreground.

Save.
Hope you enjoyed my tut,would love to see your results.

Hugs,Mary

Snowflake Kisses


Tube of choice,I am using PinUpToons,which you can purchase here,do not use unless you have a license to do so.

Scrapkit is Snowflakes Kisses from Kelly at Scraps By Storm here and you can purchase the kit here. This kit is gorgeous,thank you Kelly!!

Script font of choice.
-This tutorial was written assuming you have working knowledge of PSP-

Open a new 600x600 white image.

Paste frame 3/resize 5%.

Click inside frame with magicwand/selections/modify/expand by 4.

Paste paper 5 below frame layer/resize 15%/selections/invert/delete/do not deselect.

Paste tube/position/delete/deselect/sropshadow:

Vertical 5
Horizonal 5
Opacity 55
Blur 6

Hide white background layer/layers/merge/merge visible/apply same dropshadow/unhide layer.

Paste glitter doodle 4 below merged frame layer/position to the left of the frame/layers/duplicate/image/mirror/right click on copy layer/merge/merge down to first doodle layer/layers/duplicate/image/flip.

Paste beaded wire 3/position with pick tool towards the bottom of the frame/layers/duplicate/image/flip.

Moving up top/paste bow 6/resize 50%/edit/repeat resize/layers/duplicate 3 times/position bows/dropshadow:

Vertical 6
Horizonal 6
Opacity 62
Blur 7

Paste kiss 4/resize 50%/edit/repeat resize/position/same dropshadow.

Paste striped flower 1/resize 50%/edit/repeat resize/layers/duplicate 3 times/position over bows/same dropshadow.

Paste butterfly/resize 50%/layers/duplicate 2 times/position/same dropshadow.

Paste flowerpot 2/resize 60%/position/dropshadow:

Vertical 4
Horizonal 4
Opacity 57
Blur 5

Layers/merge/merge visible.

Image/resize all layers 15%.

Add copyrights.

Add name.
*For my name,I used glitter tile 2 for fill/white on foreground.
Save.
Hope you enjoyed my tut,would love to see your results.

Hugs,Mary

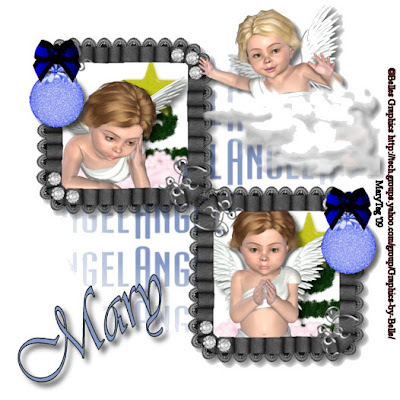
My Christmas Angels


All elements are from Kissy at Taggin AngelsNScraps here,and can be found at Heartbeatz Creations,the Angels here,the Christmas Tree here,the Frames here and the Christmas Bulbs here. Just love these Kissy,thank you!!

Mask of choice,I am using Vix_Mask 36 here.

Bow of choice.

Font of choice,I am using Vivaldi,came with my psp program.
-This tutorial was written assuming you have working knowledge of PSP-

Dropshadow for tut:
Vertical 6
Horizonal 6
Opacity 60
Blur 9

Open mask,minimize.

Open a new 600x600 white image.

Layers/new raster layer/flood fill color of choice,I used #8598c3/right click/new mask layer/from image/select mask/ok/layers/merge/merge group.

Paste frame 2/resize 40%/click inside frames with your magicwand/selections/modify/expand by 6.

Paste the christmas tree below frame layer/resize 50%/edit/repeat resize/p;osition/selections/invert/delete/repeat for 2nd frame/do not deselect.
Paste angel 1/resize 50%/position/delete/do not deselect.

Paste angel 2/resize 35%/position/delete/deselect/dropshadow to both angel layers.

Hide mask and white background layers/layers/merge/merge visible/dropshadow/unhide layers.

Moving up top/paste bulb 2/resize 50%/edit/repeat resize 2 times/layers/duplicate/position/dropshadow.

Paste bow of choice/resize if needed/layers/duplicate/position/dropshadow.
Paste angel 3/resize 50%/position/dropshadow.

Layers/merge/merge visible.

Image/resize all layers 12%.

Add copyrights.

Add name.
*For my name,I used color #8598c3 for fill/black on foreground.

Save.
Hope you enjoyed my tut,would love to see your results.
Hugs,Mary

Just Happy


Tube/close up of choice,Elias Chatzoudis,which you can purchase here,do not use unless you have a license to do so.


Scrapkit is Just Happy from Wilma at Wilma4ever here and you can purchase the kit here. You did an awesome job on this kit Wilma,thank you!!


Template of choice,I am using template 114 from Missy at Divine Intentionz here. Thank you!


Font of choice.


-This tutorial was written assuming you have working knowledge of PSP-


Dropshadow for tut :
Vertical 4
Horizonal 4
Opacity 48
Blur 6


Open template/hit shiftD/close the orginal/delete credit layer.


Image/canvas size 500x500.


Highlight background layer/flood fill white.


Highlight square 1/click on it with your magicwand/edit/paste paper 7 into selection/deselect/dropshadow.


Repeat with square 2 using paper 8/dropshadow/do not deselect.


Paste close up as a new layer/resize if needed/position/selections/invert/delete/deselect/dropshadow.


Highlight circle layer/magicwand again/paste paper 5 into selection/dropshadow.


Highlight staples layer/image/mirror/dropshadow.


Hide white background layer/layers/merge visible/unhide layer.


Paste doodle 4 below merged layers/resize 50%/position to the left/layers/duplicate/image/mirror/right click on copy layer/merge/merge down/layers/duplicate/image/flip/right click/merge/merge down/effects/textures/mosiac-antique/settings:

number of columns and rows 100
tile diffusion % 15
grout width 8
grout diffusion 30
symmetric checked


Paste ruffle flower frame 4/resize 30%.


Moving up top/paste curled ribbon 4/resize 50%/layers/duplicate/position/dropshadow.


Paste curled ribbon 1/resize 50%/edit/repeat resize/layers/duplicate/position with pick tool/dropshadow.


Paste flower 1/resize 50%/edit/repeat resize/position to the right/layers/duplicate/image mirror/dropshadow.


Repeat with bow 1.


Repeat with flower 4.


Hide mosiac layer and white background layer/layers/merge/merge visible/position/unhide layers/position mosiac layer some.


Paste tube/resize if needed/position/dropshadow.


Layers/merge/merge visible.


Image/resize all layers 3%.


Add copyrights.


Add name.
*For my name,I used paper 2 for fill/black on foreground.


Save.


Hope you enjoyed my tut,would love to see your results.


Email me


Hugs,Mary

Sunday, November 15

Play Me A Lullaby


Tube is from Jay at Heartbeatz Creations and even though this tube isn't available,check out her many other awesome posers here.

Scrapkit is also from Jay,The 8th kit in her Twilight Series,Play Me A Lullaby Edward,check out her blog here and you can purchase this kit here.(at the time of this being posted,the kit is on sale!!) This kit is gorgeous Jay,just love it!! Thank you!!!!!
Mask of choice,I am using mask 159 from Insatiable Dreams here. Thank you for sharing!
Font of choice,I am using LL Cooper here.
-This tutorial was written assuming you have working knowledge of PSP-
Dropshadow for tut:
Vertical 5
Horizonal 5
Opacity 59
Blur 9

 
Open mask,minimize.

Open a new 600x600 white image.

Paste frame 2 as a new layer.

Paste paper 4 as a new layer below frame layer/right click/new mask layer/from image/select mask/ok/layers/merge/merge group/layers/duplicate 2 times/position.

Click inside your frame with the magicwand/selections/modify/expand by 6.
Paste paper 20 below frame layer/selections/invert/delete/do not deselect.
Paste element 7/position/delete/do not deselect.

Paste element 32/delete/do not deselect.

Paste tube/position/delete/deselect/apply dropshadow to last 3 layers.

Highlight tube layer/effects/photo effects/sepia toning/change settings to 80.
Hide masks layers and white background layer/layers/merge/merge visible/dropshadow/unhide layers.

Make sure merged layers is highlighted/layers/duplicate 2 times/rename 1,2 and 3/using pick tool/move layer 2 to the left alittle,layer 3 to the right and move layer 1 up top.

Right click on top layer/merge/merge down to last copy layer.

Paste element 34 below merged layers/position to the top left with your pick tool/layers/duplicate/image/mirror/image flip.

Paste element 22/resize 30%/image/free rotate to the right 90*/using pick tool position/layers/duplicate/image/flip.

Moving up top,paste element 14/resize 30%/layers/duplicate/position/dropshadow.

Paste element 42/resize 35%/layers/duplicate/position both/dropshadow.

Paste tube/resize if needed/position/dropshadow.

Paste element 37/resize 40%/edit/repeat resize/layers/duplicate/position both/dropshadow.

Layers/merge/merge visible.

Image/resize all layers 15%.

Add copyrights.

Add name.
*For my name,I used paper 9 for fill/black on foreground.

Save.
Hope you enjoyed my tut,would love to see your results.

Hugs,Mary
  © Blogger template Customization and Installation by Krissy's Scraps and Imaging 2011
Back to TOP